Download
1 / 57
570 likes | 618 Views
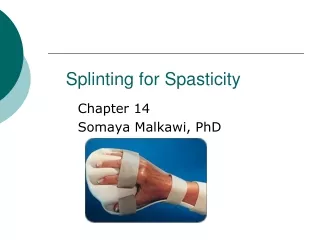
Clinical Examination for Splinting. Somaya Malkawi, PhD University of Jordan Occupational Therapy Department. History, interviews, chart review, reports. Part 1. Obtaining a history. You should obtain the history from medical charts, surgical, radiologic reports

E N D
Clinical Examination for Splinting Somaya Malkawi, PhD University of Jordan Occupational Therapy Department
Obtaining a history • You should obtain the history from medical charts, surgical, radiologic reports • Physician’s referral or prescription • Age, gender, diagnosis • Past medical history and dates of occurrence • Occupation • Pertinent medical history (e.g. diabetes, epilepsy, kidney, gout) • UE dysfunction is due to orthopedic or neurological or trauma affecting soft tissue such as burn, tendon laceration) • Anatomic structure involved at surgery • Protocol : different and decide on the rehabilitation program and timing
Interview • Impact of condition on functioning, family, economic status, social/emotional wellbeing • Co-histories from family, parents, friends, caregivers • Check questions page 77 • Habits, stress, obesity
observation • In the initial process of evaluation while interviewing your client, use your observation skills! • Nonverbal communication (facial expressions and body language) mood, emotions, and motivation. • Use of the involved UE and trunk: some clients may exaggerate their impairment (guarding or less AROM) • Check points to observe on (page 77) or (form 5-1) • Posture of whole UE.. Asymmetry • Resting hand posture: • 10 – 15 wrist flex/ 10 UD / 15—20 MCP flex • Slight flexion and abd of thumb
palpation • Muscle tone (PROM) ask pt to relax muscles • Muscle symmetry (compare right and left) • Scar density • Tendon nodules • Masses (ganglia) • Skin temperature • Wear sterile gloves
Assessments Part 2
Pain • No equipment is necessary. • During initial evaluation; use a pain scale. • Numeric analogue scale (1, 2, 3,… 10). • Visual analogue scale (10 cm vertical line). • Verbal rating scale (no pain, mild, moderate…). • Graphic representation (point out pain on a body chart) (fig 5-3) • Pain questionnaires (e.g. McGill pain questionnaire) usually used by pain management centers.
Methods • Obtain a written description of the pain including the following factors: • Level of pain: see previous slide. • Location of pain: have the client point out his or her pain on a body chart and rate them (referred pain: palpation of one area results in pain in another area). • Type of pain: throbbing (نابض), aching, sharp, stabbing, shooting, burning, or hypersensitivity to light touch. • Frequency of pain: constant or intermittent! What seem to cause the pain? What is pain associated with (e.g. AROM). • Children’s report of pain (table 5-3)
Skin Color Temperature Texture Muscle atrophy Scarring Edema Hair pattern Sweating Watch for Fragile skin ..older people , steroids, diabetes) Skin allergies (bandages , adhesive, latex Monitor rashes after prescription
Wound assessment • If the wound is closed; skip to scar assessment, if the wound is open, assess the following: • Size: length and width using a ruler, do not touch the wound by the ruler except was sterile. What about future measurements? • Depth: use sterile cotton swap only if pt is comfortable • Color: wound are red, yellow, black, or any of them together. We love the red wound! • Red: uninfected, definite borders, granulation tissue present, apparent revascularization
Wound assessment • Yellow: wound may have odor, draining and purulent, semi-liquid slough, usually in the late inflammatory stage, epithelialization will be delayed due to infection.dominant cellular activity is the macrophage (Pac Man), • Black: Presence of Escher (necrotic tissue) will increase the work required by the macrophage and delay healing.
Wound assessment • Drainage: mild, moderate, or heavy? • Serous: clear, white or slightly yellow, indicator of healthy open wound. • If infection is suspected, refer client back to the referring physician.
Wound assessment • Amount of discharge • Oder of discharge: means infection, if present refer client back to the referring physician. • Temperature: use thermometers or temperature tapes to measure the temperature of an area near the wound and compare it with an intact area. • Always observe the wound for the cardinal signs of infection: redness, swelling, increased temperature and pain. stages of wound healing and splinting precautions (next class) read chapter
Scar assessment • In assessing scar, consider the following: • Color: deep red lighter with time. • Size: length x width. • Flat/raised: the scar itself maybe flat or raised, if raised describe it in terms of mild or moderate. • Sometimes their will be a lump under the skin which is a combination between scar and fluid, commonly it appears on the dorsum of the hand or on the wrist: describe it by location, size, and height. • Adhesions: adhesions of superficial scar to underlying fascia and tendons. Can be seen during active movements. Observe and palpate and describe by mild, moderate, or sever or simply by raising the skin (the scar tissue)
Scar assessment • Precautions: • Respect the healing of a new scar the tissue to which it may adhere. • Do not move the scar if when a portion of the wound is still open. • Do not aggressively attempt to move the scar within the first week after suture removal. • Do not manipulate a scar strongly in the treatment or assessment of scar over a tendon in the early stages of healing.
ROM Assessment Part 5
Vascular status assessment Part 6
Vascular status assessment • Blood flow to the hand may be affected by proximal injuries or diagnoses, e.g.: • Injury to the hand itself. • Conditions such as Raynaud's phenomenon.
Observation Consider the following: • Color: • White grayish (pallor): arterial interruption. • Congested purple blue: venous blockage. • Dusky blue: chronic venous insufficiency. • Red: venous problem or inflammatory phase of healing or infection.
Observation • Trophic changes (texture of the skin and nails) which can be the result of sympathetic nerve or vascular changes: • Dry/moist. • Shiny/dull. • Pain: in 2/3 of clients with UE vascular problems. Aching, cramping, tightness, or cold intolerance. May be associated with vibration, cold, or repetition.
Palpation tests of vascular status • Capillary Refill Test: • firmly press on the distal portion of the volar finger or finger nail. • Until it turns white. • Release and count seconds. • Normal refill time is less than 2 seconds.
Palpation tests of vascular status • Peripheral Pulse palpation (usually used with proximal vascular problems e.g. TOS): • Gently press on the radial or ulnar arteries just proximal to the wrist crisis. • Record pulse strength and quality. • Compare with intact hand. • check before and after each exercise with certain movements to determine the BAD position.
Surface temperature assessment • If forearm temperature is at least 4 degrees warmer than the fingertips temperature then vascular problems are expected. • In testing for Raynaud’s phenomenon: • Test baseline temperature. • Test after being in a warm room for 30 minutes. • Record time of temperature returning to baseline. • Test after being immersed in ice for 20 seconds. • Record time of temperature returning to baseline. • Normal time is 10 minutes, Raynaud’s phenomenon patients may take 20 – 45 minutes.
Assessment of Swelling Part 7
Swelling • Inflammatory swelling is a normal body response to injury, surgery or trauma, bringing good cells for healing. • Normal reduction of edema begins within 2 weeks post surgery/trauma/injury but may take months to complete. • Edema that does not decrease gradually and stays longer than 2 weeks is a problem!! it becomes more like gel interferes with joint and tendon motion UE function. • Inflammatory edema that occur after injury, surgery or insult starts as fluids spongy fibrotic!!. • So what?? Resistant to methods aimed at reducing the swelling
swelling You should consider: • Amount of swelling: • Volumetric displacement. • Circumferential measurement. • Characteristics of edema: • observation. • Palpation.
Volumetric displacement • Equipments: • Tank. • Collection beaker. • Graduated cylinder. • Methods: • See picture next slide. • Notes: • After measuring the affected hand, compare it to the intact hand, a difference of 10-ml is significant and shows a systematic increase in volume.
Volumetric displacement • Precautions: • This method must not be used with: open wounds, unstable vascular status, casts, external fixators, etc. • Discussion: • To increase test reliability, repeat the test 3 times and average. • To increase test reliability, mark the forearm at the edge of water! Web-space between fingers.
Circumferential measurement • Equipments: • Tape measure with finger loop (standardize location in relation to anatomic landmarks, standardize tension!). • Methods: • Apply tape measure. • Tighten. • Record reading. • Discussion: • To increase reliability: standardize location in relation to anatomic landmarks, standardize tension, and have the same therapist do the test all times. • Compare to intact hand.
observation • Look for and document using a checklist including: • Shininess. • Dryness. • Loss of joint creases. • Skin color (erythematic, cyanosis, or pallor).
Assessment of Sensation Part 8
Static two-point discrimination • Measures innervation density (number of nerve endings). • Flexor zones I and II are to be tested. • Two-point discrimination relates to the clients’ ability to feel something and to know what they are feeling. • Equipments: • Disk-Criminator. • Boley gauge.
Static two-point discrimination • Methods: • Ask patient to respond by “two” or “one”. • Support client’s hand. • Occlude the client vision. • Start with 5 mm. • Force must be applied to the point of blanching, in a longitudinal direction, and perpendicular to the skin. • If patient recognizes 5 mm increase distance, vice versa. • Begin distally and progress proximally.
Static two-point discrimination • Scoring: • 7 out of 10 correct response in one area are required for a correct responses.
Moving two-point discrimination • Always returns earlier than static two-point discrimination. • Measures progress in return of sensation following nerve injury. • Equipments: • Disk-Criminator. • Boley gauge.
Moving two-point discrimination • Methods: • Ask patient to respond by “two” or “one”. • Support client’s hand. • Occlude the client vision. • Start with 5 mm. • Moving force must be applied to the point of blanching, in a longitudinal direction, and perpendicular to the skin, along the finger tip only. • Begin proximally and progress distally. • Begin with 5 – 8 mm and increase or decrease as needed.
Moving two-point discrimination • Scoring: • 7 out of 10 correct response in one area are required for a correct responses. • 2 mm is considered normal moving two-point discrimination.
Touch/Pressure Threshold Test • Recovers earlier than two-point discrimination sensation. • Effective in identifying sensory impairments due to nerve compressions. • Equipments: • The Semmes-Weinstein Pressure Aesthesiometer kit of 20 monofilaments (5-monofilaments kit is also available).
Touch/Pressure Threshold Test • Equipments: • The Semmes-Weinstein Pressure Aesthesiometer kit of 20 monofilaments (5-monofilaments kit is also available).
Touch/Pressure Threshold Test • Methods: • Explain the test to client. • Support the hand in a putty. • Occlude client’s vision. • Ask the patient to respond with “touch” when he/she feels a touch. • Begin with the largest green MF. If responded continue to smaller, if no response continue to larger MF. • For green and blue MFs, apply the filament must be applied 3 times, 1 correct response is good enough. All other large MFs must be applied once for each trial. • Distal to proximal.
Touch/Pressure Threshold Test • Filament must be applied perpendicular to the skin until it bends. Apply in 1-1.5 seconds hold for 1.5 seconds lift in 1-1.5 seconds. • Record on a hand chart (MF size and color).
Localization of light touch • The last sensory stimulus to return. • Has a significant importance after nerve repair. • Equipments: • Smallest MF recognized earlier. Determined by the previous test. • Cotton ball.
Localization of light touch • Methods: • Explain the test to client. • Support the hand in a putty. • Occlude client’s vision. • Touch the hand somewhere and dot it on a chart. • Ask the patient to respond by opening his/her eyes and point out where you’ve touch him/her. • If the response was correct do not draw any thing on the chart. • If the client pointed out the stimulus in another place than given, draw an arrow from the dot you’ve drawn toward the place he/she pointed out.
Assessment of coordination Part 9
Coordination assessment • O’Connor dexterity test. • Nine-hole Peg test. • Jebsen-Taylor hand function test. • Minnesota rate of manipulation test. • Crawford small parts dexterity test. • Purdue peg board.
Assessment of strength Part 10
contraindications • As simple as this: is the testing going to damage a healing process (fracture, ligament repair, tendon laceration, tendon transfer, etc)? • So do not perform strength testing except when resistance is approved by referring physician.
Grip strength test • Always use the Jamar grip dynamometer. • Do not ignore calibration! • Testing setting: • Client seated. • Shoulder adducted. • Elbow flexed to 90 degrees. • Forearm neutral. • Place dynamometer in the client’s hand. • Provide gentle support at the base of the dynamometer. • Instruct client squeeze smoothly not jerkily. • Allow wrist extension during grip.
Grip strength test • Methods and procedures: • Standard grip test: 3 trials on the 2nd handle setting. • Five-level grip test: 1 trial on each handle setting, when curve is a flat line or shows up/down/up/down waves lack of maximal efforts. • Rapid change grip test: therapist alternate the dynamometer between hands for 10 trials for each hand. Thought to prevent client from self-limiting his grip strength!!!!!!!!! • There are normative data, BUT compare to the intact hand if possible.