Download

1 / 32
390 likes | 875 Views
Logisim program. Lecture 10. Contents. Contents. Logisim Interface. Logisim Definition. Logisim Purpose. Logisim Features. Welcome to Logisim!. Logisim Interface. Logisim Definition. Logisim is an educational tool for designing and simulating digital logic circuits.

E N D
Logisim program Lecture 10
Contents Contents Logisim Interface Logisim Definition Logisim Purpose Logisim Features Welcome to Logisim!
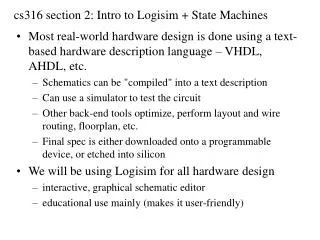
Logisim Definition • Logisim is an educational tool for designing and simulating digital logic circuits. • With its simple toolbar interface and simulation of circuits as they are built, it is simple enough to facilitate learning the most basic concepts related to logic circuits. • With the capacity to build larger circuits from smaller subcircuits, and to draw bundles of wires with a single mouse drag. • Logisim can be used to design and simulate entire CPUs for educational purposes.
Logisim Purpose Students at colleges and universities around the world use Logisim for a variety of purposes, including: A module in general-education computer science surveys A unit in sophomore-level computer organization courses Over a full semester in upper-division computer architecture courses
Logisim Features A. It is free! (Logisim is open-source) B. It runs on any machine supporting Java 5 or later; special versions are released for MacOS X and Windows . C. The drawing interface is based on an intuitive toolbar. Color-coded wires aid in simulating and debugging a circuit. D. The wiring tool draws horizontal and vertical wires, automatically connecting to components and to other wires. E. Completed circuits can be saved into a file, exported to a GIF file, or printed on a printer. F. Circuit layouts can be used as "subcircuits" of other circuits, allowing for hierarchical circuit design. G. Included circuit components include inputs and outputs, gates, multiplexers, arithmetic circuits, flip-flops, and RAM memory. H. The included "combinational analysis" module allows for conversion between circuits, truth tables, and Boolean expressions.
Welcome to Logisim! • Logisim allows you to design and simulate digital circuits. • It is intended as an educational tool, to help you learn how circuits work. To practice using Logisim, let's build a XOR circuit - that is, a circuit that takes two inputs (which we'll call x and y) and outputs 1 if the inputs are the same and 0 if they are different. The following truth table illustrates.
Steps of building a circuit Adding wires Orienting yourself Adding gates Step 1 Step 2 Step 3 Testing your circuit Adding text Step 4 Step 5
Step 1: Orienting yourself • When you start Logisim, you'll see a window similar to the following. Since you'll be using a different system, some of the details may be slightly different. • All Logisim is divided into three parts, called the explorer pane, the attribute table, and the canvas. Above these parts are the menu bar and the toolbar. • The canvas is where you'll draw your circuit; and the toolbar contains the tools that you'll use to accomplish this.
Step 2: Adding gates • Building a circuit is easiest by inserting the gates first as a sort of skeleton for connecting wires into the circuit later. The first thing we're going to do is to add the two AND gates. • Click on the AND tool in the toolbar (the next-to-last tool listed). Then click in the • editing area where you want the AND gates to go. Be sure to leave plenty of room for stuff on the left. • Notice the five dots on the left side of the AND gate. These are spots where wires can be attached. It happens that we'll just use two of them for our XOR circuit; but for other circuits, you may find that having more than two wires going to an AND gate is useful.
Step 2: Adding gates • Now add the other gates. • First click on the OR tool; then click where you want it. • And select the NOT tool and put those two gates into the canvas. • I left a little space between the NOT gates and the AND gates; if you want to, though, you can put them up against each other and save yourself the effort of drawing a wire in later.
Step 2: Adding gates • Now we want to add the two inputs x and y into the diagram. Select the input pin ,and place the pins down. • You should also place an output pin next to the OR gate's output. (Again, though I'm leaving a bit of space between the OR gate and the output pin, you might choose to place them right next to each other.) • If you decide you don't like where you placed something, then you can right-click (or control-click) anything in the canvas to view a pop-up menu. Choose Delete. You can also rearrange things using the select tool .
Step 3: Adding wires After you have all the components blocked out on the canvas, you're ready to start adding wires. Select the wiring tool. Then start dragging from one position to another in the canvas area, and a wire will start to appear between the two points. Wires in Logisim must be horizontal or vertical. To connect the upper input to the NOT gate and the AND gate, then, I added three different wires.
Step 3: Adding wires As you draw wires, you may see some blue or gray wires. Blue in Logisim indicates that the value at that point is ``unknown'', and gray indicates that the wire is not connected to anything. This is not a big deal temporarily. But by the time you finish your circuit, none of your wires should be blue or gray. (The unconnected legs of the OR gate will still be blue: That's fine.) Once you have all the wires connected, all of the wires you inserted will themselves be light or dark green.
Step 3: Adding text Adding text to the circuit isn't necessary to make it work; but if you want to show your circuit to somebody (like a teacher), then some labels help to to communicate the purpose of the different pieces of your circuit. Select the text tool. You can click on an input pin and start typing to give it a label.(It's better to click directly on the input pin than to click where you want the text to go, because then the label will move with the pin.) You can do the same for the output pin. Or you could just click any old place and start typing to put a label anywhere else.
Step 4: Testing your circuit Our final step is to test our circuit to ensure that it really does what we intended. Logisim is already simulating the circuit. Let's look again at where we were. Note that the input pins both contain 0s; and so does the output pin. This already tells us that the circuit already computes a 0 when both inputs are 0.
Step 4: Testing your circuit Now to try another combination of inputs. Select the poke tool and start poking the inputs by clicking on them. Each time you poke an input, its value will toggle. For example, we might first poke the bottom input. By poking the switches through different combinations, we can verify the other two rows. If they all match, then we're done: The circuit works! To archive your completed work, you might want to save or print your circuit. The File menu allows this, and of course it also allows you to exit Logisim.
Sub-Circuits Create a new schematic (File->New) for your work. Create a new subcircuit (Project->Add Circuit ). You will be prompted for a name for the subcircuit; call it NAND . In the new schematic window that you see create a simple NAND circuit with 2 input pins on the left side and an output pin on the right side. Go back to your "main" schematic by double-clicking "main" in the circuit selector at the left of the screen. Your original (blank) schematic will now be displayed, but your NAND circuit has been stored. Now, single click the word "NAND" in the list. This will tell Logisim that you wish to add your "NAND" circuit into your "main" circuit. Try placing your NAND circuit into the "main" schematic. If you did it correctly, you should see a gate with 2 input pins on the left and one output pin on the right. Try hooking input pins and output pins up to these and see if it works as you expect. Repeat these steps to create several more subcircuits: NOR, XOR, 2 to 1 MUX, and 4 to 1 MUX.
Logisim Menus File menu Simulate menu Edit menu Logisim Menus Window menu Project menu Help menu
The explorer pane Libraries contain components that can be dropped into circuits. They are displayed as folders in the explorer pane; to access a library's components, you have only to doubleclick the corresponding folder. Below, I have opened the Gates library and selected the NAND tool from it. You can see that Logisim now stands ready to add NAND gates into the circuit.
Logisim libraries Built-in libraries In the Load Library submenu, you can see that Logisim has three categories of libraries. Logisim libraries Logisim libraries JAR libraries
Logisim libraries JAR libraries Logisim libraries Built-in libraries 03 02 are libraries that are developed in Java but not distributed with Logisim. You can download JAR libraries that others have written, or you can write your own. . 1 are projects built within Logisim and saved to the disk. You can develop a set of circuits in a single project and then use that set of circuits as a library for another projects. are libraries that are distributed with Logisim.
Base Library Gate Library Memory Library Library Reference
Arithmetic Library Legacy Library Plexers Library Library Reference
The attribute table • Many components have attributes, which are properties for configuring how the component behaves or appears. • The attribute table is for viewing and displaying a component's attribute values. • To select which component's attributes you wish to view, click the component using the Select tool . • (You can also right-click (or control-click) the component and choose Show Attributes from the popup menu. • Also, manipulating a component via the Poke tool or the Text tool will display that component's attributes.)
Creating bundles • Every input and output on every component in the circuit has a bit width associated with it. • Many of Logisim's built-in components include attributes allowing you to customize the bit widths of their inputs and outputs. • The below screen shot illustrates a simple circuit for finding the bitwise AND of two three-bit inputs; each pin has its Bit Width attribute customized for dealing with three-bit data, as with the pictured AND gate attributes.
Splitters • When you work with multi-bit values, you will often want to route different bits in different directions. • The Base library's splitter tool allows you to accomplish this. • In this example, the splitter happens to actually split an incoming value into multiple outgoing values. But splitters can also combine multiple values into a single value.
Wire colors We are now in a position to summarize the full rainbow of colors that Logisim wires can take on. The following little circuit illustrates all of them at once.
Gray Blue Dark green The wire is for carrying a one-bit value, but the value it is carrying is not known. In the above example, this is occurring because the NOT gate's input is unknown, and so its output is also unknown. The wire's bit width is unknown. This occurs because the wire is not attached to any components' inputs and outputs. The wire is carrying a one-bit 0 value. Dark green Blue Wire colors Gray
Bright green Black Red The wire is carrying an error value. This usually arises because conflicting values on the wire. The wire is carrying a multi-bit value. Some or all of the bits may not be specified. The wire is carrying a one-bit 1 value. Black Red Bright green Wire colors
Orange The components attached to the wire do not agree in bit width. An orange wire is effectively "broken": It does not carry values between components. Orange Wire colors