Download
1 / 8

E N D
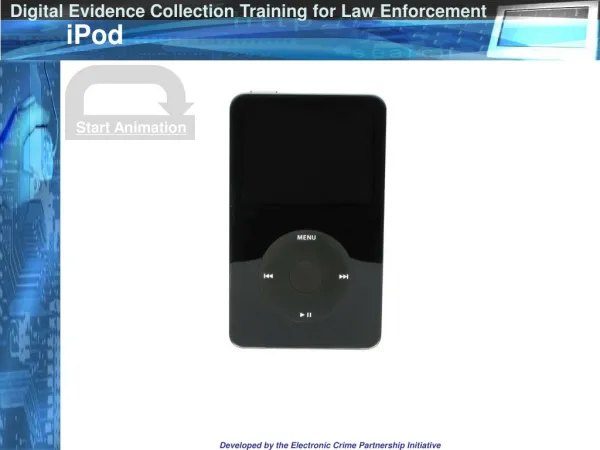
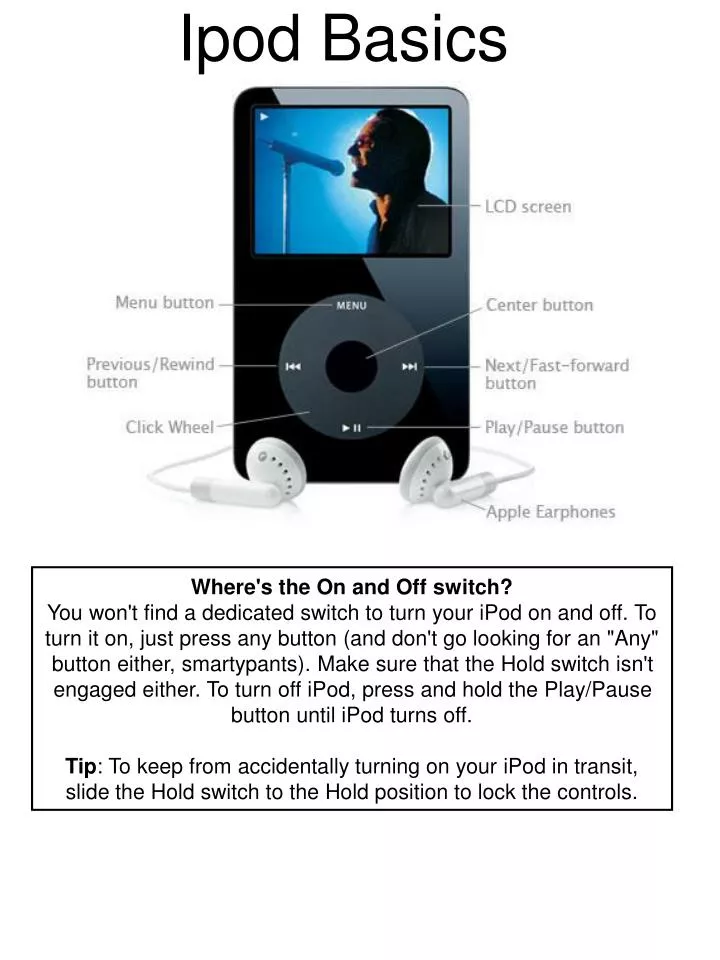
Ipod Basics Where's the On and Off switch? You won't find a dedicated switch to turn your iPod on and off. To turn it on, just press any button (and don't go looking for an "Any" button either, smartypants). Make sure that the Hold switch isn't engaged either. To turn off iPod, press and hold the Play/Pause button until iPod turns off. Tip: To keep from accidentally turning on your iPod in transit, slide the Hold switch to the Hold position to lock the controls.
Click WheelThis donut-shaped dial doesn't physically spin; it's a touch-sensitive pad (much like a track pad on a portable computer) that senses movement as you glide your finger across its surface. Just whirl your finger around the wheel to scroll through menus, crank up the volume, scrub through an audio track, eyeball your photo collection, and more, depending on where you're at in your iPod. Although the Click Wheel doesn't actually rotate, it'll play an audible clicking sound through an internal speaker on your iPod while you scroll to let you know it's working The wheel also serves as a 4-way controller; just press any control's label toward the edge of the wheel to activate it. Unlike the wheel, these buttons aren't touch-sensitive—pressing a label on the Click Wheel actually pushes a corresponding button underneath the wheel. You can play, pause, rewind, fast-forward, and skip songs, or go to other menus using the buttons on the Click Wheel. Click wheel Center Button Center buttonThis button (formerly known as the Select button) in the middle of the Click Wheel (but separate from it) lets you choose the currently highlighted menu item shown on the LCD. For example, if you're in the Music menu, you can whirl your finger around the Click Wheel until Songs is highlighted, then press the Center button to go to the Songs menu and see all the songs on your iPod (in iPod menu speak, you just chosen Music > Songs). You can then highlight a song and press the Play/Pause button to hear it. You can easily get to anything on your iPod by simply using the Click Wheel and Menu and Center buttons.
Menu buttonThis button takes you back to the previous menu. For example, if you're now playing a song (after following our example for the Center button, above), pressing the Menu button will return you to the Songs menu. Press the Menu button again to go back to the Music menu, and one more time to return to the main (iPod) menu. Previous/Rewind buttonWhen a song (or audiobook or podcast) is playing (the Now Playing screen appears on the LCD), you can start the song over by pressing this button once, go to the previous song in the list by pressing the button twice, or rewind through the current song by holding down the button as long as you want. When you're browsing photos, pressing this button lets you go back to the previous screen of photos. If you're viewing a slideshow, press this button to go back to the previous photo in the slideshow. Next/Fast-forward buttonWhen a song (or audiobook or podcast) is playing (the Now Playing screen appears on the LCD), you can skip to the next song in the list by pressing this button once, or fast-forward through the current song by holding down the button as long as you want. When you're browsing your photos, pressing this button lets you skip to the next screen of photos. If you're viewing a slideshow, press this button to skip to the next photo in the slideshow. Play/Pause buttonWhen you choose a song, video, audiobook, or podcast, pressing this button will either play the selection or pause it if it's already playing. When you're viewing photos, you can choose any photo or album and press this button to play a slideshow. Press it again to pause the slideshow. Pressing and holding the Play/Pause button also turns off iPod. Next/ Fast Forward Button Previous/Rewind button
Apple Earphones If you want to hear your music, you've got to plug some headphones into your iPod. The included Apple earbud-style headphones provide awesome sound with full frequency response (20 Hz to 20,000 Hz), and connect to iPod with a 3.5-mm stereo miniplug. If you have a hard time keeping these types of ’phones in your ears, feel free to plug in a different set of headphones. Here's the bird's eye (left)—and bug's eye (right)—view of an iPod with color display. iPod nano features its headphone port on its bottom (next to the Dock Connector). Headphone/AV portThis is the place to plug in your headphones—either the included Apple Earphones or your own (as long as it has a stereo 3.5-mm miniplug). iPod features the headphone jack/AV port up top, while iPod nano sports a headphone port on its bottom (it doesn't have AV capabilities). When you're not feeling selfish and hogging your tunes to yourself, you can alternatively use a 3.5-mm stereo miniplug to dual RCA jack cable (not included) to connect your iPod or iPod nano to your home stereo and share your tunes with the neighbors. Or hook up a pair of powered speakers to the port. If you've got photos or video on your iPod, you can also use this port to connect your iPod to a TV (this feature isn't available on iPod nano), then gather up family and friends to watch slideshows, music videos, movies—including your own home movies and TV shows on the bigger screen. You'll need an Apple iPod AV Cable (optional) to make this connection.
Ipod- and ITunes • Visit the Download iTunes page, download iTunes, install it and start it up. http://www.apple.com/itunes/download/ - The Website to download Itunes to your computer. • Connect your iPod to your computer as follows: • To connect iPod: Connect the Dock Connector side of the cable that came with your iPod to the Dock Connector on the bottom of your iPod (the rectangle with horizontal line icon should be face up). Connect the USB side of the cable to a high-powered USB port on your computer. • When iTunes recognizes your iPod, the iPod Setup Assistant appears to help you set up your iPod. Type a name for your iPod in the top field • Choose the "Automatically update songs on my iPod" checkbox if you want to sync your entire iTunes music library and playlists to your iPod each time you plug it in.If you want control of what goes onto your iPod, deselect this checkbox. • If you have an iPod with a color display, you can have iTunes automatically copy your photos to your iPod (using your settings in iTunes preferences) to fill any remaining space by choosing the "Automatically copy photos to my iPod" checkbox. Then choose a folder from the Synchronize photos from menu. If you prefer to copy photos manually, deselect this checkbox. • Click Next to go to the next screen. If you'd like to register your iPod at this time, click Register My iPod. Click Finish to end the setup process and open iTunes (you should see your iPod hanging out in the iTunes Source pane. Syncing your iPod • When the iPod Setup Assistant finishes, if you elected to “Automatically update songs on my iPod”, iTunes immediately begins transferring your songs to your iPod—assuming you have songs in your iTunes library. If you did not choose to automatically update, you need to set up manual options for syncing your iPod. -Manually Syncing--- SEE NEXT PAGE
Songs from CDs iTunes: Adding songs from CDs to your library You can import songs from your CDs into your iTunes library. Imported songs are encoded and stored on your hard disk so you can listen to them without having the original CD. For the best performance and results, use the computer's internal CD or DVD drive to import songs. • Insert an audio CD in your computer. After a moment, the songs on the CD are listed in the iTunes window. • Click to remove the checkmark next to any songs you don't want to import into your library. If you want to remove the gap of silence that normally occurs between songs, select two or more adjacent songs and from the Advanced menu, choose Join CD Tracks. iTunes imports any joined songs as one track. To change back to importing the songs separately, select the joined songs and from the Advanced menu, choose Unjoin CD Tracks. • Click the Import button to add the selected songs to your library. Tip: iTunes 7 introduced a gapless playback option that doesn't require joining CD tracks. . 4. The display area at the top of the iTunes window shows how much time it will take to import each song. To cancel import, click the small X next to the progress bar. By default, iTunes plays songs while they're being imported. 5. You can click the Pause button to stop playback, or continue to use iTunes for other tasks; the import will continue. You can also stop iTunes from playing songs automatically by deselecting the "Play songs while importing" checkbox in the Importing pane of iTunes preferences.
Disconnecting Ipod from Computer • Safely disconnect iPod If you haven't set up iPod to be used as a hard disk or if you don't manage your content manually, just unplug it to disconnect it.If you use iPod as a hard disk or manage your content manually, you must eject or "unmount" it before disconnecting it from your computer. You can tell if iPod is being used as a hard disk if its icon appears in the Finder or in My Computer. In addition, you'll see this message on iPod's screen: • Disconnecting iPod from your computer without ejecting it first can damage files on iPod and on your computer. • To eject iPod: • Select your iPod in the iTunes Source list. • Click the Eject iPod button in the lower right • corner of the iTunes window, as indicated here. • The Eject iPod button appears when you select your iPod in the Source list. • When you've successfully ejected iPod, it's safe to disconnect it. You'll see this message on iPod's screen or you'll see the iPod menu: Additional ways to eject iPod • In later versions of iTunes, you can just click the eject button that's next to your iPod's name in the Source list. • You can also eject iPod by choosing a menu command in iTunes, or by using a keyboard shortcut: • From the Controls menu, choose Eject iPod. • Press Command-E (Mac) or Control-E (Windows). If iTunes isn't open, you can still eject iPod in the Finder or My Computer. • Windows • Double-click My Computer. • Right-click the iPod icon. • Choose Eject from the shortcut menu.