Download
1 / 47
470 likes | 571 Views
MANUAL PARA CREAR BASES DE DATOS EN VISUAL STUDIO. Ado.net. DIRIGIDO A:. Este manual esta dirigido a. Vamos a crear un sistema para llevar el control de las obras municipales, supongamos que tenemos el siguiente formulario: Noregistros es una etiqueta llamada etposicion. txtclave. txtNombre.

E N D
DIRIGIDO A: Este manual esta dirigido a
Vamos a crear un sistema para llevar el control de las obras municipales, supongamos que tenemos el siguiente formulario: Noregistros es una etiqueta llamada etposicion txtclave txtNombre txtFecha btnprimero txtinversion btnanterior btnsiguiente btnAgregar btnultimo btnguardar btneliminar etposicion btnimprimir GridView1 btnsalir
Nombres de las cajas de Texto, botones y etiqueta Txtclave Txtnombre Txtinversion Txtfecha btnAgregar btnGuardar btnImprimir btnEliminar btnSalir etposicion
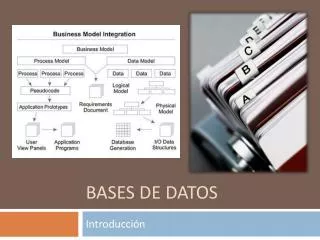
Lo primero que debemos hacer es nuestra base de datos en acces o sql server según se necesite, en nuestro caso lo haremos en acces, entramos a acces y hacemos los siguientes pasos:
Guardamos nuestra base de datos, a la cual le ponemos obras en nuestra carpeta, en este caso se guardo en la carpeta obras en la unidad c.
Crear tabla Obras, damos doble clic en Id y cambiamos el nombre del campo a clave y cambiamos el tipo de dato de Auto numérico a numérico.
Para cambiar los tipos de datos es en la pestaña mostrada a continuación:Declaramos Clave auto numérico, nombre texto, fecha texto y inversión de tipo moneda.
Antes de salir de acces debemos de guardar nuestra base de datos con compatibilidad de Office 2002-2003
En visual studio hacemos lo siguiente: Buscamos un control llamado OleDbDataAdapter para hacer la conexión con acces. Si no esta en las herramientas tenemos que agregar el control. Para agregarlo hacer lo siguiente: clic derecho sobre caja de herramientas y elegir choose items
Ahora agregamos un OleDbDataAdapter a nuestro formulario y seleccionamos New Connection.
En esta pantalla debemos de cambiar el DataSource, seleccionamos Change para elegir el driver de Microsoft Acces..
Seleccionamos nuestra base de datos y en la siguiente pantalla damos clic en ok:
Nos queda la consulta de la siguiente manera y damos clic en Siguiente:
Debemos de tener en la parte inferior nuestro Oledbdataadapter, Oledbconnection y dataset11
A continuación vincularemos las cajas de texto con nuestro dataset. Damos clic derecho a la caja de texto del campo clave y buscamos la propiedad Databinding, seleccionamos la porpiedad text y seleccionamos la opción como se muestra en la figura: para cada caja de texto seleccionamos el campo correspondiente.
Cambiar el nombre a Dataset11 por DsObras y al OleDbDataAdapter por DaObras
Código del botón Primero donde DsObras es el nombre del Dataset y Datos es el nombre de la tabla. BindingContext(DsObras, “Datos").Position = 0 MostrarPosicion() Código del botón Siguiente BindingContext(DsObras, “Datos").Position += 1 MostrarPosicion() Código del botón Anterior BindingContext(DsObras, “Datos").Position -= 1 MostrarPosicion() Código del botón Ultimo BindingContext(DsObras, “Datos").Position = _ BindingContext(DsObras, “Datos").Count - 1 MostrarPosicion()
Agregamos a nuestro código el procedimiento de MostrarPosicion Private Sub MostrarPosicion() DimbmBase As BindingManagerBase = BindingContext(DsObras, “Datos") Dim iTotal As Integer = bmBase.Count 'total registros Dim iPos As Integer If iTotal = 0 Then etPosicion.Text = "No registros" Else iPos = bmBase.Position + 1 'número (1, 2, ...) de registro 'Mostrar información en la etiqueta etPosicion.Text = iPos.ToString & " de " & iTotal.ToString End If End Sub
Código del botón Agregar Me.txtClave.Text = "" Me.txtNombre.Text = "" Me.txtFecha.Text = " " Me.txtInversion.Text = "" Me.txtClave.Focus()
Código del botón Guardar Dim miTabla As DataTable = DSOBRAS.Datos Dim cfilas As DataRowCollection = miTabla.Rows Dim nuevaFila As DataRow Dim nombre As String Dim clave As String Dim inversion As Double Dim fecha As String clave = Me.txtClave.Text nombre = Me.txtNombre.Text inversion = Me.txtInversion.Text fecha = Me.txtFecha.Text Try 'Nueva fila nuevaFila = miTabla.NewRow 'Columnas de la tabla nuevaFila.Item("CLAVE") = clave nuevaFila.Item("NOMBRE") = nombre nuevaFila.Item("Inversion") = inversion nuevaFila.Item("fecha") = fecha MsgBox("Registroagregado") cfilas.Add(nuevaFila) Catch ex As System.Data.ConstraintException REM Capturar posible error por clave duplicada (teléfono) MessageBox.Show("ERROR DE CLAVE DUPLICADA") End Try DaObras.Fill(DSOBRAS) MostrarPosicion() If (DSOBRAS.HasChanges()) Then DaObras.Update(DSOBRAS) MessageBox.Show("Origen de datosactualizado") End If Me.Close()
Código del botón eliminar DimbmBase As BindingManagerBase = BindingContext(DSOBRAS, "datos") Dim vistaFilaActual As DataRowView Dim NL As String = Environment.NewLine If (MessageBox.Show("¿Desea borrar este registro?" & NL, _ "Buscar", MessageBoxButtons.YesNo, _ MessageBoxIcon.Question) = DialogResult.Yes) Then vistaFilaActual = bmBase.Current vistaFilaActual.Row.Delete() MostrarPosicion() End If
Código de las cajas de texto en el evento keypress para avanzar con un enter a otra caja de texto. Código de la caja de texto txtclave en el evento keypress If e.KeyChar = Chr(13) Then txtNombre.Focus() End If Código de la caja de texto txtnombre en el evento keypress If e.KeyChar = Chr(13) Then txtfecha.Focus() End If Código de la caja de texto txtfecha en el evento keypress If e.KeyChar = Chr(13) Then txtfecha.Focus() End If Código de la caja de texto txtinversion en el evento keypress If e.KeyChar = Chr(13) Then Btnguardar.enabled=true btnguardar.Focus() End If
Código del evento load del formulario: btnGuardar.Enabled = False DSOBRAS.Clear() DaObras.Fill(DSOBRAS) MostrarPosicion()
Código del botón eliminar DimbmBase As BindingManagerBase = BindingContext(DSOBRAS, "datos") Dim vistaFilaActual As DataRowView Dim NL As String = Environment.NewLine If (MessageBox.Show("¿Desea borrar este registro?" & NL, _ "Buscar", MessageBoxButtons.YesNo, _ MessageBoxIcon.Question) = DialogResult.Yes) Then vistaFilaActual = bmBase.Current vistaFilaActual.Row.Delete() MostrarPosicion() End If
Para imprimir a excel debemos de agregar una referencia de la siguiente manera:
Agregar las referencias que se encuentran en la carpeta obras.
Código del botón imprimir a Excel Dim excelApp As New Excel.Application() Dim excelBook As Excel.Workbook = excelApp.Workbooks.Add Dim excelWorksheet As Excel.Worksheet = _ CType(excelBook.Worksheets(1), Excel.Worksheet) excelApp.Visible = True With excelWorksheet ' Set the column headers and desired formatting for the spreadsheet. .Columns().ColumnWidth = 21.71 .Range("A1").Value = "CLAVE" .Range("A1").Font.Bold = True .Range("B1").Value = "NOMBRE" .Range("B1").Font.Bold = True .Range("C1").Value = "FECHA" .Range("C1").Font.Bold = True .Range("D1").Value = "INVERSION" .Range("D1").Font.Bold = True ' Start the counter on the second row, following the column headers Dim i As Integer = 2 ' Loop through the Rows collection of the DataSet and write the data ' in each row to the cells in Excel. Dim dr As DataRow For Each dr In DsObras.Tables(0).Rows .Range("A" & i.ToString).Value = dr("CLAVE") .Range("B" & i.ToString).Value = dr("NOMBRE") .Range("C" & i.ToString).Value = dr("FECHA") .Range("D" & i.ToString).Value = dr("INVERSION") i += 1 Next End With
Vincular el gridview con la base de datos en la propiedad Datasource y Datamember.
CONSULTAS: Agregue y diseñe el siguiente formulario.
Nombres de los controles del formulario consultas: rbtNombresa cmdNames rbtNombresd cboNombres cmdSort gridobras
Declaraciones de variables en el formulario de consultas: Dim conn As String = _ "Provider=Microsoft.jet.oledb.4.0;data source=C:\OBRAS\OBRAS.mdb;" Dim DVobras As DataView Protected Const DEFAULT_FILTER As String = "Nombre like '%'" Protected Const DEFAULT_SORT As String = "Nombre ASC, Nombre DESC" Protected Const NO_RECORDS_FOUND_MESSAGE As String = "No existenregistros en esecriterio de busqueda." Protected Const CAPTION_TITLE As String = "Ordena y filtra en un Dataview" Protected Const NO_RECORDS_TO_SORT_MESSAGE As String = "No existenregistrosparaordenar." Protected Const CAPTION_ICON_BUTTON As MsgBoxStyle = CType(MsgBoxStyle.Information + MsgBoxStyle.OkOnly, MsgBoxStyle)
Código para realizar consultas en el botón cmdNames Dim strFilter As String 'Process the row filter criteria based on first character of the product name. ' if <ALL> was selected, show all rows in the grid, else show only ' those rows beginning with the selected letter. If cboNombres.Text = "<ALL>" Then strFilter = "Nombre like '%'" Else strFilter = "Nombre like '" & cboNombres.Text & "%'" End If DVobras.RowFilter = strFilter 'Display the sorted and filtered view in the datagrid Gridobras.DataSource = DVobras 'Display the number of rows in the view 'lblRecords.Text = STATUS_MESSAGE & dvProducts.Count.ToString 'lblFilter.text = strFilter 'display a msgbox if no records were found that ' match the user criteria If DVobras.Count = 0 Then MsgBox(NO_RECORDS_FOUND_MESSAGE, CAPTION_ICON_BUTTON, CAPTION_TITLE) End If
Código para el botón cmdSort Dim strSort As String 'Only sort if the dataview currently has records If DVobras.Count = 0 Then MsgBox(NO_RECORDS_TO_SORT_MESSAGE, CAPTION_ICON_BUTTON, CAPTION_TITLE) Exit Sub End If 'Process the sort criteria selected for the view ' construct a sort string for the primary, secondary sort keys ' The Primary sort key is the UnitsInStock column, the ' secondary sort key is UnitsOnOrder column If rbtNombresa.Checked = True Then strSort = "Nombre ASC" Else strSort = "Nombre DESC" End If If rbtNombresd.Checked = True Then strSort = strSort & ", Nombre ASC" Else strSort = strSort & ", Nombre DESC" End If 'Apply the sort criteria to the dataview DVobras.Sort = strSort 'Display the view in the datagrid Me.Gridobras.DataSource = DVobras
Código del formulario de consultas en el evento load Dim amigosConnection As New OleDbConnection(conn) Dim productadapter As New OleDbDataAdapter("SELECT clave, nombre, fecha, inversion from Datos", amigosConnection) DimdsOBRAS As NewDataSet() Dim cmd As OleDbCommand Dim idrfc As String amigosConnection.Open() productadapter.Fill(dsOBRAS, "DATOS") ''create the dataview; use a constructor to specify '' the sort, filter criteria for performance purposes DVobras = New DataView(dsOBRAS.Tables("DATOS"), DEFAULT_FILTER, DEFAULT_SORT, DataViewRowState.OriginalRows) ' Bind the DataGrid to the dataview created above Gridobras.DataSource = DVobras ''Populate the combo box for productName filtering. '' Allow a user to select the first letter of products that they wish to view cboNombres.Items.AddRange(New Object() {"<ALL>", "A", "B", "C", "D", "E", "F", "G", _ "H", "I", "J", "K", "L", "M", "N", "O", "P", "Q", "R", "S", "T", "U", "V", "W", "X", "Y", "Z"}) cboNombres.Text = "<ALL>"