Download

1 / 140
1.4k likes | 1.5k Views
CHECKMATE INVENTORY. Welcome to CheckMate!. “CheckMate—providing businesses with data collection solutions since 1984.”. CONTENTS. TAKE THE TOUR!!!. Start from the beginning and take the full tour, or jump to a certain section via the buttons below. SETTING UP. PORTABLE BAR

E N D
Welcome to CheckMate! “CheckMate—providing businesses with data collection solutions since 1984.”
CONTENTS TAKE THE TOUR!!! • Start from the beginning and take the full tour, or jump to a certain section via the buttons below. SETTING UP PORTABLE BAR CODE READER ADDING A VENDOR RUN A QUERY ADDING A BADGE PHYSICAL INVENTORY PART LOCATE RUN A REPORT ADDING A PART REORDER PARTS SERIAL # LOCATE REINDEX/ CLEANUP ACTIVITY CODES COMMON IDENTIFIERS CREATE QUERY RECEIVE AN ORDER Use the navigator bar to go to the first, previous, next and last screens. It can be found in the upper right corner of each screen.
Purpose of Training Module WHO (is it for?): people who will use the program. WHY (a Training Module?): to give you a visual reference guide to the CheckMate program. WHAT (is it?): visual instructions on how to initially setup the program, maintain database integrity, perform activities, etc. WHEN(can it be used?): when training a new employee on how to use the program; any time a visual reference to the program is. WHERE (can it be used?): at your personal computer or laptop. HOW (do you use it?): Click Here for Instructions
Instructions: Using the Training Module • Navigator Bar: The navigator bar in the upper right hand corner allows you to go to the first, previous, next or last slide by pressing the corresponding buttons. • Go To Menu: You may also right click anywhere on the screen (except for a button) to get the “Go To” menu.
Navigator Bar 1) First Slide- takes you to the beginning of the show. 2) Previous Slide- takes you to the previous slide in the show. 3) Next Slide- takes you to the next slide in the show. 4) Last Slide- takes you to the end of the show.
Go To Menu To the right is the “Go To” Menu. You may use this to go to the previous or next screen, but more importantly, you may click the Go button to go to other screens. You may also change the arrow, or pointer, to a pen and then change the pen color. Lastly, to end the show without watching all of it you must click the End Show button.
Go To Menu (CONT.) • After you click “Go” you may choose to click either Slide Navigator, By Title, or Previously Viewed. • Go-Slide Navigator- shows you a numbered list of all of the slides in the show. You can scroll down the list or type in the number of the slide you wish to see and it will automatically find it for you.
Go To Menu (CONT.) • Go-By Title- a list of the titles of slides 1-60. From here you will be able to choose which slide you want to go to by scrolling up and down the list of titles. You must use the Slide Navigator to get to Slides 61-141 as they are not included on the Go-By Title list of slides.
Go To Menu (CONT.) The Hidden Slide and Custom Show options are grayed out because they have no use in this training module. • Go-Previously Viewed-This takes you back to the last slide you viewed. This is particularly useful when you use a link or button to get to a slide then want to return to the slide you just left. The Navigator Bar merely allows you to go to the previous slide in the overall order, not the last slide viewed.
CheckMate Inventory Now that you are familiar with the training module’s options let’s go on. You may go back to the Contents Screen by clicking the ‘Contents’ button and use the buttons there to go to the section of your choice or you may continue taking the full tour now by clicking ‘Continue Tour.’ CONTENTS Continue Tour
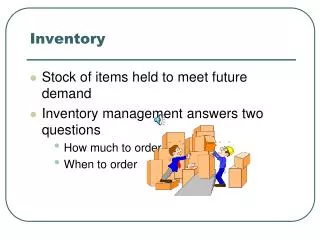
OVERVIEW CheckMate Inventory is a versatile program designed to answer the following questions: 1) What parts do I have? 2) How many do I have? 3) Where are the parts located? 4) What parts do I need to reorder?
How to Use CheckMate Inventory • After installing CheckMate on your computer, open the program. When you type in your password in the following box, • you will open the Main Window. admin
Setting Up • Before using CheckMate, you must set several system options. To set the system options, click Utilities and then Setup.
System Options The system options must be set before you run CheckMate • Company Name- appears at the tops of screens and reports • Receive Location- default location given to recently received parts • Transit Location- default location given to parts in transit • Event Interval- number of days added to today’s date to compute the next event date • Online Timeout- the number of seconds CheckMate waits before clearing information on the Main Window • Activity Default- issue or receive for primary activity online • New Stock Default- choose to edit, initialize, or reject new stocks • Reader Port- serial COMport to which portable bar code reader is connected. Now you are ready to get started
Getting Started…Adding Badges • To begin, Badges may be created for those customers who will be issued supplies and parts. To add a Badge, click Maintenance then Badge.
Badge Data Entry To add a new Badge, hit the Add button . Fill in the necessary information for each Badge. Each person must have a unique Badge ID and a Badge Name. All other data is optional. When you have finished a Badge, hit the Add Button at the bottom of the Badge Maintenance Window to start another.
Badge Maintenance Manchester, Sterling P. 00001 8/14/2000 Fairbanks, Alaska in January 973-0121 1706 116th Dr. NE Lake Stevens WA 98258
Adding Parts • Now add Parts into the database. From the Main Window, click Maintenance then Part.
Part Data Entry • To start adding Parts, click the add button at the bottom of the screen . Now fill in the necessary information for the Part: the AKA (usually the name that the part is also known as or the UPC), Part Number (bar code), and Description. All other data including Group/Common ID, Unit of Issue, Case Size, Standard Storage, Qty In, Reorder, Target, Critical, On Order, Price, and Cost are optional and can be added at another time, or not at all. When you wish to add another Part, hit the add button. When you are finished adding Parts, hit the OK button.
Part Maintenance 85455552 000001 HAMMER, 16”, BLACK WORK CTR. AC09 A BLACK 16” SMITH AND DELK HAMMER Eagle Hardware ea 1 HAMMERS Product A10 interchangeable $20.00 06/10/00 $15.95
Activity Codes Click on an activity button for detailed instructions on performing that activity.
How to Receive Parts To Receive Parts, first scan the letter ‘R’ from the Activity Codes List. RRR R
How to Receive Parts Next scan in the Part number. After this, click on the ‘Serialized’ toggle at the bottom right if you are receiving items that have individual serial numbers.
How to Receive Parts Now enter the quantity to receive for unserialized/ serialized items.
How to Receive Parts If you are receiving unserialized parts you are finished. If not, add the serial numbers now. SERIALIZED UNSERIALIZED-FINISHED
How to Issue Parts To Issue parts, from the Main Window, scan the letter ‘I’ from the Activity Codes List. RRR I
How to Issue Parts (CONT.) Scan the part number now or click ‘Serialized’ if you wish to issue items by their serial numbers.
How to Issue Parts (CONT.) Now enter the quantity for issuing w/o S.N., or the quantity then serial #’s for issuing with serial #’s. UNSERIALIZED SERIALIZED
How to Locate a Part To locate a part, scan the letter ‘L’ on the Activity Codes List (see also Locate a Part). LLL L
How to Receive with a P.O. To receive parts with a P.O., scan the letter ‘P’ from the Activity Codes List. *P* P
How to Receive with a P.O. Next, enter an eight digit Purchase Order number (as described here) then click the OK button.
How to Receive with a P.O. and then enter the quantity of parts. Scan a part bar code,
How to Receive with a P.O. Now enter the multiplier, the number in the case by which you multiply the quantity.
How to Receive with a P.O. The Receive is now done and will be posted on the Main Window and shown on reports.
How to Clear Main Window Data To clear data on the Main Window, scan the letter ‘C’ from the Activity Codes List. *P* C
How to Set an Event Date for a Part • To set an Event Date for any number of parts, scan the letter ‘E’ from the Activity Codes List. *P* E
How to Set an Event Date for a Part (CONT.) Enter the next event date (the number of days added to today’s date to compute the next event) and click OK.
How to Set an Event Date for a Part (CONT.) Lastly, scan the desired part number.
How to Set an Event Date for a Part (CONT.) • Now the event date is set for the part and will show up on the Main Window and reports.
How to Move a Part • To move a part, first scan the letter ‘M’ on the Activity Codes List. *M8 M
How to Move a Part (CONT.) • Now enter the locations from which the part is leaving and to which the part is going. Click OK.
How to Move a Part (CONT.) • Now scan in the part that is to be moved.
How to Move a Part (CONT.) • Lastly, enter the quantity to be moved.
How to Move a Part (CONT.) • Now the part is moved and will show the new location on the Main Window and on reports.
How to Issue a Work Order • To issue parts to a work order, scan the letter ‘W’ from the Activity Codes List. 8W8 W