Download
1 / 27
270 likes | 365 Views
Prototypes tests - Status report. R. Fantechi on behalf of the P326 veto test team. Spaghetti prototype preparation. Machining of the two ends Gluing of light guides Connection to photomultipliers in a closed box HV and signal cabling. Spaghetti prototype preparation. March test beam.

E N D
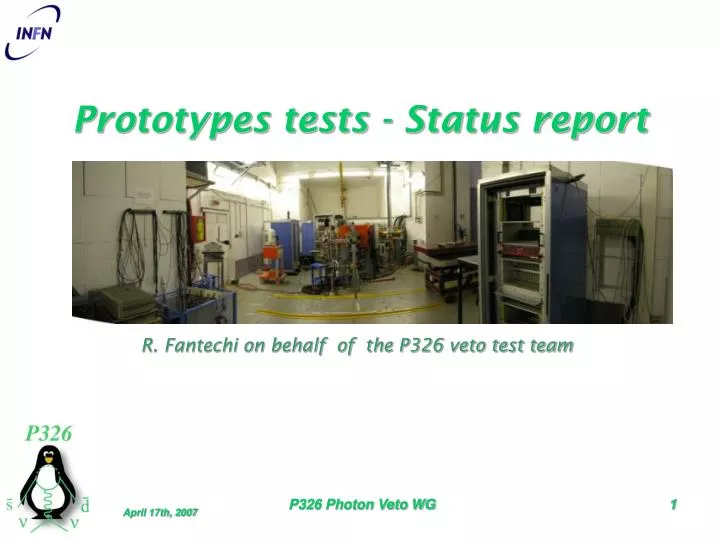
Prototypes tests - Status report R. Fantechi on behalf of the P326 veto test team P326 Photon Veto WG
Spaghetti prototype preparation • Machining of the two ends • Gluing of light guides • Connection to photomultipliers in a closed box • HV and signal cabling P326 Photon Veto WG
Spaghetti prototype preparation P326 Photon Veto WG
March test beam • Allocated beam time from 26/2 to 11/3 • No time before to do the gain calibration • Take cosmics runs during the night w/o beam • But the cosmic telescope was across a leg (the prototype was installed as a C), so impossible to disentangle the effect of attenuation length • A major problem found with the environmental background P326 Photon Veto WG
Background - 1 Scatter plot of the times of the two PMs on the same cell P326 Photon Veto WG
Background - 2 P326 Photon Veto WG
Background - 3 P326 Photon Veto WG
First shieldings P326 Photon Veto WG
First shieldings P326 Photon Veto WG
Shielding for the actual test Added concrete wall P326 Photon Veto WG
Shielding for the actual test P326 Photon Veto WG
Shielding for the actual test Improved shielding at Linac/BTF hall wall P326 Photon Veto WG
Medium term improvements In the next future: improve shielding at beam-attenuating target P326 Photon Veto WG
CKM prototype Shipped from Fermilab at the end of January Arrived in Fiumicino on February 2nd Nobody was warned of its arrival! So it stays stored at the airport for one month… Some money paid for this storage P326 Photon Veto WG
CKM prototype Some preparation needed Two tubes were missing (from Pisa) One base was missing (from Pisa) Some mechanics work for the missing tubes was needed Gain intercalibration with cosmics completed P326 Photon Veto WG
Detectors positioning Installation of CKM prototype on a movable table along the deflected electron line Installation of the spaghetti proto, on the same line as above, in alternative with the CKM prototype Use the same position with the same background shielding P326 Photon Veto WG
Detectors positioning P326 Photon Veto WG
Detectors positioning View from behind P326 Photon Veto WG
Detectors positioning The two fingers used for beam tagging P326 Photon Veto WG
Signals from prototypes CKM Spaghetti Cosmics, PM directly in the scope P326 Photon Veto WG
Gain calibration - spaghetti Prototype moved with legs upwards in the BTF hall Two scintillators in the central point For each cell, impose to have signal in time in the other vertical two Iterate and set the HV such to have MIP 200 counts above pedestal 1 MIP = 30 MeV (from Kloe experience) P326 Photon Veto WG
Gain calibration - CKM Problem Work done in a different lab Autotrigger: the and of the 4 left tubes or the and of the 4 right ones Still a problem to be understood for a tube The fifth and the sixth are different type Eventually set the voltages to have the same energy scale P326 Photon Veto WG
Opal lead glass HV scan Photoelectrons/Mev A first, quick look to one module P326 Photon Veto WG
A first look at some data • Setup tools to measure time resolution • Tag with the signal from the fingers around the one electron peak • Distribution of time difference between the two fingers • Distribution of the time difference between the first hit cell and the finger • Distribution of the time difference of the two PMs connected to the hit cell • Some preliminary result, still something to understand P326 Photon Veto WG
Time resolution finger 1 - finger 2 PM 1 - finger P326 Photon Veto WG
Time resolution PM 2 - finger PM 1 - PM 2 P326 Photon Veto WG
Plans Next beam period is now until the end of the month • First test one proto at the time with electrons • Verify response, background level, etc • Take data with electrons to evaluate efficiency, energy and time resolution... • Move one prototype at the time on the photon line and iterate the measurement • Don’t go directly to photons before having understood all the problems • Do the same for the lead glass • Use few hours to measure the response of various scintillator/fibers slabs (Protvino, Bicron cast, Bicron molded) to compare light yield. Box prepared in Pisa • Next period: 15 days in June P326 Photon Veto WG