Download
1 / 23
230 likes | 405 Views
An Overview of Servlet & JSP Technology. Agenda. Understanding the role of servlets Building Web pages dynamically Evaluating servlets vs. other technologies Understanding the role of JSP Configuring the server Configuring your development environment Testing the setup Basic server

E N D
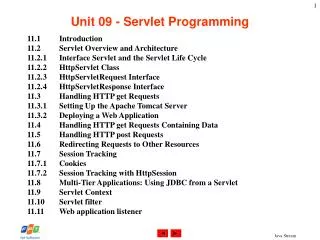
Agenda • Understanding the role of servlets • Building Web pages dynamically • Evaluating servlets vs. other technologies • Understanding the role of JSP • Configuring the server • Configuring your development environment • Testing the setup • Basic server • HTML/JSP • Servlets
A Servlet’s Job • Read explicit data sent by client (form data) • Read implicit data sent by client (request headers) • Generate the results • Send the explicit data back to client (HTML) • Send the implicit data to client(status codes and response headers)
Why Build Web Pages Dynamically? • The Web page is based on data submitted by the user • E.g., results page from search engines and order-confirmation pages at on-line stores • The Web page is derived from data that changes frequently • E.g., a weather report or news headlines page • The Web page uses information from databases or other server-side sources • E.g., an e-commerce site could use a servlet to build a Web page that lists the current price and availability of each item that is for sale.
The Advantages of Servlets Over “Traditional” CGI • Efficient • Threads instead of OS processes, one servlet copy • Convenient • Lots of high-level utilities • Powerful • Sharing data, pooling, persistence • Portable • Run on virtually all operating systems and servers • Inexpensive • There are plenty of free and low-cost servers • Secure • No shell escapes, no buffer overflows • Mainstream • See next page
Mainstream • Popular: • The single most common use of Java technology • The leading technology for medium/large Web applications • Supported by: • Apache, Oracle, IBM, Sybase, BEA, Macromedia, Caucho, Sun/iPlanet, New Atlanta, ATG, Fujitsu, Lutris, Silverstream, the World Wide Web Consortium (W3C), and many others • Plugins for IIS and Zeus • Runs on: • Windows, Unix/Linux, MacOS, VMS, and IBM mainframe OSs • Used for: • Airline companies, hotels, e-commerce sites, search engines, banks, financial sites, etc., etc., etc. Server-side Java is driving the Web
Extending the Power of Servlets: JavaServer Pages (JSP) • Idea: • Use regular HTML for most of page • Mark dynamic content with special tags • Details in second half of course <!DOCTYPE HTML PUBLIC "-//W3C//DTD HTML 4.0 Transitional//EN"> <HTML> <HEAD><TITLE>Welcome to Our Store</TITLE></HEAD> <BODY> <H1>Welcome to Our Store</H1> <SMALL>Welcome, <!-- User name is "New User" for first-time visitors --> <%= coreservlets.Utils.getUserNameFromCookie(request) %> To access your account settings, click <A HREF="Account-Settings.html">here.</A></SMALL> <P> Regular HTML for rest of on-line store’s Web page </BODY></HTML>
Server Setup and Configuration • Download and install the Java Software Development Kit (SDK) • Download a server. • Configure the server • Set up your development environment • Test your setup • Establish a simplified deployment method • Create custom Web applications • For very detailed coverage of these steps for Tomcat 4 and 5, see • http://www.coreservlets.com/Apache-Tomcat-Tutorial/
Download & Install the Java SDK (or JDK) • Recommended Java version • JDK 1.4 • Obtain at http://java.sun.com/j2se/1.4/ • Be sure to set PATH variable as described in Java documentation • Minimum supported Java version • Servlets 2.3 and JSP 1.2 (standalone servers). • Java 1.2 or later. • J2EE 1.3 (which includes servlets 2.3 and JSP 1.2). • Java 1.3 or later. • Servlets 2.4 and JSP 2.0 (standalone servers). • Java 1.3 or later. • J2EE 1.4 (which includes servlets 2.4 and JSP 2.0). • Java 1.4 or later.
Download a Free Server for Your Desktop • Apache Tomcat • http://jakarta.apache.org/tomcat/ • For installation and setup details, see http://www.coreservlets.com/Apache-Tomcat-Tutorial/ • Macromedia JRun • http://www.macromedia.com/software/jrun/ • Caucho Resin • http://caucho.com/products/resin/ • New Atlanta ServletExec • http://www.newatlanta.com/products/servletexec/ • Jetty • http://jetty.mortbay.org/jetty/
Configure the Server • Identify the SDK installation directory. • For Tomcat: set JAVA_HOME • Specify the port. • Change the port from default (usually 8080) to 80 • Make server-specific customizations. • For Tomcat: • Enable servlet reloading • Enable the ROOT context • Turn on the invoker servlet • These changes already done for class. To reproduce for home/office setup, see book or refer to http://www.coreservlets.com/Apache-Tomcat-Tutorial/
Set Up Your Development Environment • Create a development directory • Choose a location in which to develop your servlets, JSP documents, and supporting classes (e.g., C:\Servlets+JSP) • Set your CLASSPATH • Tell the compiler about the servlet and JSP JAR file and the location of your development directory. • Setting this variable incorrectly is the single most common cause of problems for beginners. • Make shortcuts to start and stop the server • Make sure it is convenient to start and stop the server. • Bookmark or install the servlet and JSP API documentation • You’ll refer to this documentation frequently, so keep it handy.
Test Your Setup • Verify your Java installation • Be sure that you get meaningful results for both of these: • java -version • javac -help • Check your basic server configuration • Start server and access the server home page (http://localhost/) • Access a simple user-defined HTML page • Download Hello.html from book's source code archive • Put in install_dir/webapps/ROOT • Access with http://localhost/Hello.html • Access a simple user-defined JSP page • Download Hello.jsp and put in install_dir/webapps/ROOT • Access with http://localhost/Hello.jsp
Test Your Setup (Continued) • Compile and deploy a packageless servlet • Download HelloServlet.java from source code archive • Place in development directory (e.g., C:\Servlets+JSP) • Compile (if errors, check CLASSPATH) • Move HelloServlet.class to install_dir/webapps/ROOT/WEB-INF/classes • Access with http://localhost/servlet/HelloServlet
Test Your Setup (Continued) • Compile and deploy a packaged servlet • Download HelloServlet2.java from source code archive • Place in coreservlets subdirectory of development directory (e.g., C:\Servlets+JSP\coreservlets) • Compile (if errors, check CLASSPATH) • Move HelloServlet2.class to install_dir/webapps/ROOT/WEB-INF/classes/coreservlets • Access with http://localhost/servlet/coreservlets.HelloServlet2
Test Your Setup (Continued) • Compile and deploy a packaged servlet that uses a helper class • Download HelloServlet3.java and ServletUtilities.java • Place in coreservlets subdirectory of development dir • Compile (if errors, check CLASSPATH) • Move both class files to install_dir/webapps/ROOT/WEB-INF/classes/coreservlets • Access with http://localhost/servlet/coreservlets.HelloServlet3
Establish a Simplified Deployment Method • Copy to a shortcut or symbolic link • Make shortcut to install_dir/webapps/ROOT/WEB-INF/classes • For packageless servlets, copy .class file to this shortcut • For packaged servlets, copy entire directory to shortcut • This is the simplest method for beginners • This is the method I will use throughout class • Use the -d option of javac • Lets you have source files in one location but automatically place .class files in another location • Let your IDE take care of deployment • Use ant or a similar tool • Ant is especially popular when using custom Web apps
Web Applications: A Preview • Learning • Use default Web application (ROOT on Tomcat) • Use default URLs (http://…/servlet/ServletName) • Advantages • Simpler • Can test without restarting server or editing web.xml • Deployment • Use a custom Web application (on Tomcat, a directory in install_dir/webapps with structure similar to ROOT) • Register custom URLs in WEB-INF/web.xml • Advantages • URLs look better • Advanced features (init params, security, filters, etc.) depend on your using registered URLs
Making Custom Web Apps • Make a directory whose structure mirrors the structure of the default Web application. • HTML (and, eventually, JSP) documents go in the top-level directory • The web.xml file goes in the WEB-INF subdirectory • Servlets and other classes go either in WEB-INF/classes or a subdirectory of WEB-INF/classes that matches the package name. • On Tomcat, entire directory goes in install_dir/webapps • Update your CLASSPATH. • Add webAppDir/WEB-INF/classes to it.
Making Custom Web Apps • Use the directory name in the URL • All URLs should be of the form http://host/webAppDir/… • Use web.xml to assign custom URLs • Use the servlet and servlet-mapping elements <servlet> <servlet-name>Servlet2</servlet-name> <servlet-class> coreservlets.HelloServlet2 </servlet-class> </servlet> <servlet-mapping> <servlet-name>Servlet2</servlet-name> <url-pattern>/servlet2</url-pattern> </servlet-mapping>
Summary • Servlets are efficient, portable, powerful, and widely accepted in industry • Regardless of deployment server, run a free server on your desktop for development • Getting started: • Set your CLASSPATH • Servlet JAR file • Top of your package hierarchy • Put class files in proper location • .../WEB-INF/classes • Use proper URL, usually http://host/servlet/ServletName • Download existing servlet first time • Start with HelloServlet from www.coreservlets.com