Download
1 / 25
250 likes | 368 Views
Camerawork 101. “Perhaps it sounds ridiculous, but the best thing that young filmmakers should do is to get hold of a camera and some film and make a movie of any kind at all.” - Stanley Kubrick. Captures moving images Arguably the most important piece of equipment in filmmaking

E N D
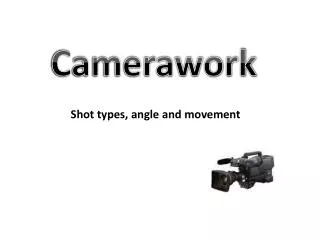
Camerawork 101 “Perhaps it sounds ridiculous, but the best thing that young filmmakers should do is to get hold of a camera and some film and make a movie of any kind at all.” - Stanley Kubrick
Captures moving images Arguably the most important piece of equipment in filmmaking The ‘eye’ of the filmmaker The ultimate bridge between technicality and creativity. The Camera’s role
Cameras come in many shapes and sizes, deciding on a type and format can be difficult: Which camera to use? Web SD HDV DVC PRO HD 35mm 4k + DV / DVCAM Digibeta Consumer Prosumer Professional
Basically, the camera uses a series of optics to project the light reflected off an object onto a reactive surface, upon which it imprints in some form. The science of the Camera
Nomenclature • Focus • Gain • Aperture (Iris/f-stop) • Shutter • White Balance • Zebra
An opening which (like the human eye’s pupil) can contract or expand to control the amount of light entering the lens. Measured as an f/stop (eg. f/1.2, f/4, f/8, f/12) Aperture (Av, Iris) Open Closed
Whilst the aperture is in effect a light control function - the effect it has on the image is critical. A closed aperture is akin to a high f/stop value (eg. F/16) and focuses the light tightly through the lens, resulting in a large depth-of-field, meaning more of what the camera is seeing is in focus at the same time: Depth-of-field
Whilst the aperture is in effect a light control function - the effect it has on the image is critical. An open aperture is akin to a low f/stop value (eg. F/1.8) and allows a wider swathe of light through the lens, resulting in a shallow depth-of-field, meaning less of what the camera is seeing is in focus at the same time: Depth-of-field
To summarise: Depth-of-field
The difference: Depth-of-field Shallow (Small) DOF Aperture Open Deep (Large) DOF Aperture Closed
Shutter speed is the other light-limiting function: If you want to open your aperture to get a lovely soft image with a shallow depth-of-field, the image is likely to be too bright. The shutter flickers open and shut in front of the lens fast enough to limit the light without compromising depth-of-field. Measured by the number of times it flickers per second - eg: 1/3 (3 times a second) = Slow 1/25 (25 times a second) = Average 1/100 (100 times a second) = Fast Making the shutter slower than your frame rate results in jerky movies! Shutter (Tv)
When the aperture and shutter are set up, the light levels are now correct, but the image may not be focused - and will be blurry. Focusing moves the glass elements in a lens into a position where the part of the scene you want in focus is sharp and the other parts may not necessarily be. Especially when there is a shallow depth-of-field, it may be difficult to establish a consistent focus point. One way to do this is to zoom directly into the subject, focus the image and then pull back to your desired framing. This is known as a “focus pull”. Focus
For digital cameras, gain represents the amount to which the image is being artificially amplified. This happens specifically in ‘low-light’ modes, but is best avoided: The more gain that is introduced, the more electrical noise becomes present in the image, resulting in a horribly grainy image: Gain (x dB)
Ever wondered why the image you’ve just shot looks either too yellow or too blue? This is due to the different wavelengths of light that are available in different environments. White Balance
Set to correspond to the Tungsten Lighting (2000K), this shot appears cool. Set at daylight (5200K) this shot appears artificially warm, almost sepia. White Balance
Set slightly warmer to 3000K, this image appears the closest to the eye’s perception of the shot: This setting can be used to creatively control the colour of your footage. White Balance
To set your white balance manually: Hold a white card in front of your camera. Zoom in so the card fills the field of vision Press the ‘custom white balance’ option Wait for confirmation Reset your shot What you have done is effectively to give the camera a baseline for what it should expect white to be, and it has set itself to balance out the shift in that setting. White Balance
Zebra Allows you to see at a glance if areas of your image are over-exposed (too bright) and correct this.
Framing/Shot length • Extreme Long Shot ELS • Long Shot LS • Mid-Shot MS • Close Up CU • Extreme Close Up ECU
Angles • Bird’s eye view • High angle • Eye level • Low angle • Oblique (Canted/Dutch) angle • Point-of-view
Movement • Pan • Tilt • Dolly • Crane • Handheld • Aerial • Zoom
Only use zoom to set up / frame your shots - don’t go zoom-happy when shooting: it gives your footage an amateur feel. Avoid camera movements that are difficult to achieve without professional equipment (eg. A crane shot) as they won’t necessarily look right. Use a tripod wherever you can - a stable/smooth look is a professional-looking one! Simple rules:
Comments? Questions? Comments
Meeting 3 will be… Lighting 101