Download
1 / 1
10 likes | 125 Views
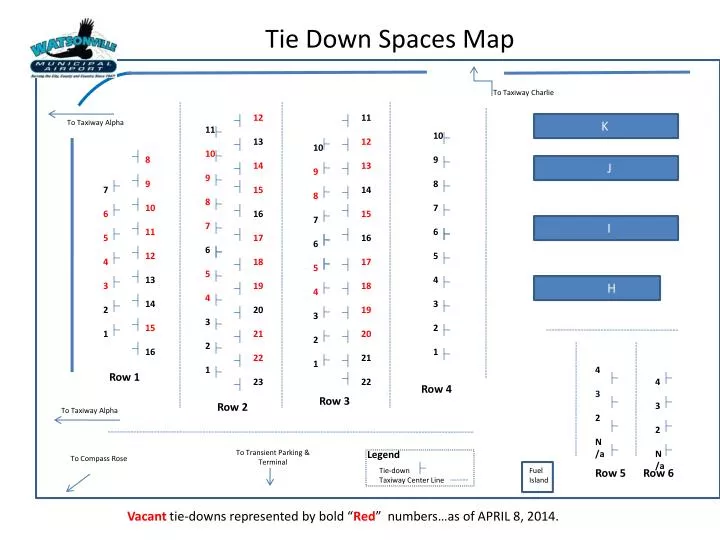
Tie Down Spaces Map. To Taxiway Charlie. To Taxiway Alpha. To Taxiway Alpha. 10 9 8 7 6 5 4 3 2 1. 12 13 14 15 16 17 18 19 20 21 22 23. 11 12 13 14 15 16 17 18 19 20 21 22. K. 11 10 9 8 7 6 5 4 3 2 1. 10 9 8 7 6 5 4 3 2 1. 8 9 10 11

E N D
Tie Down Spaces Map To Taxiway Charlie To Taxiway Alpha To Taxiway Alpha 10 9 8 7 6 5 4 3 2 1 12 13 14 15 16 17 18 19 20 21 22 23 11 12 13 14 15 16 17 18 19 20 21 22 K 11 10 9 8 7 6 5 4 3 2 1 10 9 8 7 6 5 4 3 2 1 8 9 10 11 12 13 14 15 16 J 7 6 5 4 3 2 1 I H 4 3 2 N/a Fuel Island 4 3 2 N/a Row 1 Row 4 Row 3 Row 2 To Transient Parking & Terminal To Compass Rose Legend Row 5 Row 6 Tie-down Taxiway Center Line Vacant tie-downs represented by bold “Red” numbers…as of APRIL 8, 2014.