Download
1 / 24
320 likes | 423 Views
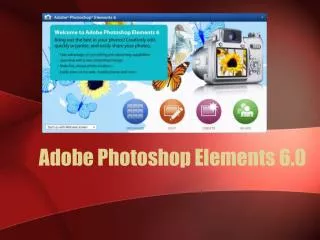
Name of p rofessional photo edit software. For education and home user (easier). Company name. Version number. Adobe Photoshop Elements 8.0. photo editing software licensed for use on DEC computers c an be purchased for home use by DEC staff.

E N D
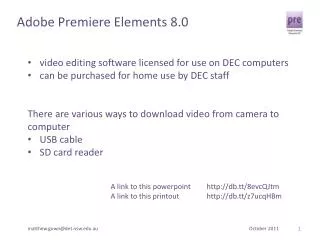
Name of professional photo edit software • For education and home user (easier) • Company name • Version number Adobe Photoshop Elements 8.0 • photo editing software licensed for use on DEC computers • can be purchased for home use by DEC staff A link to this powerpoint http://db.tt/0NXQrtPa A link to this printouthttp://db.tt/4aDbulDh
Start a new project Click EDIT
Photoshop Elements window 7. Undo as much as you want 2. Click double-arrows to show Toolbar as single or double column 1. To reset the window panels to look like this go to the Window menu and select Reset Panels 3. A black triangle in the bottom-right of a tool button means there are multiple versions – click and hold 6. Apply effects to all or selected parts of a photo 4. double-click PROJECT BIN to show or hide it for more screen space. The Project bin shows you thumbnails of all your open files. Double-click a thumbnail to bring to the front. 5. The layers of the photo appear here. 8. Colour picker
The colour picker 5. Click OK to accept new colour 6. Switches between foreground and background colour 4. New colour is shown here 1. Foreground colour. Click to change. 3. Then click around in this square to choose shade or tint 7. Background colour 2. Drag up or down in the spectrum to choose colour 8. Resets to black and white
Zoom and hand tool 1. File menu, Open photo called “brush size”. 3. “+” to zoom in 7. “-” to zoom out 2. Click on “Zoom Tool” 4. Then click on page to zoom 5. Click on “Hand Tool” to move zoomed photo around in window 6. Or press the space bar to turn current tool into “Hand Tool”
Brush size and hardness 1. File menu, Open photo called “brush size”. 4. …its size. 6. … left square bracket to make brush smaller. 5. Press the right square bracket key to make the brush bigger and… 2. Click on “Brush” tool 3. Note brush icon and… 8. … left square bracket and the shift key to make brush softer. 7. Press the right square bracket and the shift key to make the brush harder and… 9. Have a go at matching brush size to the dots above.
Make a blank page 1. File menu, New, Blank File… 6. To rotate page click Image menu, Rotate (left or right) 5. Click OK 2. International Paper 3. For this exercise choose “A6” 4. Background should be white
Make a blank page 1. File menu, New, Blank File… 6. To rotate page click Image menu, Rotate (left or right) 5. Click OK 2. International Paper 3. For this exercise choose “A6” 4. Background should be white
1. File menu, Open… and find photo called “red eye”. Fix “red eye” problem 4. Click into red eye 6. right-click and “Delete layer” if you don’t want layer anymore 5. You can hide or show the top layer by clicking here 3. Click on Red Eye tool 2. right-click on background and duplicate layer
Add text to photo 1. File menu, Open photo called “sunset”. 3. Select font (Impact) 4. Select size (12) 2. Click on “Text” tool 6. …switching to white here. 8. Note text appears as new layer 9. Hide or show layer by clicking here 5. Select white by clicking “default colours” and… 7. Click where you want the text
Scale, move and rotatetext 1. Click on “Move” tool 2. Make sure you are working on the text layer. 3. To scale textdrag a corner handle 4. To move textclick and drag the text box 5. To rotate text drag the “curved handle” that appears when you hover mouse outside a corner handle. 5. To distort text press Control-T and then right-click on text to
Save edited photo 1. File menu, Save 2. And Save As appears because… 3. …the original single layer JPG photo… 5. So if you want to keep the layers (to change things later)you must save as a Photoshop file (PSD), or… 4. …has multiple layers. (JPG files can only have a single layer) 6. …flatten the layers by selecting JPG here high quality (8), OK. 7. You can also flatten layers by right-clicking here
Feathering an edge 1 1. File menu, Open photo called “lemons” 4. “lasso” the lemons. 3. Make sure there is “0” feathering 2. Click the “Lasso” tool 5. If you select the wrong bit, drop the selection by pressing Control-D 7. Then double-click blank file in Project Bin (to bring it to the front) 6. Then press Control-C to copy 8. And paste lemons onto blank page by pressing Control-P 9. Then repeat from step 3 with feathering set at 20px (pixels).
Feathering an edge 2 1. File menu, Open photo called “lemons”
Distort a selection 2. Press Control-T (to transform) 1. Select part of a photo 3. Then right-click on it and choose “Distort” 4. Then drag a handle
Remove spots 1. File menu, Open photo called “spots” 3. Select “Spot Healing Brush Tool” 4. Click on spot 2. Duplicate layer by right-clicking on background. 5. Hide or show the top layer by clicking here
1. File menu, Open photo called “wrinkles” Remove wrinkles 3. Click on “Healing Brush Tool” 5. …let go of the ALT key and “wipe” with the “healing colour”. 2. right-click and duplicate layer so you can check your work 4. Set “healing colour” by holding down the ALT key and clicking then…
Make a vignette 1. File menu, Open photos called “boy” and “girl” 9. Click “Move Tool” to move ellipse around page 3. Set feathering to 20 pixels 4. Draw an ellipse around boy’s face 2. Select “Elliptical Marquee Tool” 10. Resize ellipse by dragging corner handles 5. Move ellipse by dragging in the middle 7. Copy ellipse by pressing Control-C 8. Switch to blank page and paste ellipse by pressing Control-V 6. Drop the selection (ellipse) if you don’t want it anymore by pressing Control-D
Change colour of part of a photo 1. File menu, Open photo called “kangaroo road sign” 6. Turn on “Colour Swatches” via the Window menu 5. Then select similar colours by going to the Select menu and choosing “Similar” 3. Click on “Quick Selection Tool” 4. Then drag in the yellow area until all the yellow around the kangaroo is selected. 2. Duplicate layer by right-clicking background Be careful not to touch any black area otherwise it will select that too. Drop a wrong selection by pressing Control-D 7. Adjust height of panels by dragging here 9. Then increase the size of brush and paint selected area with chosen colour. 8. Choose “Web Hues” and then choose a colour. 6. Click “Brush Tool”
Add part of one photo to another-1 1. File menu, Open photos “baby” and “landscape”. 5. Note how you can select “-” to remove parts of a selection. 2. Click “Quick Selection Tool” 3. Drag to select baby, bit by… 4. …bit. 5. When all the baby is selected press Control-C to copy 6. And then double-click on “landscape” in the Project Bin… …see next slide
Add part of one photo to another-2 1. Press Control-P to paste “baby” into “landscape”. 2. Click on “Move Tool” • 7. Control-T (to transform) and then right-click to choose skew or distort. 3. Move “baby” around “landscape” with Move Tool. • 6. Flip “baby” by dragging this handle to the other side. 4. Resize “baby” by dragging a corner handle. • 5. Rotate “baby” by dragging the “curved handle” that appears when you hover mouse outside a corner handle.
Make a panorama 1. File menu, New, Photomerge Panorama 3. Click OK 2. Click Browse and open photos “TAFE1” and “TAFE2” 5. Click “Crop Tool” and crop image 4. right-click, Flatten Image
1. File menu, Open photo “cow” 2. Filter menu, Distort, Liquify… Filters - Liquify
Purchase the software for use at home 1. Go to http://www.sigroup.com.au 2. Click on “NSW DEC SHOP” 3. Click on “WAH” media Shop 4. Click “Add To Cart” and then “Check Out” 5. Accept the license agreement, then “Check Out” (again) and complete your payment details.