Download

1 / 14
140 likes | 149 Views
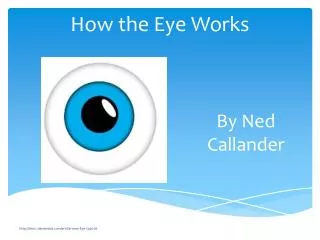
How the Eye Works. Vanderbilt Student Volunteers for Science Summer, 2005 Training Presentation. Important!!!. Please use this resource to reinforce your understanding of the lesson! Make sure you have read and understand the entire lesson prior to picking up the kit!

E N D
How the Eye Works Vanderbilt Student Volunteers for Science Summer, 2005 Training Presentation
Important!!! • Please use this resource to reinforce your understanding of the lesson! Make sure you have read and understand the entire lesson prior to picking up the kit! • We recommend that you work through the kit with your team prior to going into the classroom. • This presentation does not contain the entire lesson—only selected experiments that may be difficult to visualize and/or understand.
I. Introduction (p.1) • Parts of the eye • External eye muscles - Voluntary muscles that are used to move the eye around. This is how you look from side to side and up and down. • Cornea - The clear structure the center of the outer eye is the cornea. This protects the iris and other internal structures.
I. Introduction (cont.) • Iris • The muscle that controls the size of the pupil (and therefore how much light enters the eye); the colored part of the eye. • Alters the diameter of the pupil to adjust for varying light conditions. • Pupil - The small black hole in the middle of the blue iris (labeled #3) • Where light enters the eye. • Can change size depending on how much light is present (large for dim conditions, small for bright conditions • Lens • The special shape of the lens is what causes light to focus properly. • Shape can be changed by the eye muscles • Depends on whether you are looking at something nearby or far away. • The muscles are in red on the inside of the brown sphere. • DON’T LOSE THE LENS!!
I. Introduction (cont.) • Vitreous humor – (labeled #9) • Clear jelly substance that holds the shape of the eye (i.e. the eyeball). • Retina – (labeled #16) • The back part of the eye where there are special cells called rods and cones that sense light and send signals to the brain via nerves. • Rods - Special cells on the retina that are sensitive to light. Rods detect if there is or is not light (black or white) • Cones - Special cells also on the retina that are sensitive to colored light. There are 3 types of cones, those that respond to red, green, and blue light. Cones require more light to work so they don’t function as well at night - this is why you tend to see things in black and white at night • Blind Spot – • The point where the optic nerve leaves the back of the retina. It is labeled on the inside of the brown sphere with the number 14.
II. The iris (p.3) • The iris is an important muscle that controls how much light can enter the eye. • Hand out a flashlight to each pair. • Tell the students to study each other’s eyes, especially the size of the pupils. Then have one student quickly shine the light into one eye and observe what happens. • Let the students swap places.
III. The blind spot (p.3) • There is a part of the retina (where this nerve meets up with the back of the eye) where there are no rods and cones so you can’t see anything. This is your eye's blind spot. Hand out the index cards (one per student). • Place the card on the table with the X on the LEFT. • With the left eye closed, focus the right eye on the cross with your eyes about 1 foot from the paper. • Note: Students who wear glasses should keep them on for this if possible • While looking only at the cross, lower your head closer to the paper until you find the O disappears. This may take several tries • Try the activity again, this time rotating the card so that the O and X are not directly across from each other. • Notice that when the X or O disappears, the line appears to be continuous, without a gap where the X or O used to be. Your brain automatically "fills in" the blind spot with a simple extrapolation of the image surrounding the blind spot.
IV. Thread the needle (p.4) • Closing one eye eliminates one of the clues your brain uses to judge depth. • Tell the students to place the clay and washer on the table so that the edge of the washer, not the hole, is facing them. • Stand far enough from the washer so that an arm must be extended to reach it. • With both eyes open try to put the pencil through the hole in the washer. • Now close one eye and try again. Try the other eye. • One of the clues that the brain uses to judge distance and depth is the very slight difference between what the left eye sees and what the right eye sees. The brain combines the two views to make a three-dimensional picture of the world. • Try this experiment again with one eye closed. But this time, move your head from side to side as if to "thread the needle.” People who have lost an eye can learn to perceive depth by comparing the different views they obtain from one eye at two separate times.
VII. Gray step (p.4) • Two slightly different shades of the same color may look different if there is a sharp boundary between them. But if the boundary is obscured, the two shades may be indistinguishable. • Look at the card with the black paper down over the color(s). Can you tell if the colors are different? • Now lift the black strip. Now can you tell if the colors are different? • It is difficult to distinguish between different shades of gray or shades of the same color if there is no sharp edge between them. Your eyes do not lack the necessary sensitivity to detect the difference: if there is an edge between the two shades, the difference is obvious.
VIII. Seeing color (p.8) • Place the paper in a well-lit area. (Bright lighting is a significant factor in making this work well.) • Stare at the eye on the red fish for 15 to 20 seconds and then quickly stare at the fish bowl. You should see a bluish-green (cyan) fish in the bowl. • Now repeat the process, staring at the green fish. You should see a reddish-blue (magenta) fish in the bowl. • Finally, stare at the blue fish. You should see a yellow fish in the bowl. • The ghostly fishes that you see here are called afterimages. An afterimage is an image that stays with you even after you have stopped looking at the object.
IX. Peripheral vision(station activity—p. 6) • Using the cup as a handle, hold the posterboard base up to your face and put your nose in the center hole. • Have your partner hold a card so that it is against the curved side of the base, as far from the focus object (pin) as possible. • Keep your eyes on the pin while your partner moves the colored shape around the outside edge until you can see it. Note the angle. • Have your partner keep moving the colored shape toward the focus object. Note the angle at which you first detect color. Then note the angle at which you first discern the shape itself. • Have your partner use a different shape and repeat the experiment. You’ll probably find that your partner has to move the shapes surprisingly close to the focus object before you can make out color or shape. focus object shape nose goes in here
X. Fading dot (p.7) • An object without a sharp edge can fade from your view. • A fuzzy colored dot that has no distinct edges seems to disappear. As you stare at the dot, its color appears to blend with the colors surrounding it. • Lift the wax paper away from the pink sheet until the blue dot is blurred. • Stare at a point next to the fuzzy dot for a while without moving your eyes or your head. • The blue will gradually fade into the field of pink. As soon as you move your head or eyes, notice that the dot reappears.
XII. Moire patterns (p.8) • Hand out 2 transparencies per pair. • Tell the students to place the transparencies on top of each other so that the circles match up exactly. Then move one transparency so that they are not aligned, and watch the different patterns (light and dark lines that shifts as you move) produced. • A moire pattern, appears when two repetitive patterns overlap. • Moire patterns are created whenever one semitransparent object with a repetitive pattern is placed over another. • A slight motion of one of the objects creates large-scale changes in the moire pattern. These patterns can be used to demonstrate wave interference.
XIII. Color blindness (p.9) • Give the students the colored "29” square to help them understand how doctors detect if someone is color-blind. • Individuals are said to be color-blind when a single group of cone cells is missing from the retina. • The most common type of this form of color blindness is red-green color blindness, where the cones most receptive to both red light and green light are missing from the eye. • Color blindness of this kind is an inherited condition, with males affected much more frequently than females. There are also individuals with all three cone types, and all three photo-pigments, but one of the photo-pigments differs from normal, thereby affecting color vision.