Download
1 / 42
420 likes | 553 Views
Session 1. Use the Visual Basic programming environment Understand Essential Visual Basic menu commands and programming procedure Change Property setting Use Online Help and Exit Visual Basic. References: Michael Halvorson, Microsoft Visual Basic 6.0 Professional Step by Step

E N D
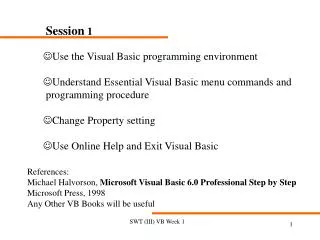
Session 1 • Use the Visual Basic programming environment • Understand Essential Visual Basic menu commands and programming procedure • Change Property setting • Use Online Help and Exit Visual Basic References: Michael Halvorson, Microsoft Visual Basic 6.0 Professional Step by Step Microsoft Press, 1998 Any Other VB Books will be useful SWT (III) VB Week 1
Start Visual Basic • In Microsoft Windows, click Start button, point to programmes and Microsoft Visual Basic • Click Visual Basic 6.0 Programme Icon • Click Open to accept the default project, a standard 32-bit Visual Basic application SWT (III) VB Week 1
Properties window Project Window Form Window Form Layout window Project Container Window Tool bar Menu bar The Visual Basic Programming Environment SWT (III) VB Week 1
The User Interface Form (I/II) A form is a window for creating the user interface of a programme Form Programme User Interface A result screen after press “Display” SWT (III) VB Week 1
The User Interface Form (II/II) The default form: Form1 A standard grid to line up elements of programmes’ user interface Adjust the size of form using the mouse Add additional forms using Add Form command on the Project menu The run-time position of the user interface is controlled by the Form Layout window A form can contain • Menus • Buttons • List Boxes • Scroll Bars ……. SWT (III) VB Week 1
The Tool Box (I/II) The elements of a programme’s user interface is added to a form by using the tools or controls in the tool box ToolBox contains controls you can use to add to a user interface Artwork, Labels, Buttons, List boxes, Scroll bars, menus, and geometric shapes. Each control added to a form becomes an Object, or programmable user interface element. These elements will be visible to the user of the program when the programme runs and will operate like the standard objects in any Windows-based application SWT (III) VB Week 1
The Tool Box (II/II) The tool box also contains controls that can be used to create objects that perform special “behind the scenes” operations in a VB programme. These objects are not visible to the user when the programme is running, these include objects for Manipulating information in databases Working with Windows-based applications …... SWT (III) VB Week 1
The Properties Window The properties window lets you change the characteristics, or property settings, of the user interface elements on a form SWT (III) VB Week 1
Project window displays the components of the project The Project Window A VB programme is made up of several files that are assembled together or compiled when a programme is complete. The project window lists all the files used in the programming process and provide access to them via two special buttons: View Code and View Object The project file that maintains the list of all the supporting files in a programming project is called the VB project (.vbp) SWT (III) VB Week 1
Getting Help Exiting Visual Basic • Save any changes you have made • On the File menu, click the Exit command SWT (III) VB Week 1
Session 2 • Create the user interface for a new programme • Set the properties for each object • Write programme code • Save and run the programme • Build an executable file Programming Step • Create the user interface • Set the properties • Write the programme code SWT (III) VB Week 1
Task, Specification, Algorithm • Lucky Seven: The programme should perform the following actions • Provide a user interface that has : Spin and End buttons 3 spinner windows, a descriptive label, a winner display window • Pick three random number and display them when the user click Spin • Display a stack of coins and beep if the number 7 appears in one of the spinner windows • Terminate when the End button is clicked SWT (III) VB Week 1
Creating the User Interface (I/IV) 1 On the file menu, click the New Project command 2 Enlarge the Form window until the scroll bar appear in the Project Window as shown on the right 3 Click the CommandButton control in the toolbox, then place the mouse pointer over the form 4 Move the mouse pointer close to the upper-left corner of the form, hold down the left mouse button, then drag down and to the right. Stop dragging and release the mouse button until you have a button similar to the one shown here on the right 5 Add a second CommandButton 6 Add the number Labels 7 Add an image Command button Label Control Image Control SWT (III) VB Week 1
Setting the Properties (II/IV) Setting the CommandButton Properties 1 Click the first command button on the form 2 Double click the Properties window title bar (the Properties window is enlarged to full size) 3 Double click the Caption property in the left column, and change the current Caption “Command1” to Spin 4 Open the object drop-down list box at the top of the Properties window, a list of interface objects appears 5 Click Command2 and change its Caption to End SWT (III) VB Week 1
Setting the Properties (III/IV) Setting the Number Labels Properties 1 Click the first number label and then holding down the Shift key click the second and third number labels. 2 Click the Alignment property, then the drop-down list box to align the buttons to Centre 3 Click the BorderStyle property and change it to FixedSingle 4 Double-click the Font property and change the Font and Style (e.g., Times New Roman, Bold, and 24 point size) 5 Delete the captions in the 1st, 2nd and 3rd number labels SWT (III) VB Week 1
Setting the Properties (IV/IV) Setting the Descriptive Labels Properties 1 Click the fourth label object on the form 2 Change the caption to “Lucky Seven” 3 Change the Fond property 4 Double-click the ForeColor property and change the colour of your object The System tab shows the current colours used for the user interface elements in your system, the palette shows all the available colours SWT (III) VB Week 1
Setting the Properties Setting the Image Box Properties 1 Click the image box object on the form 2 Click the Stretch property and set it to True 3 Double-click the Picture property and load a picture using dialog box 4 Click the Visible property, select False to make the picture invisible when the programme starts SWT (III) VB Week 1
Writing the Code Use the Code Window 1 Double click the End command button on the form, the code window appears The event is a mouse click VB subroutine, or event procedure associated with a particular object in the interface A body of a procedure always fits between these two lines and is executed when a user activates the interface element associated with the procedure SWT (III) VB Week 1
Writing the Code 2 Type End, and press the Down arrow key. The End statement stops the execution of a programme and remove it from the screen End is a keyword recognised by Visual Basic Compiler. VB has several hundred unique keywords 3 Indent the End statement by placing the cursor to the beginning of the line with End state in it, and press the spacebar 4 times (the indenting scheme is one of programming conventions to keep your programme clear and readable, the set of conventions regarding how programme code is organised is often referred to as programme style SWT (III) VB Week 1
Writing the Code Write Code for the Spin button 1 Open the object drop down list box in the Code window 2 Click Command1 in the list box and write the following code SWT (III) VB Week 1
Writing the Code A Look at the Command1_Click Procedure The Command1_Click procedure is executed when the user click the Spin button on the form It performs 3 tasks: hides the coin stack, creates random numbers for the label windows and displays the coin stack when the number seven appears. Image1.Visible = False 'hide coins Comment explanatory notes included in the programme following a single quotation mark(‘). These notes are not processed by VB when the programme runs, they exist only to document what the programme does. Programme statement SWT (III) VB Week 1
Writing the Code A Look at the Command1_Click Procedure The Rnd function creates a random number between 0 and 1 Int (Rnd*10) to create numbers between 0 and 9 and round them to integer number The numbers are then assigned to the Caption properties of the first three labels, and the assignment causes the numbers to be displayed in the label windows The last group of statements checks whether any of the random number is 7, if one or more of them is, the stack of coin is made visible and beep SWT (III) VB Week 1
Saving the Programme 1 On the File menu, click the Save Project As command 2 Select your programme file folder 3 Type the file name (e.g. MyLucky) and press enter Run the Programme 1 Click the Start button on the toolbar 2 Click the Spin button 3 Click the Spin button 10 to 20 times, watching the results 4 Click the End button to finish SWT (III) VB Week 1
Hungarian Convention To help identify objects from their names, the Hungarian convention is used. Then when you see a list of subroutine names, for example, you can identify the object being referred to. It is good practice to change the default names of objects to ones that you want, as soon as you create the object. The convention suggests using the following prefixes: Check box chk Combo box cbo Command button cmd Data dat Directory list box dir Drive list box drv File list box fil Form frm Frame fra Horizontal scroll bar hsb Image img Label lbl Line lin List box lst Menu mnu Picture box pic Radio button opt Shape shp Text box txt Vertical scroll bar vsb SWT (III) VB Week 1
Session 3 • Use variables to store data in your program • Get input by using InputBox function • Display messages by using the MsgBox function • Use Mathematical operators and functions in formulas SWT (III) VB Week 1
Programme Statement Keywords properties functions operators symbols Visual Basic Compiler The Anatomy of a VB Programme Statement A programme statement is a valid instruction for the Visual Basic Compiler Statement Syntax: is the rules for constructing programme statement Example: Label1.Caption = Time Object name Property name assignment operator VB Function SWT (III) VB Week 1
Using Variable to Store Information VB variables follow the usual rules. There are many types of variables including Byte, Boolean Integer, Long, Single, Double, Currency, Date, String and Objects. Variants and sub-types The programmer has the option of declaring variables with explicit types or as type variant. The variant type provides dynamic typing: at run time the value has an associated tag to record the value currently stored. Declarations Dim A ‘ A as variant Dim B As Integer Dim C As String ‘variable length string Dim D As String*10 ‘fixed length string Const pi = 3.14.59 ‘pi as constant SWT (III) VB Week 1
Working with Specific Data Types Data type Size Sample usage Integer 2 bytes Dim Birds% Birds%=37 Long 4 bytes Dim Loan& integer Loan&=32,000 Single precision 4 bytes Dim Price! floating point Price!=899.98 Double precision 8 bytes Dim Pi# floating point Pi#=3.1415926535 Currency 8 bytes Dim Credit@ Credit = 567899.90 String 1 byte per Dim Dog$ character Dog$=“Pointer” Boolean 2 bytes Dim Flag as Boolean Flag = True Date 8 bytes Dim Birthday as Date Birthday = #3-1-63# SWT (III) VB Week 1
User Defined Data Types Example: Using Type statement to define a new data type Type Employee Name As String DateOfBirth As Date HireDate As Date End Type Use the new data type Dim ProductManager As Employee ProjectManager.Name = “Erick Cody” ProjectManager.HireData = #3-9-89# SWT (III) VB Week 1
Working with Arrays of Variables (I/III) • An array is a collection of values stored under a single name • Creating an Array: Before you can use an array, you must declare it. • Declaring a Fixed-Sized Array: Syntax • Public ArrayName (Dim1Elements, Dim2Elements, ...) As DataType • Public is the keyword that creates a global array • ArrayName is the variable name of the array • Dim1Elements is the number of elements in the first dimension of the array • Dim2Elements is the number of elements in the second dimension of the array • As DataType is a keyword corresponding to the type of data that will be include • in the array • To declare arrays locally in an event procedure, replace the public keyword with Static keyword and • place the declaration inside and event procedure. Local array can only be used inside the procedure. SWT (III) VB Week 1
Working with Arrays of Variables (II/III) SWT (III) VB Week 1
Working with Arrays of Variables (III/III) Creating Dynamic Array To create a dynamic array, omitting the number of elements in the array. e.g. Public Temperature ( ) As Variant Actual size must be set before use by using the keyword ReDim SWT (III) VB Week 1
Working with Visual Basic Operators Operator Mathematical Operation + Addition - Subtraction * Multiplication / Division \ Integer division Mod Remainder division ^ Exponentiation (Rising to a power) & String concatenation (Combination) SWT (III) VB Week 1
Visual Basic Mathematical Functions Abs (n) Atn (n) Cos (n) Exp (n) Rnd (n) Sgn (n) Sin (n) Sqr (n) Str (n) Tan (n) Val (n) SWT (III) VB Week 1
Operator Precedence Operator Order of Precedence ( ) Values within parentheses are always evaluated first ^ Exponentiation is second - Nagetive is third */ Multiplication and division is fourth \ Integer division is fifth Mod Remainder division is sixth +- Addition and subtraction is last SWT (III) VB Week 1
Using Variable to Store Input Get Input by using InputBox Exercise: Create a user interface as shown on the right and type in the code and run the program. Use the online help to find out more about InputBox function. SWT (III) VB Week 1
Functions InputBox is a special Visual Basic keyword known as function. A function is a statement that performs meaningful work, such as prompt user for information, or calculating an equation, and then return a result to the program The value returned by a function can be assigned to a variable, or a property, or another statement or function When a function uses more than one argument, the arguments are separated by commas, the whole group of arguments is enclosed in parentheses, e.g FullName = InputBox$(Prompt, Title) SWT (III) VB Week 1
Using a Variable for Output The MsgBox function uses text strings to display output in a dialog box, the syntax for the MsgBox function is ButtonClicked = MsgBox(Message, NumberOfButtons, Title) Message: is the text to be displayed on the screen NumberOfButtons: is button style number (1 - 5) Title: is the text displayed in the message box title bar The variable ButtonClicked is assigned the result returned by the function, which indicates which button the user clicked in the dialog box. If you are just displaying a message in MsgBox, the assignment operator (=), the ButtonClicked variable, and the NumberOfButton argument are optional. Find out more about MsgBox in the VB online Help. SWT (III) VB Week 1
Week 1 Lab Exercises (I/IV) 1. Practice the Lucky Seven program described in pages 12 -23 of this note. But make sure that you use the Hungarian convention described in page 24 to name all the objects, e.g., the Spin button is a command button, you can name it as cmdSpin. Obviously, “cmdSpin” is more meaning than “Command1”. 2. Following this example, can you create a Lucky Eight program? 3. Try and change the colour and other appearances of the objects and user interface. Note: There is a coins.jpg image in the module’s document directory which you can copy to your own directory and use in the program. SWT (III) VB Week 1
Week 1 Lab Exercises (II/IV) The “Hello World” Program 1 Create a user interface using TextBox and CommandButton Control 2 Set the following properties for TextBox and Command Control Property Setting Text1 Text (Empty) Command1 Caption “OK” TextBox 3 Double-click the OK command button and type the following programme statement between Private Sub and End sub statement Text1.Text = “Hello, World!” 4 User the Form Layout window to set the position of the form when the programmes runs 5. Make sure to use the Hungarian convention Can you change the appearance, font, text size, colour etc of “Hello World!” ? SWT (III) VB Week 1
Week 1 Lab Exercises (III/IV) Using Timer Object A timer object is an invisible stopwatch that gives you access to the system clock from your programs. A timer object is accurate to 1 millisecond (1/1000 second) Creating a digital clock by using timer object 1 Open a new project and resize the form to a small window 2 Click the timer control in the toolbox 3 Create a small timer object on the left side of the form 4 Click the Label control in the tool box, and create a label in the centre of the form that fills most of the form 5 Open the properties window, and set the following properties Label1 Caption Empty Font Times New Roman, Bold, 24 point Alignment 2 - Center Timer1 Interval 1000 Enabled True Form1 Caption “Digital Clock” 6 Double click the timer object and type the following code in the Timer1_Timer event procedure Label1.Caption = Time 7 Can you display date on your digital clock as well? SWT (III) VB Week 1
Week 1 Lab Exercises (IV/IV) Use File system objects 1 Click the DriveListBox control in the toolbox 2 Click the DirListBox control in toolbox and then add a directory list box to the form below the drive list box 3 Add FilelistBox 4 Add Image control 5 Set object properties as follows Object Property Setting File1 Pattern *.bmp; *wmf;*.ico; *.jpg Image1 Stretch True 6 Type the following code Private Sub Dir1_Change() File1.Path = Dir1.Path End Sub Private Sub Drive1_Change() Dir1.Path = Drive1.Drive End Sub Private Sub File1_Click() SelectedFile = File1.Path & "\" & File1.FileName Image1.Picture = LoadPicture(SelectedFile) End Sub Try and browse images in your system. I have put some in the module’s document directory. Try and copy them into your local directory and have a look at those images. SWT (III) VB Week 1