Download
1 / 12
130 likes | 500 Views
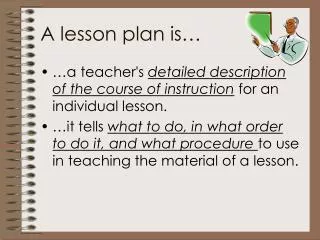
Making a lesson plan. How to plan a lesson for an effective interaction in class. Why plan?. Just as for good cooking you need to know how to cook, what ingredients you need and how much time you will take, for good teaching, too, you need to plan!. You need to keep these questions in

E N D
Making a lesson plan How to plan a lesson for an effective interaction in class
Why plan? Just as for good cooking you need to know how to cook, what ingredients you need and how much time you will take, for good teaching, too, you need to plan! You need to keep these questions in mind: • What do you want to teach? • Why do you want to teach it? • How much do students already know about it? • How much time will you need to teach it? • What things will you need in class in order to teach? • How will you go about it step by step? • How will you know your students have learnt?
The objective Keep the following things in mind when defining the objective: • What task will the students accomplish? • What content do you want them to learn? • Under what conditions will they learn it? • Eg. The students will identify, draw and label the parts of a flowerafter observing flowers and matching flash cards. What do you want the students to learn and how?
Warming up It is important to know your students and make them feel comfortable in your class. Only then will they be ready to learn! • Students are not automatically ready to receive what you are teaching. Create their interest, grab their attention and guage their previous knowledge. • A warm up activity can be a song or a game or pictures that get them to start thinking on the topic and talking about it.
Planning your time • Identify how much can be covered in a fixed amount of time. • Break the plan into sections so that you can speed up or slow down to accommodate changes Eg. 11.00 to 11.10 – Warm up activity 11.10 to 11.20 – Dissection and observation of a flower 11.20 to 11.30 – Matching flash cards etc. Don’t try to include too much. Leave some space for assimilation
Steps Students can work on their own, in pairs or groups. Plan the lesson step by step. Eg. • Dissection and observation of the parts of a flower • Matching of flash cards • Drawing and labelling the parts of a flower etc. Give time for students to learn at their own pace,. Some learn faster than others. Some may take time. Every student learns differently. Some can read and understand. Others need to hear it or see it while some others need to use their hands to create and learn. Address these different learning styles.
Reflection • Leave at least ten minutes at the end of the class for students to ask questions. • This could start as a discussion and lead to probing questions. • It could also be a time for clarification While taking a lesson on flowers you could bring in poems, songs art , craft, dance related to flowers to make the lesson lively and for students to find connections between different subjects.
Conclusion An abrupt stopping of the lesson leaves the learner uncomfortable. It is good to remind students of what they have learnt during the lesson. Give enough time for a neat conclusion! That doesn’t mean you don’t leave open ended questions, encouraging students to think and find out more!
Assessment Continuous and comprehensive assessment can happen throughout the lesson at different points of time. Eg. You can assess students on : • Observation and discussion • Team work • Matching of flash cards • Drawing and labelling • Research work etc. Instead of only asking questions that test memory, ask questions that make students imagine, compare, contrast, evaluate and apply concepts! Assessment is related to the objective s of the lesson. The assessment should test whether or not your objectives have been met.
Home work Give interesting homework so that the students feel like attempting it. Meaningless repetitive exercises are unnecessary and boring! Home work can be used for: • Recapitulation and assessment Eg. Draw and label the parts of a flower • Research Eg. Find out the names of ten common flowers in your neighbourhood You could involve parents or the community in the research work given to students. Students could find out facts about their surroundings, for example , by interviewing their family members and people in the neighbourhood.
Allow yourself to be spontaneous in class and divert from the lesson plan if needed as long as you can guide the students back to the topic/activity A complete lesson plan should include the following details: • The subject being taught • The topic/subtopic • The grade/class it is meant for • The resources required • The time taken to conduct the lesson • The objectives of the lesson • The steps • Reflection and recapitulation • Assessment/home work After the class, reflect on the lesson plan. What worked and what didn’t and why? Would you do it differently the next time?
Enjoy planning your lesson. Be creative!

![A teaching [lesson] plan.](https://cdn4.slideserve.com/1112789/slide1-dt.jpg)