Download
1 / 10

E N D
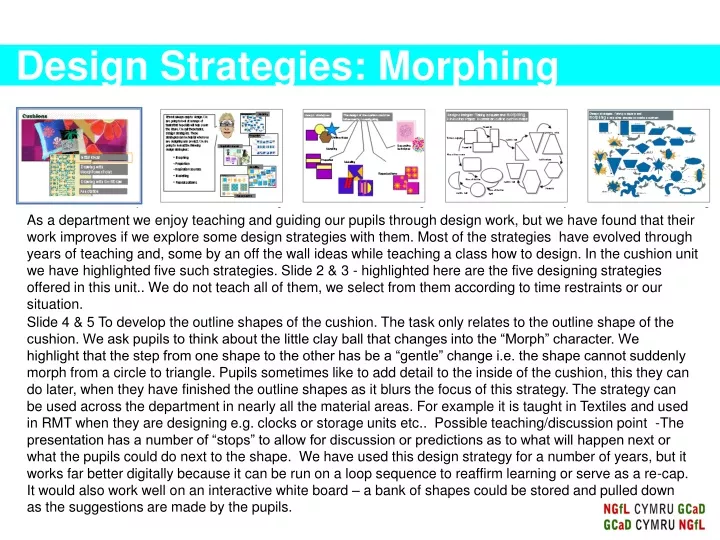
Design Strategies: Morphing As a department we enjoy teaching and guiding our pupils through design work, but we have found that their work improves if we explore some design strategies with them. Most of the strategies have evolved through years of teaching and, some by an off the wall ideas while teaching a class how to design. In the cushion unit we have highlighted five such strategies. Slide 2 & 3 - highlighted here are the five designing strategies offered in this unit.. We do not teach all of them, we select from them according to time restraints or our situation. Slide 4 & 5 To develop the outline shapes of the cushion. The task only relates to the outline shape of the cushion. We ask pupils to think about the little clay ball that changes into the “Morph” character. We highlight that the step from one shape to the other has be a “gentle” change i.e. the shape cannot suddenly morph from a circle to triangle. Pupils sometimes like to add detail to the inside of the cushion, this they can do later, when they have finished the outline shapes as it blurs the focus of this strategy. The strategy can be used across the department in nearly all the material areas. For example it is taught in Textiles and used in RMT when they are designing e.g. clocks or storage units etc.. Possible teaching/discussion point -The presentation has a number of “stops” to allow for discussion or predictions as to what will happen next or what the pupils could do next to the shape. We have used this design strategy for a number of years, but it works far better digitally because it can be run on a loop sequence to reaffirm learning or serve as a re-cap. It would also work well on an interactive white board – a bank of shapes could be stored and pulled down as the suggestions are made by the pupils.
Design Strategies: proportions & combining shapes Background – This takes the concept of the proportion of thirds and is applied horizontally, vertically or diagonally on a cushion product. Possible teaching/discussion point - The cushions are illustrated in varying divisions and pupils are asked to comment on their prefer combination – which ones do they like the most and which ones do they dislike and WHY? They may conclude that the division of three rule is a helpful guide as a starting point. Slide 7,8 & 9 – this is a technique to encourage pupils that successful designs can be made from very simple shapes. Digitally building up the shapes on screen/interactive whiteboard, helps the pupils with this concept considerable. The task is then extended further allowing two shapes to be combined – these tasks can be completed digitally or with paper & glue. Pupils can also can completed this task for homework using Open office or in PowerPoint or Word. Slide 10 – takes the concept further by using other shapes to be combined and layered.
Design Strategies: repeating & developing patterns In Slides 7 & 8 the concept of repeat patterning is introduced. A brief introduction is given in slide 7 and in slide 8 pupils are introduced to the concept of developing your own pattern style – possibility mixing known repeat pattern styles with their own ideas. Slides 9 illustrates in a step by step way how complex and aesthetically pleasing patterns can be built from on single unremarkable shape. Slide 10 illustrates a more developed range of designs based on the previous slide but it is not animated. Slide 10 combines the concepts previous introduced, mixing developed patterns, using repeat styles and also reminding pupils of the division of three concept. These designs are annotated and the designs illustrated within the context of product area.
Design Strategies: inspiration source Everyday inspiration uses the concept that every thing around us can be a source of inspiration for a design ideas. We have started working more and more from stimulus sources to inspire design thinking. Sometimes pupils bring in what interests them, or we have a collection of images that we simply loop digitally for inspiration. In this case, the first slide relates to trees as an introduction for inspiration. The slide show the development of designs by using the silhouette of a tree, leaves and ivy/climbers as a means of a design source. Slide 2 is based on butterflies as its inspiration source, and is more simplistic . Slide 3 is more involved and illustrates how graffiti can be evolved into imagery. You may want to have a bank of images that pupils can use if they are need further inspiration. Often past pupils are used as a stimuli here too.
Design Strategies: annotation From the very outset pupils are encourage to make comments about their designs. We formally teach this and it has helped to develop their designing skills. We refer to annotation and explain it as “design chatter” or gossiping to yourself about the design !!! Slide 2 - A list of aspects that they may wish to comment about is suggested to them e.g. comments relating to the shape, size, colour combinations and manufacturing detail. We try to link this concept to the previously taught lesson on product analysis where they were encouraged to use technical language or descriptive explanation/justification. Other comments could also include- possible suitable materials, or if the cushion appears easy or difficult to make; we are mindful they have limited experience related to these aspects but some pupils are able to project their thinking. Slide 3 & 4. Pupils are encouraged to write down their comments as they design, but also to consider the fact that the annotation is complimentary to the designs and should not dominate the page. Further explanations could refer to the fact that good annotation helps to explain some aspects that are sometimes difficult to draw, and it can also explain to another person the depth of their design thinking.
Design Strategies: drawing with Word/PowerPoint Background – Drawing with Word/PowerPoint is probably some peoples idea of a nightmare – but in our Lower School room we have to date, limited computer access in the Textile room. This activity was devised to extend our pupils CAD capability as a homework or library lunch task. All computers throughout the school have PowerPoint or Word, as do a reasonable percentage of our pupils home computers. We are now looking at the possibility of writing an Open Office self help guide too. We have found to date that PowerPoint is much easier to use than Word, as it does not ‘jump’ about like Word can do. This unit is written more in the style of a pupil’s self study guide, than any of the other units. Sometimes we print this guide and pupils follow it. Pupils of all abilities have enjoyed the task either as a homework or as an extension assignment . Slide 2 There are many useful drawing tools in PowerPoint/ Word but before you can access them, the Drawing tool bar needs to be opened. Slide 3 & 4 - Pupils need to click on AutoShapes in the Drawing tool bar to open the AutoShapes drop down menu. In this menu they will find the Basic Shape menu. Within the Basic Shapes menu, a range of possible outline shapes can be selected from.
Design Strategies: drawing with Word/PowerPoint Slides 5 & 6 . Freehand drawing with PowerPoint /Word does require some patience and perseverance. There are three line styles that can be used - Curve, Freeform and Scribble. We use in the main, Curve and Freeform – these will give you an outline shape but in order to achieve refinement in the drawing you can follow one of these two routes. Route one – having drawn the object –with your object selected - right click on your mouse and in this menu select Edit Points. Click on a edit point on your object , and right click again, and it will open up another menu that will allow you to edit your design considerably. Route two – draw your object - select it , and at the bottom left on the Drawing toolbar is a Draw menu. Click on this and select Edit Points, again click on an edit point and right click your mouse, and the edit point menu will open. More guidance is given on this feature on the Hat unit. Slide 7 & 8 – Adding colour and shade. Pupils are quite familiar with adding colour to objects in Word or PowerPoint, most are also aware of the Fill Effects range, but these are covered to ensure all pupils have parity of skills and knowledge. The Gradient Effect (slide 8) is a relatively effective means to give an object an appearance of depth, in particular if the base is darker that the top of an object. The transparency tool is useful to give fabric a sheer effect .
Design Strategies: drawing with Word/PowerPoint Slide 9 - We have found only a limited use for the Texture Tool. Slide 10 - Interesting results can be achieved with the Pattern Effect . A wide range of textures can be created, e.g. tweeds, self-striped etc if care if taken to select the Foreground and Background colours. Slide 11 - It took us a little time to discover this aspect of Fill Effects and we have used it considerably since. A more detailed step by step version of this is found in the Bag unit. To give a relatively realistic fabric effect, a photograph can be taken of any fabric e.g. denim and used to fill the object (cushion). Scale can be a little bit out, but pupils of all ages and abilities have found it helpful.
Design Strategies: drawing with SerifDraw The idea of this is to familiarise pupils with graphics program - SerifDraw. In the initial lesson all the pupils are shown where the tools and effects of the program are located before they start on a task. Slide 4 illustrates the Quick Box features of SerifDraw and pupils very quickly are able to develop a range of ideas and develop these further again using the Node features see – Slide 5.
Planning We try and find time for this aspect, but as we all know it coincides with that busy time when you are up to your ears trying to finish practical products. Hence yet again, we find explaining the key aspects related to the presentation of the final designs, and then leaving the information to “loop” on the projector, This has been an effective way of ensuring that pupils get on with this aspect. The feel good factor of being able to present their work well, is a great incentive for pupils. The focus of the slides is to look at ways to enable pupils to present their ideas to as high a standard as possible. Pupils are asked to draw their final design on plain paper and render it to as high a standard as possible or generate a final image using CAD. Cutting the image out carefully. The cushion drawing is then placed on the selected background. The one third two third proportion rule can also apply here i.e. the cushion drawing can be one third over the selected background image. We find actually demonstrating this a good way to make this point. This can be done physically, or using Slide 5 to discuss on screen the negative and positive aspects of various layouts. A minor point, but one that is relevant, is that if possible there should be a colour link between the rendered cushion and the background image. The colour link on the slide - blue sky is the link colour to the cushion drawing. Pupils are asked to find backgrounds that relate to the function of their product – i.e. room it will placed in. The difference between a presentation drawing, and product specification is explained at this point. Slides 6&7 focus on product specification. We impress that this is to be a clean, uncluttered informational design sheet, and that this could be sent to a factory to make the product. All the information must be on the sheet. Pupils usually complete this to a good standard without any real difficulties. Guidance needs to be given regarding swatch sizes.