Download
1 / 5
50 likes | 150 Views
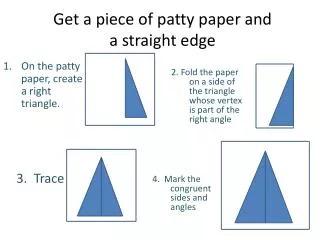
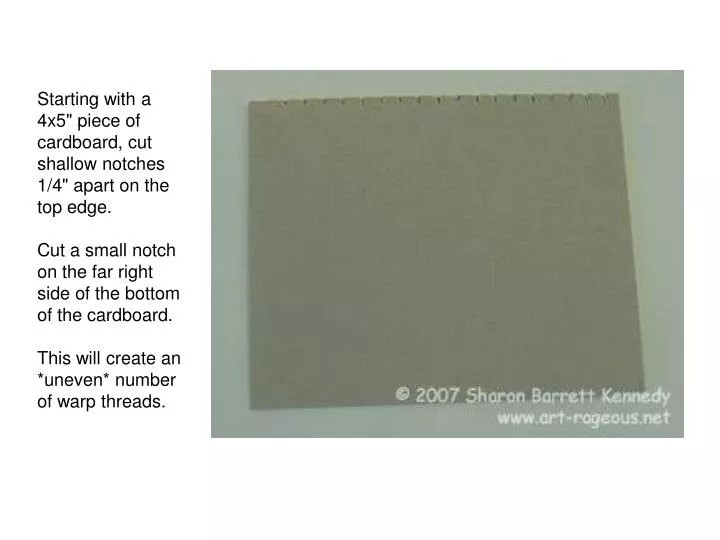
Starting with a 4x5" piece of cardboard, cut shallow notches 1/4" apart on the top edge. Cut a small notch on the far right side of the bottom of the cardboard. This will create an *uneven* number of warp threads.

E N D
Starting with a 4x5" piece of cardboard, cut shallow notches 1/4" apart on the top edge. • Cut a small notch on the far right side of the bottom of the cardboard. • This will create an *uneven* number of warp threads.
Letting approximately 6" of yarn extend from the front,secure the yarn into the first notch on the left. Wrap the yarn down the back of the cardboard,around the bottom and up the front.Secure into the same (first) notch.Wrap the yarn on the back of the cardboard around the tab,and bring to the front, through the second notch.Pull the yarn down towards the bottom of the cardboard.Wrap the yarn around the bottom, and up through the same (second) notch.Continue with this pattern.Secure the yarn into the notch on the bottom edge. You should have an uneven number of warp threads on one sideand an even number on the other side. Your loom is now ready for weaving.
BEGINNING TO WEAVE Using a piece of yarn in the same or a contrasting color, begin weaving an over/under pattern, starting at the bottom right edge of the cardboard. Leave a "tail" of several inches, which will be woven into the finished bag.If you end one side by going "over" the warp thread, you'll go "under" the first warp thread on the other side.Be sure to "beat" the yarn--i.e. pull it down close to the previous row--as you work.When you need to add more yarn, simply back up a couple of warp threads, and begin as you did before. You'll weave these pieces into the bag.When there's no more space at the top to weave, you're done. Slip the yarn off the notches at the top and remove from the cardboard. Weave in loose pieces, or simply knot (not the best finish) and turn the bag inside out.Most students chose to add a braided drawstring to their bag. While the girls in my classes knew how to braid, most of the boys needed to learn this skill. Students also finished and reinforced the top edge of the bag by looping yarn around the first several strings. They greatly enjoyed working on this project, and they were pleased with the results!