Download
1 / 63
730 likes | 1.08k Views
Microscopy techniques. CO2: Ability to demonstrate practices in microscopy, staining, sterilization, isolation and identification of bacteria and fungi. At the end of the lecture, you should able to:. Identify the two primary metric units used to measure microbes.

E N D
CO2: Ability to demonstrate practices in microscopy, staining, sterilization, isolation and identification of bacteria and fungi
At the end of the lecture, you should able to: • Identify the two primary metric units used to measure microbes. • List the units of the metric system in order, from meter to nanometer. • Define microscopy. • Explain the relevance of electromagnetic radiation to microscopy. • Define empty magnification. • List and explain two factors that determine resolving power. • Discuss the relationship between contrast and staining in microscopy. • Contrast simple and compound microscopes. • Compare and contrast bright-field microscopy, dark-field microscopy, and phase microscopy. • Compare and contrast fluorescent and confocal microscopes. • Contrast transmission electron microscopes with scanning electron microscopes in terms of how they work, the images they produce, and the advantages of each. • Describe two variations of probe microscopes. • Explain the purpose of a smear, heat fixation, and chemical fixation in the preparation of a specimen for microscopic viewing. • Describe the use of acidic and basic dyes, mentioning ionic bonding and pH. • Describe the simple, Gram, acid-fast, and endospore staining procedures. • Explain how stains for electron microscopy differ from those used in light microscopy. • Discuss the purposes of classification and identification of organisms. • Discuss the difficulties in defining species of microorganisms.
Units of Measurement • Scientists use metric units of measurement that are simpler than English units and are standardized throughout the world. • The metric system is a decimal system in which each unit is one tenth the size of the next largest unit. • The basic unit of length in the metric system is the meter (m), which is slightly longer than an English yard. • One thousandth of a meter is a millimeter (mm), about the thickness of a dime, and one-thousandth of a millimeter is a micrometer (μm), which is small enough to be useful in measuring the size of cells. • One thousandth of a micrometer is a nanometer (nm), which is one billionth of a meter and is used to measure the smallest cellular organelles and viruses.
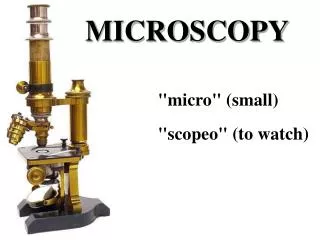
Microscopy • Refers to the use of light or electrons to magnify objects. • (animation)
General Principles of Microscopy • The same general principles guide both light and electron microscopy.
Wavelength of Radiation • Various forms of radiation differ in wavelength, which is the distance between two corresponding parts of a wave. • The human eye distinguishes different wavelengths of light as different colors. • In addition to light, moving electrons act as waves with wavelengths dependent upon the voltage of an electron beam. • Electron wavelengths are much smaller than those of visible light, and thus their use results in enhanced microscopy.
Magnification • Magnification is the apparent increase in size of an object and is indicated by a number followed by an “×” which is read “times.” • Magnification results when a beam of radiation refracts (bends) as it passes through a lens.
Resolution • Resolution (also called resolving power) is the ability to distinguish between objects that are close together. • The better the resolution, the better the ability to distinguish two objects that are close to one another. • Modern microscopes can distinguish between objects as close as 0.2 μm.
A principle of microscopy is that resolution distance is dependent on • the wavelength of the electromagnetic radiation and • the numerical aperture of the lens, which is its ability to gather light. • Immersion oil is used to fill the space between the specimen and a lens to reduce light refraction and thus increase the numerical aperture and resolution.
Contrast • Contrast refers to differences in intensity between two objects, or between an object and its background. • Since most microorganisms are colorless, they are stained to increase contrast. • Polarized light may also be used to enhance contrast.
Light Microscopy • Several classes of microscopes use various types of light to examine specimens.
Bright-Field Microscopes • The most common microscopes are bright-field microscopes, in which the background (or field) is illuminated. There are two basic types: • Simple microscopes • contain a single magnifying lens and are similar to a magnifying glass. • Compound microscopes • use a series of lenses for magnification.
Light rays pass through a specimen and into an objective lens immediately above the object being magnified. • The objective lens is really a series of lenses, and several objective lenses are mounted on a revolving nosepiece. • The lenses closest to the eyes are ocular lenses, whereas condenser lenses lie beneath the stage of the microscope and direct light through the slide.
The total magnification of a compound microscope is determined by multiplying the magnification of the objective lens by that of the ocular lens. • The limit of useful magnification for light microscopes is 2000× because they are restricted by the wavelength of visible light. • A photograph of a microscopic image is a micrograph.
Dark-Field Microscopes • Pale objects are best observed with dark-field microscopes, which utilize a dark-field stop in the condenser that prevents light from directly entering the objective lens. • Instead, light passes into the slide at an oblique angle. • Only light rays scattered by the specimen enter the objective lens and are seen, so the specimen appears light against a dark background.
Phase Microscopes • Phase microscopes use a phase plate to retard light rays passing through the specimen so that they are 1⁄2 wavelength out of phase with neighboring light waves, thereby producing contrast. • Phase-contrast microscopes produce sharply defined images in which fine structures can be seen. • Differential interference contrast microscopes create phase interference patterns and use prisms to split light beams into their component colors, giving images a dramatic three-dimensional or shadowed appearance.
Fluorescent Microscopes • Fluorescent microscopes use an ultraviolet (UV) light source to fluoresce objects. • Since UV light has a shorter wavelength than visible light, resolution is increased. • Contrast is improved because fluorescing structures are visible against a black background.
Confocal Microscopes • Confocal microscopes use fluorescent dyes in conjunction with UV lasers to illuminate the fluorescent chemicals in only one thin plane of a specimen at a time. • Several images are taken and digitized, and then computers construct three-dimensional images of the entire specimen.
Electron Microscopy • Because the shortest wavelength of visible light is about 400 nm, structures closer together than about 200 nm cannot be distinguished using light microscopy. • By contrast, electrons traveling as waves have wavelengths between 0.01 nm and 0.001 nm; thus, their resolving power is much greater, and they typically magnify objects 10,000× to 100,000×.
There are two general types. • Transmission Electron Microscopes • Scanning Electron Microscopes
Transmission Electron Microscopes (TEM) • A TEM generates a beam of electrons that passes through a thinly sliced, dehydrated specimen, through magnetic fields that manipulate and focus the beam, and then onto a fluorescent screen that changes the electrons’ energy into visible light.
Scanning Electron Microscopes (SEM) • In SEM, the surface of the specimen is first coated with a metal such as platinum or gold. • The SEM then focuses the beam of electrons back and forth across the surface of the coated specimen, scanning it rather than penetrating it. • Electrons scattered off the surface of the specimen pass through a detector and a photomultiplier, producing a signal that is displayed on a monitor.
Probe Microscopy • Probe microscopes use miniscule electronic probes to magnify specimens more than 100,000,000×. • There are two types. • Scanning tunneling microscopes • pass a pointed metallic probe across and above the surface of a specimen and measure the amount of electron flow. • They can reveal details on a specimen surface at theatomic level. • Atomic force microscopes • traverse the tip of the probe lightly on the surface of the specimen. • Deflection of a laser beam aimed at the probe’s tip measures vertical movements that are translated by computer to reveal the specimen’s atomic topography.
Staining • Both light and electron microscopy use staining—the coloring of specimens with • dyes—to increase contrast.
Preparing Specimens for Staining Preparing specimens for staining involves • making a thin film of organisms—or smear—of the specimen on a slide, and • then either passing the slide through a flame (heat fixation) or • applying a chemical (chemical fixation) to attach the specimen firmly to the slide.
Q1 In detail, describe the procedure in preparing a specimen for staining. Why must a smear be fixed to the slaid?
Principles of Staining • The colored portion of a dye, known as the chromophore, typically binds to chemicals via covalent, ionic, or hydrogen bonds. • Anionic chromophores called acidic dyes • cationic chromophores known as basic dyes • used to stain different portions of an organism to aid viewing and identification.
Simple Stains • Simple stains are composed of a single basic dye such as crystal violet and • involve no more than soaking the smear in the dye and • rinsing.
Differential Stains • Differential stains use more than one dye so that different cells, chemicals, or structures can be distinguished. • The Gram stain differentiates between purple-staining Gram-positive cells and pink-staining Gram-negative cells. • The procedure has four steps: 1. Flood the smear with the primary stain, crystal violet, and rinse. 2. Flood the smear with the mordant, iodine, and rinse. 3. Flood the smear with the decolorizing agent, a solution of ethanol and acetone, and rinse. 4. Flood the smear with the counterstain, safranin, and rinse.
Q2 In a Gram stain, one step could be omitted and still allow differentiation between gram-positive and gram-negative cells. What is that one step?
The acid-fast stain is used to differentiate cells with waxy cell walls, such as cells of Mycobacterium and Nocardia.
Cover the smear with a small piece of tissue paper to retain the dye during the procedure. • Flood the slide with the red primary stain, carbolfuchsin, for several minutes while warming it over steaming water. In this procedure, heat is used to drive the stain through the waxy wall and into the cell, where it remains trapped. • Remove the tissue paper, cool the slide, and then decolorize the smear by rinsing it with a solution of hydrochloric acid (pH < 1.0) and alcohol. The bleaching action of acid-alcohol removes color from both nonacid-fast cells and the background. Acid-fast cells retain their red color because the acid cannot penetrate the waxy wall. The name of the procedure is derived from this step; that is, the cells are colorfast in acid. • Counterstain with methylene blue, which stains only bleached, non-acid-fast cells.
Endospores cannot be stained by normal techniques because their walls are practically impermeable to all chemicals.
The Schaeffer-Fulton endospore stain uses heat to drive the primary stain, malachite green, into the endospore.
Special Stains • Acidic dyes are repulsed by the negative charges on the surface of cells and therefore do not stain them. • Flagellar stains bind to flagella, increase their diameter, and change their color, all of which increases contrast and makes them visible.
Flagellar stains bind to flagella, increase their diameter, and change their color, all of which increases contrast and makes them visible.
Such dyes that stain the background and leave the cells colorless are called negative (or capsule) stains.