Download
1 / 25
260 likes | 287 Views
SECTION VIEWS. C H A P T E R S E V E N. OBJECTIVES. Understand sections and cutting-plane lines. 2. Apply correct section-lining practices. 3. Recognize and draw section lining for 10 different materials. 4. Draw a section view given a two-view drawing.

E N D
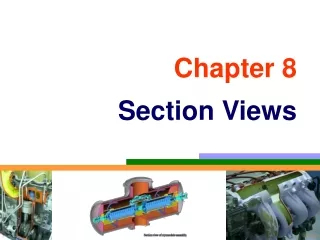
SECTION VIEWS C H A P T E R S E V E N
OBJECTIVES • Understand sections and cutting-plane lines. • 2. Apply correct section-lining practices. • 3. Recognize and draw section lining for 10 different materials. • 4. Draw a section view given a two-view drawing. • 5. Demonstrate correct hidden-line practices for section views. • 6. Identify seven types of sections. • 7. Apply section techniques to create clear, interpretable drawings. • 8. Demonstrate the proper techniques for sectioning ribs, webs, and spokes. • 9. Use hatching when using conventional breaks to show elongated objects. • 10. Interpret drawings that include section views.
UNDERSTANDING SECTIONS Section views are used for three main purposes: • To document the design and manufacture of single parts that are manufactured as one piece. • To document how multiple parts are to be assembled or built. • To aid in visualizing the internal workings of a design. When the part is cut fully in half, the resulting view is called a full section.
The Cutting Plane The cutting plane appears edgewise as a thick dashed line called the cutting-plane line. The arrows at the ends of the cutting-plane line indicate the direction of sight for the sectional view. The Cutting Plane
Visible Edges on Cutting Planes Newly visible edges cut by cutting plane are crosshatched with section lining.
LABELING CUTTING PLANES Note that each section (A-A and B-B) is completely independent.
RULES FOR LINES IN SECTIONVIEWS • Show edges and contours that are • now visible behind the cutting plane. • Omit hidden lines in section views. • A sectioned area is always • completely bounded by a visible • outline—never by a hidden line. • A visible line can never cross • a sectioned area in a view • of a single part.
CUTTING-PLANE LINE STYLE It is made up of equal dashes, each about 6 mm (1/4“) long ending in arrowheads. This form works especially well for drawings. The alternative style, uses alternating long dashes and pairs of short dashes and ends with arrowheads. This style has been in general use for a long time, so you may still see it on drawings. Both lines are drawn the same thickness as visible lines. The arrowheads at the ends of the cutting plane line indicate the direction in which the cutaway object is viewed. Alternative Methods for Showing a Cutting Plane A and B.
Visualizing Cutting-Plane Direction Correct and Incorrect Cutting-Plane Line Placement
SECTION-LINING TECHNIQUE • Uniformly spaced by an interval of about 2.5 mm • Not too close together • Uniformly thin, not varying in thickness • Distinctly thinner than visible lines • Neither running beyond nor stopping short of visible outlines
Section-Lining Symbols Section-lining symbols may be used to indicate specific materials. These symbols represent general material types only, such as cast iron, brass, and steel. Symbols for Section Lining
Section-Lining in CAD CAD programs usually include libraries that allow you to select from a variety of section-lining patterns, making it easy to use different patterns, angles, and scales for the spacing of the pattern.
HALF SECTIONS Symmetrical objects can be shown effectively using a special type of section view called a half section. A half section exposes the interior of half of the object and the exterior of the other half. This is done by removing one quarter of the object. Cutting plane Half section
BROKEN OUT SECTIONS It often happens that only a partial section of a view is needed to expose interior shapes. Such a section, limited by a break line, is called a broken out section.
REVOLVED SECTIONS The shape of the cross section of a bar, arm, spoke, or other elongated object can be shown in the longitudinal view by using a revolved section. To create a revolved section, first imagine a cutting plane perpendicular to the centerline or axis of the object. Next, revolve the plane 90° about a centerlineat right angles to the axis. 90°
REMOVED SECTIONS A removed section is one that is not in direct projection from the view containing the cutting plane — that is, it is not positioned in agreement with the standard arrangement of views.
OFFSET SECTIONS In sectioning complex objects, it is often desirable to show features that do not lie in a straight line by “offsetting” or bending the cutting plane. These are called offset sections. Note the offset cutting plane line
RIBS IN SECTION To avoid giving a false impression of thickness and solidity, ribs, webs, gear teeth, and other similar flat features are not hatched with section lining even though the cutting plane slices them. Thin features are not hatched even though the cutting plane passes lengthwise through them.
ALIGNED SECTIONS When parts with angled elements are sectioned, the cutting plane may be bent to pass through those features. The plane and features are then imagined to be revolved into the original plane. The angle of revolution should always be less than 90° for an aligned section. Aligned Section
PARTIAL VIEWS If space is limited on the paper or to save time, partial views may be used with sectioning. Another method of drawing a partial view is to break out much of the circular view, retaining only those features that are needed for minimum representation.
INTERSECTIONS IN SECTIONS Whenever an intersection is small or unimportant in a section, it is standard practice to disregard the true projection of the figure of intersection. Larger intersections may be projected Note that the larger hole K is the same diameter as the vertical hole. In such cases the curves of intersection (ellipses) appear as straight lines.
CONVENTIONAL BREAKSAND SECTIONS Conventional breaks are used to shorten the view of an object that is too long to show clearly at one scale on the drawing sheet.
ASSEMBLY SECTIONS Section views are often used to create assembly drawings. Notice that the hatching on different parts has different hatch patterns or hatch at different angles. When used on the same part, the hatching is always at the same angle to help you recognize the parts easily.
COMPUTER TECHNIQUES FOR SECTIONS 2D and 3D sectional views are created using CAD. Most CAD systems have a “hatch” command to generate the section lining and hatch patterns to fill an area automatically. (Courtesy of PTC.) (Courtesy of PTC.)