Download

1 / 19
190 likes | 215 Views
On the off chance that you are an individual or sole owner/single individual smarter apps business situated in the United States, follow these means to join up with the Apple Developer Program on your iPhone or iPad. Before you start, youu2019ll need an iPhone running iOS 12.4 or later and iPad 13.1 or later with a Touch ID, Passcode, or Face ID empowered.

E N D
Step 1: Visit Apple’s Developer Website Go to Apple’s developer website and try to create an Apple ID if you already don’t have one and set up the two-factor authentication for your account. Follow to https://developer.apple.com/ Then press on “Account” at the top edge of the webpage.
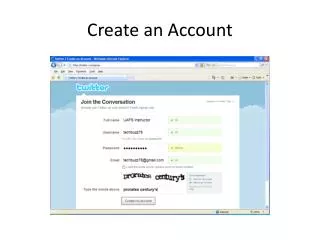
If you do not have an Apple ID, then you can start one by pressing on the “Create yours now” link followed to “Don’t have an Apple ID?”
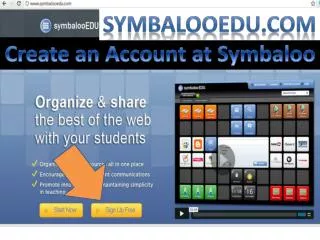
Step 2: Join the Apple Developer Program Click to join the Apple Developer Program:-
Once logged in or started a new Apple ID and logged in with it at https://developer.apple.com/, you’ll see a weblink with the name “Join the Apple Developer Program.”
That will take you to a page where Apple discloses to all of you about the engineering program. You can peruse this if you need it, yet you snap on the “Enroll” button once you prepare.
Once you go through this information, press on “Start your enrollment.”
Step 3: Check Entered Details in Your Enrollment Confirm that your email address, name, and Country location is correct, then select the type of account that you’re enrolling as. Next, you’ll approach to check your email address, name, and nation area. At that point, select the record (or element type) that you will enlist.
Step 4: Update Contact Details Update your contact information and follow through the terms and conditions at the bottom of the webpage. In the next following screen, you’ll ask for your Individual Account:
After that, you’ll approach to peruse the Apple engineer account understanding. Peruse this at that point, check the checkbox affirming that you’ve understood it, and snap Continue.
Step 5: Verify Your Account Information When you have perused Apple’s Developer Program License Agreement and clicked proceed with you’ll be approached to confirm your record data; when you’ve done this, snap Continue.
Step 6: Decide if you want Automatic Renewal. Next, you’ll be brought to a screen disclosing how much the enlistment charge will cost and its length. You’ll likewise have the alternative to empower programmed restoration, which will support you if you’d prefer not to stress over recharging your arrangement every year. At that point, click Purchase to move paying your designer account.
Step 8: Process the Payment Fill in your complete information, and then press Continue to finalize your payment.
Step 7: Sign in your Apple ID Sign In:-
Step 9: Users and Access Fill the rest of the information on proceeding screens. Users & Access:- Inside 24 hours, Apple ought to send you an email affirming that your Apple Developer Account has to be made effectively.
Step 10: Upgrade Your Plan in our System After you have made your Apple designer account and have finished your enlistment in the program, return to our framework to update your application to one of our paid plans. You can do as such by tapping on the catch close to your application’s name in the upper right-hand corner of the application dashboard.
Step 11: Enter App’s Details Enter in your app’s details in the Publishing Information section of the app dashboard. Since you have moved up to one of our paid plans and have set up your Apple engineer account, in the App Dashboard, go to Settings – > Publishing Info and round out the Apple-specific data application.
IMPORTANT NOTE To distribute your iTunes account for your sake, we will require full admittance to your engineer account. In that capacity, we need your username and secret word for your designer account. Right now, there is certifiably not a different client consent setting that will permit us to distribute for your benefit thoroughly. Along these lines, if it’s not too much trouble, make sure to send us your accreditations once you have complete arrangement of your record. You can become familiar with what data is required in the Publishing Information page here. When you have sent your application off to our distributing group to submit to Apple and Google, you’ll have to contact us at support. For More Info:- Create an apple developer account
Get in Touch With Us:- FACEBOOK - https://www.facebook.com/IADeveloper TWITTER - https://twitter.com/indiadeveloper LINKEDIN - https://www.linkedin.com/company/indianappdeveloper EMAIL - sales@indianappdeveloper.com