Download
1 / 88
880 likes | 1.02k Views
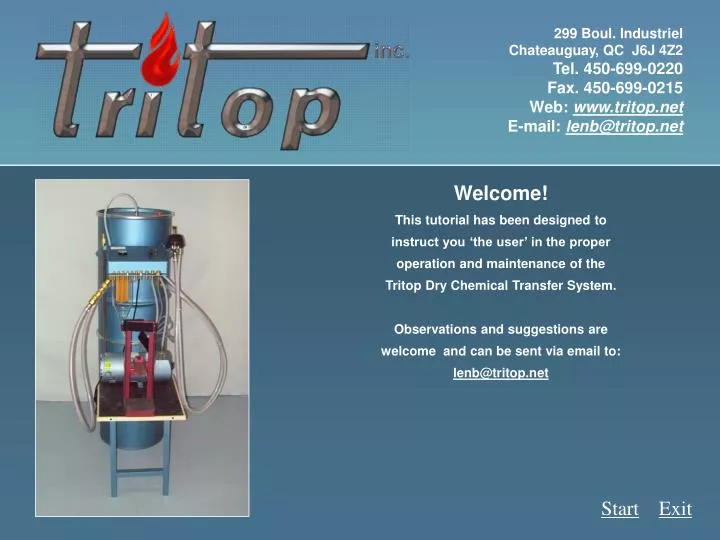
299 Boul. Industriel Chateauguay, QC J6J 4Z2 Tel. 450-699-0220 Fax. 450-699-0215 Web: www.tritop.net E-mail: lenb@tritop.net. Welcome! This tutorial has been designed to instruct you ‘the user’ in the proper operation and maintenance of the Tritop Dry Chemical Transfer System.

E N D
299 Boul. Industriel Chateauguay, QC J6J 4Z2 Tel. 450-699-0220Fax. 450-699-0215 Web:www.tritop.net E-mail: lenb@tritop.net Welcome! This tutorial has been designed to instruct you ‘the user’ in the proper operation and maintenance of the Tritop Dry Chemical Transfer System. Observations and suggestions are welcome and can be sent via email to: lenb@tritop.net StartExit
Transfer System 500 series Instructions Exit │Introduction│Chemical Transfer│ Pressure Extinguisher Service│Cartridge Extinguisher Service│Trouble Shooting│ ║Requirements & Working Place ║ Daily Maintenance ║ Filter Bowl Cleaning ║ • REQUIREMENTS • Power supply: 115V, 5A, 60Hz • Factory setting shut-off pressure is -21”Hg by default • Use Transfer System for one class of chemical only • Do not knock the vaccu-chamber wall, deformation of vaccu-chamber can cause a implosion • Only use automatic clean to empty filter bowl • Open filter bowl only to change filter element • Do not use Transfer System in humid, dusty areas • WORKING PLACE • Do not store Transfer System in varying temperature and humidity locations. • Do not use Transfer System in humid or dusty areas • Temperature of working place should be stable and be around 18-25°C • Extinguisher temperature should be the same as working place before performing maintenance. • IMPORTANT STATEMENT • The “Tritop Inc.” Dry Chemical Transfer System is a sealed system designed to control all aspects of Dry Chemical Control from one recipient to another by means of …”Vacuum differential”. • It has adjustable automatic fill level and self cleaning features. • Users following the enclosed listed requirements and operating instructions should have no reason to remove or alter any facet other than accidental breakage.
Transfer System 500 series Instructions Exit │Introduction│Chemical Transfer│ Pressure Extinguisher Service│Cartridge Extinguisher Service│Trouble Shooting│ ║Requirements & Working Place ║ Daily Maintenance ║ Filter Bowl Cleaning ║ RECOMMENDED DAILY MAINTENANCE Beginning day 1.Run a filter bowl cleaning cycle to decrease the compacting of chemical in vaccu-chamber (allow the Transfer System to shut-off automatically) 2.Run a filling cycle with a small bottle (approx 8oz) to open up possible blocking. End Day Run a filter bowl cleaning cycle to remove remaining chemical in filter bowl.
Transfer System 500 series Instructions Exit │Introduction│Chemical Transfer│ Pressure Extinguisher Service│Cartridge Extinguisher Service│Trouble Shooting│ ║Requirements & Working Place ║ Daily Maintenance ║ Filter Bowl Cleaning ║ FILTER BOWL CLEANING OPERATION ImportantDo not allow level of chemical in filter bowl to increase beyond the filter bottom. Cleaning of the filter bowl prior to reaching filter element ensures good performance of the System. Automatic cleaning of filter bowl (Back-wash) 1.Transfer System must in Initial Position 2.Turn control valve to “IN”, press start switch, filter bowl will be empty after automatic shut-off. Manual cleaning of filter bowl 1.Transfer System must in Initial Position 2.Turn control valve to “IN”, press start switch 3.Allow vacuum to increase to -15”Hg on vacuum gauge, then turn control valve to “OFF” 4 .When system shuts off, Immediately turn control valve to “IN”. ( If filter bowl does not empty, repeat operation). Initial Position:Control Valve is in “OFF” position. Chamber Inlet is coupled to quick connect plug located on adapter storage rack.. Stopper is installed on Extinguisher fill head.
Transfer System 500 series Instructions Exit │Introduction│Chemical Transfer│ Pressure Extinguisher Service│Cartridge Extinguisher Service│Trouble Shooting│ ║ Basic Operations║Extraction Wand (in)║ Extractor (in) ║ Recovery Unit (out) ║ Overview and Basic Operations 1. Start Switch turn on power train when pressed. 2. Vacuum Gauge indicates actual pressure in vacuum pump (power-train). 3. Vacuum Set Switch allow to adjust Shut-Off pressure with a flat head screw driver. 4. Control Valve allow to select different operations of the Transfer System. • ‘OFF’ position use to turn-off the Transfer System.• ‘IN’ position use to transfer of chemical into Vaccu-Chamber. • ‘OUT’ position use to transfer of chemical from Vaccu-Chamber CLICK on instructions Steps to see illustration picture
Transfer System 500 series Instructions Exit │Introduction│Chemical Transfer│ Pressure Extinguisher Service│Cartridge Extinguisher Service│Trouble Shooting│ ║ Basic Operations║Extraction Wand (in)║ Extractor (in) ║ Recovery Unit (out) ║ Overview and Basic Operations 1. Start Switch turn on power train when pressed. 2. Vacuum Gauge indicates actual pressure in vacuum pump (power-train). 3. Vacuum Set Switch allow to adjust Shut-Off pressure with a flat head screw driver. 4. Control Valve allow to select different operations of the Transfer System. • ‘OFF’ position use to turn-off the Transfer System.• ‘IN’ position use to transfer of chemical into Vaccu-Chamber. • ‘OUT’ position use to transfer of chemical from Vaccu-Chamber CLICK on instructions Steps to see illustration picture
Transfer System 500 series Instructions Exit │Introduction│Chemical Transfer│ Pressure Extinguisher Service│Cartridge Extinguisher Service│Trouble Shooting│ ║ Basic Operations║Extraction Wand (in)║ Extractor (in) ║ Recovery Unit (out) ║ Overview and Basic Operations 1. Start Switch turn on power train when pressed. 2. Vacuum Gauge indicates actual pressure in vacuum pump (power-train). 3. Vacuum Set Switch allow to adjust Shut-Off pressure with a flat head screw driver. 4. Control Valve allow to select different operations of the Transfer System. • ‘OFF’ position use to turn-off the Transfer System.• ‘IN’ position use to transfer of chemical into Vaccu-Chamber. • ‘OUT’ position use to transfer of chemical from Vaccu-Chamber CLICK on instructions Steps to see illustration picture
Transfer System 500 series Instructions Exit │Introduction│Chemical Transfer│ Pressure Extinguisher Service│Cartridge Extinguisher Service│Trouble Shooting│ ║ Basic Operations║Extraction Wand (in)║ Extractor (in) ║ Recovery Unit (out) ║ Overview and Basic Operations 1. Start Switch turn on power train when pressed. 2. Vacuum Gauge indicates actual pressure in vacuum pump (power-train). 3. Vacuum Set Switch allow to adjust Shut-Off pressure with a flat head screw driver. 4. Control Valve allow to select different operations of the Transfer System. • ‘OFF’ position use to turn-off the Transfer System.• ‘IN’ position use to transfer of chemical into Vaccu-Chamber. • ‘OUT’ position use to transfer of chemical from Vaccu-Chamber CLICK on instructions Steps to see illustration picture
Transfer System 500 series Instructions Exit │Introduction│Chemical Transfer│ Pressure Extinguisher Service│Cartridge Extinguisher Service│Trouble Shooting│ ║ Basic Operations║Extraction Wand (in)║ Extractor (in) ║ Recovery Unit (out) ║ Overview and Basic Operations 1. Start Switch turn on power train when pressed. 2. Vacuum Gauge indicates actual pressure in vacuum pump (power-train). 3. Vacuum Set Switch allow to adjust Shut-Off pressure with a flat head screw driver. 4. Control Valve allow to select different operations of the Transfer System. • ‘OFF’ position use to turn-off the Transfer System.• ‘IN’ position use to transfer of chemical into Vaccu-Chamber. • ‘OUT’ position use to transfer of chemical from Vaccu-Chamber CLICK on instructions Steps to see illustration picture
Transfer System 500 series Instructions Exit │Introduction│Chemical Transfer│ Pressure Extinguisher Service│Cartridge Extinguisher Service│Trouble Shooting│ ║ Basic Operations║Extraction Wand (in)║ Extractor (in) ║ Recovery Unit (out) ║ Overview and Basic Operations 1. Start Switch turn on power train when pressed. 2. Vacuum Gauge indicates actual pressure in vacuum pump (power-train). 3. Vacuum Set Switch allow to adjust Shut-Off pressure with a flat head screw driver. 4. Control Valve allow to select different operations of the Transfer System. • ‘OFF’ position use to turn-off the Transfer System.• ‘IN’ position use to transfer of chemical into Vaccu-Chamber. • ‘OUT’ position use to transfer of chemical from Vaccu-Chamber CLICK on instructions Steps to see illustration picture
Transfer System 500 series Instructions Exit │Introduction│Chemical Transfer│ Pressure Extinguisher Service│Cartridge Extinguisher Service│Trouble Shooting│ ║Basic Operations║Extraction Wand (in) ║ Extractor (in) ║ Recovery Unit (out) ║ Use the EXTRACTION WAND to transfer of chemical from container into VACCU-CHAMBER 1. Turn control valve to “IN” 2. Press start switch 3. Uncouple Inlet assembly at vacuum inlet and couple to extraction wand 4. Rest wand tip on surface of powder, letting suction drag wand to bottom. Repeat several times then move wand in circular motion to pick up loosened remaining powder CLICK on instructions Steps to see illustration picture
Transfer System 500 series Instructions Exit │Introduction│Chemical Transfer│ Pressure Extinguisher Service│Cartridge Extinguisher Service│Trouble Shooting│ ║Basic Operations║Extraction Wand (in) ║ Extractor (in) ║ Recovery Unit (out) ║ Use the EXTRACTION WAND to transfer of chemical from container into VACCU-CHAMBER 1. Turn control valve to “IN” 2. Press start switch 3. Uncouple Inlet assembly at vacuum inlet and couple to extraction wand 4. Rest wand tip on surface of powder, letting suction drag wand to bottom. Repeat several times then move wand in circular motion to pick up loosened remaining powder CLICK on instructions Steps to see illustration picture
Transfer System 500 series Instructions Exit │Introduction│Chemical Transfer│ Pressure Extinguisher Service│Cartridge Extinguisher Service│Trouble Shooting│ ║Basic Operations║Extraction Wand (in) ║ Extractor (in) ║ Recovery Unit (out) ║ Use the EXTRACTION WAND to transfer of chemical from container into VACCU-CHAMBER 1. Turn control valve to “IN” 2. Press start switch 3. Uncouple Inlet assembly at vacuum inlet and couple to extraction wand 4. Rest wand tip on surface of powder, letting suction drag wand to bottom. Repeat several times then move wand in circular motion to pick up loosened remaining powder CLICK on instructions Steps to see illustration picture
Transfer System 500 series Instructions Exit │Introduction│Chemical Transfer│ Pressure Extinguisher Service│Cartridge Extinguisher Service│Trouble Shooting│ ║Basic Operations║Extraction Wand (in) ║ Extractor (in) ║ Recovery Unit (out) ║ Use the EXTRACTION WAND to transfer of chemical from container into VACCU-CHAMBER 1. Turn control valve to “IN” 2. Press start switch 3. Uncouple Inlet assembly at vacuum inlet and couple to extraction wand 4. Rest wand tip on surface of powder, letting suction drag wand to bottom. Repeat several times then move wand in circular motion to pick up loosened remaining powder CLICK on instructions Steps to see illustration picture
Transfer System 500 series Instructions Exit │Introduction│Chemical Transfer│ Pressure Extinguisher Service│Cartridge Extinguisher Service│Trouble Shooting│ ║Basic Operations║Extraction Wand (in) ║ Extractor (in) ║ Recovery Unit (out) ║ Transfer of chemical into VACCU-CHAMBER through EXTRACTOR 1. Raise extractor cone; place uncovered pail on stand; lower extractor cone and clamp firmly to top of pail, ensuring a tight seal 2.Turn control valve to “IN” position, push start switch 3. Remove plug from extractor outlet and couple to vacuum inlet 4.Swivel the assembly to permit chemical transfer to the vaccu-chamber When transfer complete, (vacuum gauge pressure returns to pre transfer level). Return cradle assembly to up-right position. Unscrew union and check outlet screen .Switch to off and return modules to their respective locations. If transfer not completed within 70 seconds, return cradle assembly to upright position and carry out screen inspection. 5.Turn control valve to “OFF” when finished 6.Remove inlet assembly; replace plug on extractor; return pail to upright position and lock in place; raise extractor cone to remove pail CLICK on instructions Steps to see illustration picture
Transfer System 500 series Instructions Exit │Introduction│Chemical Transfer│ Pressure Extinguisher Service│Cartridge Extinguisher Service│Trouble Shooting│ ║Basic Operations║Extraction Wand (in) ║ Extractor (in) ║ Recovery Unit (out) ║ Transfer of chemical into VACCU-CHAMBER through EXTRACTOR 1.Raise extractor cone; place uncovered pail on stand; lower extractor cone and clamp firmly to top of pail, ensuring a tight seal 2. Turn control valve to “IN” position, push start switch 3. Remove plug from extractor outlet and couple to vacuum inlet 4.Swivel the assembly to permit chemical transfer to the vaccu-chamber When transfer complete, (vacuum gauge pressure returns to pre transfer level). Return cradle assembly to up-right position. Unscrew union and check outlet screen .Switch to off and return modules to their respective locations. If transfer not completed within 70 seconds, return cradle assembly to upright position and carry out screen inspection. 5.Turn control valve to “OFF” when finished 6.Remove inlet assembly; replace plug on extractor; return pail to upright position and lock in place; raise extractor cone to remove pail CLICK on instructions Steps to see illustration picture
Transfer System 500 series Instructions Exit │Introduction│Chemical Transfer│ Pressure Extinguisher Service│Cartridge Extinguisher Service│Trouble Shooting│ ║Basic Operations║Extraction Wand (in) ║ Extractor (in) ║ Recovery Unit (out) ║ Transfer of chemical into VACCU-CHAMBER through EXTRACTOR 1.Raise extractor cone; place uncovered pail on stand; lower extractor cone and clamp firmly to top of pail, ensuring a tight seal 2.Turn control valve to “IN” position, push start switch 3. Remove plug from extractor outlet and couple to vacuum inlet 4.Swivel the assembly to permit chemical transfer to the vaccu-chamber When transfer complete, (vacuum gauge pressure returns to pre transfer level). Return cradle assembly to up-right position. Unscrew union and check outlet screen .Switch to off and return modules to their respective locations. If transfer not completed within 70 seconds, return cradle assembly to upright position and carry out screen inspection. 5.Turn control valve to “OFF” when finished 6.Remove inlet assembly; replace plug on extractor; return pail to upright position and lock in place; raise extractor cone to remove pail CLICK on instructions Steps to see illustration picture
Transfer System 500 series Instructions Exit │Introduction│Chemical Transfer│ Pressure Extinguisher Service│Cartridge Extinguisher Service│Trouble Shooting│ ║Basic Operations║Extraction Wand (in) ║ Extractor (in) ║ Recovery Unit (out) ║ Transfer of chemical into VACCU-CHAMBER through EXTRACTOR 1.Raise extractor cone; place uncovered pail on stand; lower extractor cone and clamp firmly to top of pail, ensuring a tight seal 2.Turn control valve to “IN” position, push start switch 3. Remove plug from extractor outlet and couple to vacuum inlet 4. Swivel the assembly to permit chemical transfer to the vaccu-chamber When transfer complete, (vacuum gauge pressure returns to pre transfer level). Return cradle assembly to up-right position. Unscrew union and check outlet screen .Switch to off and return modules to their respective locations. If transfer not completed within 70 seconds, return cradle assembly to upright position and carry out screen inspection. 5.Turn control valve to “OFF” when finished 6.Remove inlet assembly; replace plug on extractor; return pail to upright position and lock in place; raise extractor cone to remove pail CLICK on instructions Steps to see illustration picture
Transfer System 500 series Instructions Exit │Introduction│Chemical Transfer│ Pressure Extinguisher Service│Cartridge Extinguisher Service│Trouble Shooting│ ║Basic Operations║Extraction Wand (in) ║ Extractor (in) ║ Recovery Unit (out) ║ Transfer of chemical into VACCU-CHAMBER through EXTRACTOR 1.Raise extractor cone; place uncovered pail on stand; lower extractor cone and clamp firmly to top of pail, ensuring a tight seal 2.Turn control valve to “IN” position, push start switch 3. Remove plug from extractor outlet and couple to vacuum inlet 4.Swivel the assembly to permit chemical transfer to the vaccu-chamber When transfer complete, (vacuum gauge pressure returns to pre transfer level). Return cradle assembly to up-right position. Unscrew union and check outlet screen .Switch to off and return modules to their respective locations. If transfer not completed within 70 seconds, return cradle assembly to upright position and carry out screen inspection. 5. Turn control valve to “OFF” when finished 6.Remove inlet assembly; replace plug on extractor; return pail to upright position and lock in place; raise extractor cone to remove pail CLICK on instructions Steps to see illustration picture
Transfer System 500 series Instructions Exit │Introduction│Chemical Transfer│ Pressure Extinguisher Service│Cartridge Extinguisher Service│Trouble Shooting│ ║Basic Operations║Extraction Wand (in) ║ Extractor (in) ║ Recovery Unit (out) ║ Transfer of chemical into VACCU-CHAMBER through EXTRACTOR 1.Raise extractor cone; place uncovered pail on stand; lower extractor cone and clamp firmly to top of pail, ensuring a tight seal 2.Turn control valve to “IN” position, push start switch 3. Remove plug from extractor outlet and couple to vacuum inlet 4.Swivel the assembly to permit chemical transfer to the vaccu-chamber When transfer complete, (vacuum gauge pressure returns to pre transfer level). Return cradle assembly to up-right position. Unscrew union and check outlet screen .Switch to off and return modules to their respective locations. If transfer not completed within 70 seconds, return cradle assembly to upright position and carry out screen inspection. 5.Turn control valve to “OFF” when finished 6. Remove inlet assembly; replace plug on extractor; return pail to upright position and lock in place; raise extractor cone to remove pail CLICK on instructions Steps to see illustration picture
Transfer System 500 series Instructions Exit │Introduction│Chemical Transfer│ Pressure Extinguisher Service│Cartridge Extinguisher Service│Trouble Shooting│ ║Basic Operations║Extraction Wand (in) ║ Extractor (in) ║ Recovery Unit (out) ║ Use POWDER RECOVERY UNIT to remove of chemical from VACCU-CHAMBER to storage pail 1. Open PRU lid, insert empty pail inside the recovery unit and close lid 2. Turn control valve to “OUT” and press start switch 3. Place the extinguisher fill head on powder recovery unit an hold until a seal has been established. (System will stop when pail is full or fill head will dislodge if vaccu-chamber is empty) 4. Remove extinguisher fill head (Allow powder to settle before opening lid) CLICK on instructions Steps to see illustration picture
Transfer System 500 series Instructions Exit │Introduction│Chemical Transfer│ Pressure Extinguisher Service│Cartridge Extinguisher Service│Trouble Shooting│ ║Basic Operations║Extraction Wand (in) ║ Extractor (in) ║ Recovery Unit (out) ║ Use POWDER RECOVERY UNIT to remove of chemical from VACCU-CHAMBER to storage pail 1. Open PRU lid, insert empty pail inside the recovery unit and close lid 2. Turn control valve to “OUT” and press start switch 3. Place the extinguisher fill head on powder recovery unit an hold until a seal has been established. (System will stop when pail is full or fill head will dislodge if vaccu-chamber is empty) 4. Remove extinguisher fill head (Allow powder to settle before opening lid) CLICK on instructions Steps to see illustration picture
Transfer System 500 series Instructions Exit │Introduction│Chemical Transfer│ Pressure Extinguisher Service│Cartridge Extinguisher Service│Trouble Shooting│ ║Basic Operations║Extraction Wand (in) ║ Extractor (in) ║ Recovery Unit (out) ║ Use POWDER RECOVERY UNIT to remove of chemical from VACCU-CHAMBER to storage pail 1. Open PRU lid, insert empty pail inside the recovery unit and close lid 2. Turn control valve to “OUT” and press start switch 3. Place the extinguisher fill head on powder recovery unit an hold until a seal has been established. (System will stop when pail is full or fill head will dislodge if vaccu-chamber is empty) 4. Remove extinguisher fill head (Allow powder to settle before opening lid) CLICK on instructions Steps to see illustration picture
Transfer System 500 series Instructions Exit │Introduction│Chemical Transfer│ Pressure Extinguisher Service│Cartridge Extinguisher Service│Trouble Shooting│ ║Basic Operations║Extraction Wand (in) ║ Extractor (in) ║ Recovery Unit (out) ║ Use POWDER RECOVERY UNIT to remove of chemical from VACCU-CHAMBER to storage pail 1. Open PRU lid, insert empty pail inside the recovery unit and close lid 2. Turn control valve to “OUT” and press start switch 3. Place the extinguisher fill head on powder recovery unit an hold until a seal has been established. (System will stop when pail is full or fill head will dislodge if vaccu-chamber is empty) 4. Remove extinguisher fill head (Allow powder to settle before opening lid) CLICK on instructions Steps to see illustration picture
Transfer System 500 series Instructions Exit │Introduction│Chemical Transfer│ Pressure Extinguisher Service│Cartridge Extinguisher Service│Trouble Shooting│ ║ Basic Emptying ║ Emptying with Extraction Wand ║ Basic Filling ║ Filling from Extractor ║ Sampling ║ BASIC EMPTYING OPERATION: Discharge a pressure extinguisher into VACCU-CHAMBER 1. Remove extinguisher hose or nozzle, install adapter. Couple pressure inlet to adapter 2.Turn control valve to “IN” and press start switch 3.Begin discharge at -10 to -15Hg (A small drop on gauge during discharge indicates a bottom out level of pressure. When gauge rises again slightly, pressure in extinguisher has moved from a positive to a negative pressure.) 4.Detach chamber fill inlet (Test the extinguisher outlet with a fingertip to ensure extinguisher is in a state of vacuum and the extinguisher is now empty) Adapter Pressure Inlet CLICK on instructions Steps to see illustration picture
Transfer System 500 series Instructions Exit │Introduction│Chemical Transfer│ Pressure Extinguisher Service│Cartridge Extinguisher Service│Trouble Shooting│ ║ Basic Emptying ║ Emptying with Extraction Wand ║ Basic Filling ║ Filling from Extractor ║ Sampling ║ BASIC EMPTYING OPERATION: Discharge a pressure extinguisher into VACCU-CHAMBER 1.Remove extinguisher hose or nozzle, install adapter. Couple pressure inlet to adapter 2. Turn control valve to “IN” and press start switch 3.Begin discharge at -10 to -15Hg (A small drop on gauge during discharge indicates a bottom out level of pressure. When gauge rises again slightly, pressure in extinguisher has moved from a positive to a negative pressure.) 4.Detach chamber fill inlet (Test the extinguisher outlet with a fingertip to ensure extinguisher is in a state of vacuum and the extinguisher is now empty) CLICK on instructions Steps to see illustration picture
Transfer System 500 series Instructions Exit │Introduction│Chemical Transfer│ Pressure Extinguisher Service│Cartridge Extinguisher Service│Trouble Shooting│ ║ Basic Emptying ║ Emptying with Extraction Wand ║ Basic Filling ║ Filling from Extractor ║ Sampling ║ BASIC EMPTYING OPERATION: Discharge a pressure extinguisher into VACCU-CHAMBER 1.Remove extinguisher hose or nozzle, install adapter. Couple pressure inlet to adapter 2.Turn control valve to “IN” and press start switch 3. Begin discharge at -10 to -15Hg (A small drop on gauge during discharge indicates a bottom out level of pressure. When gauge rises again slightly, pressure in extinguisher has moved from a positive to a negative pressure.) 4.Detach chamber fill inlet (Test the extinguisher outlet with a fingertip to ensure extinguisher is in a state of vacuum and the extinguisher is now empty) CLICK on instructions Steps to see illustration picture
Transfer System 500 series Instructions Exit │Introduction│Chemical Transfer│ Pressure Extinguisher Service│Cartridge Extinguisher Service│Trouble Shooting│ ║ Basic Emptying ║ Emptying with Extraction Wand ║ Basic Filling ║ Filling from Extractor ║ Sampling ║ BASIC EMPTYING OPERATION: Discharge a pressure extinguisher into VACCU-CHAMBER 1.Remove extinguisher hose or nozzle, install adapter. Couple pressure inlet to adapter 2.Turn control valve to “IN” and press start switch 3.Begin discharge at -10 to -15Hg (A small drop on gauge during discharge indicates a bottom out level of pressure. When gauge rises again slightly, pressure in extinguisher has moved from a positive to a negative pressure.) 4. Detach chamber fill inlet (Test the extinguisher outlet with a fingertip to ensure extinguisher is in a state of vacuum and the extinguisher is now empty) CLICK on instructions Steps to see illustration picture
Transfer System 500 series Instructions Exit │Introduction│Chemical Transfer│ Pressure Extinguisher Service│Cartridge Extinguisher Service│Trouble Shooting│ ║ Basic Emptying║ Emptying with Extraction Wand ║ Basic Filling ║ Filling from Extractor ║ Sampling ║ Remove of chemical or remaining chemical with EXTRACTION WAND 1. Remove extinguisher valve, couple vacuum inlet to extraction wand 2. Turn control valve to “IN”, press start switch 3. Place extraction wand into chemical (Chemical will transfer automatically into Vaccu-Chamber) 4. Turn control valve to “OFF”, return wand and hoses to their appropriate places when finished CLICK on instructions Steps to see illustration picture
Transfer System 500 series Instructions Exit │Introduction│Chemical Transfer│ Pressure Extinguisher Service│Cartridge Extinguisher Service│Trouble Shooting│ ║ Basic Emptying║ Emptying with Extraction Wand ║ Basic Filling ║ Filling from Extractor ║ Sampling ║ Remove of chemical or remaining chemical with EXTRACTION WAND 1. Remove extinguisher valve, couple vacuum inlet to extraction wand 2. Turn control valve to “IN”, press start switch 3. Place extraction wand into chemical (Chemical will transfer automatically into Vaccu-Chamber) 4. Turn control valve to “OFF”, return wand and hoses to their appropriate places when finished CLICK on instructions Steps to see illustration picture
Transfer System 500 series Instructions Exit │Introduction│Chemical Transfer│ Pressure Extinguisher Service│Cartridge Extinguisher Service│Trouble Shooting│ ║ Basic Emptying║ Emptying with Extraction Wand ║ Basic Filling ║ Filling from Extractor ║ Sampling ║ Remove of chemical or remaining chemical with EXTRACTION WAND 1. Remove extinguisher valve, couple vacuum inlet to extraction wand 2. Turn control valve to “IN”, press start switch 3. Place extraction wand into chemical (Chemical will transfer automatically into Vaccu-Chamber) 4. Turn control valve to “OFF”, return wand and hoses to their appropriate places when finished CLICK on instructions Steps to see illustration picture
Transfer System 500 series Instructions Exit │Introduction│Chemical Transfer│ Pressure Extinguisher Service│Cartridge Extinguisher Service│Trouble Shooting│ ║ Basic Emptying║ Emptying with Extraction Wand ║ Basic Filling ║ Filling from Extractor ║ Sampling ║ Remove of chemical or remaining chemical with EXTRACTION WAND 1. Remove extinguisher valve, couple vacuum inlet to extraction wand 2. Turn control valve to “IN”, press start switch 3. Place extraction wand into chemical (Chemical will transfer automatically into Vaccu-Chamber) 4. Turn control valve to “OFF”, return wand and hoses to their appropriate places when finished CLICK on instructions Steps to see illustration picture
Transfer System 500 series Instructions Exit │Introduction│Chemical Transfer│ Pressure Extinguisher Service│Cartridge Extinguisher Service│Trouble Shooting│ ║ Basic Emptying║ Emptying with Extraction Wand ║ Basic Filling ║ Filling from Extractor ║ Sampling ║ BASIC FILLING OPERATION of a pressure extinguisher 1. Secure extinguisher in holding bracket 2. Turn control valve to “OUT”, press start switch 3. Remove stopper and place extinguisher fill head on extinguisher (System will automatically turn-off when extinguisher is full) 4. Remove extinguisher fillhead, replace stopper, turn control valve to “OFF” CLICK on instructions Steps to see illustration picture
Transfer System 500 series Instructions Exit │Introduction│Chemical Transfer│ Pressure Extinguisher Service│Cartridge Extinguisher Service│Trouble Shooting│ ║ Basic Emptying║ Emptying with Extraction Wand ║ Basic Filling ║ Filling from Extractor ║ Sampling ║ BASIC FILLING OPERATION of a pressure extinguisher 1. Secure extinguisher in holding bracket 2. Turn control valve to “OUT”, press start switch 3. Remove stopper and place extinguisher fill head on extinguisher (System will automatically turn-off when extinguisher is full) 4. Remove extinguisher fillhead, replace stopper, turn control valve to “OFF” CLICK on instructions Steps to see illustration picture
Transfer System 500 series Instructions Exit │Introduction│Chemical Transfer│ Pressure Extinguisher Service│Cartridge Extinguisher Service│Trouble Shooting│ ║ Basic Emptying║ Emptying with Extraction Wand ║ Basic Filling ║ Filling from Extractor ║ Sampling ║ BASIC FILLING OPERATION of a pressure extinguisher 1. Secure extinguisher in holding bracket 2. Turn control valve to “OUT”, press start switch 3. Remove stopper and place extinguisher fill head on extinguisher (System will automatically turn-off when extinguisher is full) 4. Remove extinguisher fillhead, replace stopper, turn control valve to “OFF” CLICK on instructions Steps to see illustration picture
Transfer System 500 series Instructions Exit │Introduction│Chemical Transfer│ Pressure Extinguisher Service│Cartridge Extinguisher Service│Trouble Shooting│ ║ Basic Emptying║ Emptying with Extraction Wand ║ Basic Filling ║ Filling from Extractor ║ Sampling ║ BASIC FILLING OPERATION of a pressure extinguisher 1. Secure extinguisher in holding bracket 2. Turn control valve to “OUT”, press start switch 3. Remove stopper and place extinguisher fill head on extinguisher (System will automatically turn-off when extinguisher is full) 4. Remove extinguisher fillhead, replace stopper, turn control valve to “OFF” CLICK on instructions Steps to see illustration picture
Transfer System 500 series Instructions Exit │Introduction│Chemical Transfer│ Pressure Extinguisher Service│Cartridge Extinguisher Service│Trouble Shooting│ ║Basic Emptying║ Emptying with Extraction Wand ║Basic Filling║ Filling from Extractor ║ Sampling ║ Filling a pressure extinguisher from EXTRACTOR 1. Install container pail in cradle assembly 2.Uncouple outlet socket from vaccu-chamber and couple to extractor outlet 3.Turn control valve to “OUT” ; Swivel cradle assembly; Press start switch; Place fill head on extinguisher inlet Note: Process is the same as filling extinguisher from vaccu-chamber CLICK on instructions Steps to see illustration picture
Transfer System 500 series Instructions Exit │Introduction│Chemical Transfer│ Pressure Extinguisher Service│Cartridge Extinguisher Service│Trouble Shooting│ ║Basic Emptying║ Emptying with Extraction Wand ║Basic Filling║ Filling from Extractor ║ Sampling ║ Filling a pressure extinguisher from EXTRACTOR 1.Install container pail in cradle assembly 2. Uncouple outlet socket from vaccu-chamber and couple to extractor outlet 3.Turn control valve to “OUT” ; Swivel cradle assembly; Press start switch; Place fill head on extinguisher inlet Note: Process is the same as filling extinguisher from vaccu-chamber CLICK on instructions Steps to see illustration picture
Transfer System 500 series Instructions Exit │Introduction│Chemical Transfer│ Pressure Extinguisher Service│Cartridge Extinguisher Service│Trouble Shooting│ ║Basic Emptying║ Emptying with Extraction Wand ║Basic Filling║ Filling from Extractor ║ Sampling ║ Filling a pressure extinguisher from EXTRACTOR 1.Install container pail in cradle assembly 2.Uncouple outlet socket from vaccu-chamber and couple to extractor outlet 3. Turn control valve to “OUT” ; Swivel cradle assembly; Press start switch; Place fill head on extinguisher inlet Note: Process is the same as filling extinguisher from vaccu-chamber CLICK on instructions Steps to see illustration picture
Transfer System 500 series Instructions Exit │Introduction│Chemical Transfer│ Pressure Extinguisher Service│Cartridge Extinguisher Service│Trouble Shooting│ ║ Basic Emptying║ Emptying with Extraction Wand ║ Basic Filling ║ Filling from Extractor ║ Sampling ║ Taking sample of chemical into the SAMPLING UNIT 1. Secure extinguisher in holding bracket 2.Remove extinguisher hose and install adapter 3.Couple vacuum inlet to sampling unit outlet, attach sampling unit inlet to adapter 4.Turn control valve to “IN”, press start switch and depress extinguisher lever lightly once to transfer sample CLICK on instructions Steps to see illustration picture
Transfer System 500 series Instructions Exit │Introduction│Chemical Transfer│ Pressure Extinguisher Service│Cartridge Extinguisher Service│Trouble Shooting│ ║ Basic Emptying║ Emptying with Extraction Wand ║ Basic Filling ║ Filling from Extractor ║ Sampling ║ Taking sample of chemical into the SAMPLING UNIT 1.Secure extinguisher in holding bracket 2. Remove extinguisher hose and install adapter 3.Couple vacuum inlet to sampling unit outlet, attach sampling unit inlet to adapter 4.Turn control valve to “IN”, press start switch and depress extinguisher lever lightly once to transfer sample CLICK on instructions Steps to see illustration picture
Transfer System 500 series Instructions Exit │Introduction│Chemical Transfer│ Pressure Extinguisher Service│Cartridge Extinguisher Service│Trouble Shooting│ ║ Basic Emptying║ Emptying with Extraction Wand ║ Basic Filling ║ Filling from Extractor ║ Sampling ║ Taking sample of chemical into the SAMPLING UNIT 1.Secure extinguisher in holding bracket 2.Remove extinguisher hose and install adapter 3. Couple vacuum inlet to sampling unit outlet, attach sampling unit inlet to adapter 4.Turn control valve to “IN”, press start switch and depress extinguisher lever lightly once to transfer sample CLICK on instructions Steps to see illustration picture
Transfer System 500 series Instructions Exit │Introduction│Chemical Transfer│ Pressure Extinguisher Service│Cartridge Extinguisher Service│Trouble Shooting│ ║ Basic Emptying║ Emptying with Extraction Wand ║ Basic Filling ║ Filling from Extractor ║ Sampling ║ Taking sample of chemical into the SAMPLING UNIT 1.Secure extinguisher in holding bracket 2.Remove extinguisher hose and install adapter 3.Couple vacuum inlet to sampling unit outlet, attach sampling unit inlet to adapter 4. Turn control valve to “IN”, press start switch and depress extinguisher lever lightly once to transfer sample CLICK on instructions Steps to see illustration picture
Transfer System 500 series Instructions Exit │Introduction│Chemical Transfer│ Pressure Extinguisher Service│Cartridge Extinguisher Service│Trouble Shooting│ ║ BasicEmptying ║ Basic Filling ║ Emptying on flip stand ║ Sampling ║ BASIC EMPTYING OPERATION of a cartridge extinguisher 1. Remove cover from extinguisher and attach evacuator to extinguisher (using coupling if necessary) 2.Turn control valve to “IN” and push start switch 3.While still in the upright position, couple vacuum inlet to evacuator outlet, then turn extinguisher upside down 4.Periodically depress extinguisher discharge lever during transfer until complete 5.Return extinguisher to upright position and uncouple vacuum inlet 6.Turn control valve to “OFF” CLICK on instructions Steps to see illustration picture
Transfer System 500 series Instructions Exit │Introduction│Chemical Transfer│ Pressure Extinguisher Service│Cartridge Extinguisher Service│Trouble Shooting│ ║ BasicEmptying ║ Basic Filling ║ Emptying on flip stand ║ Sampling ║ BASIC EMPTYING OPERATION of a cartridge extinguisher 1.Remove cover from extinguisher and attach evacuator to extinguisher (using coupling if necessary) 2. Turn control valve to “IN” and push start switch 3.While still in the upright position, couple vacuum inlet to evacuator outlet, then turn extinguisher upside down 4.Periodically depress extinguisher discharge lever during transfer until complete 5.Return extinguisher to upright position and uncouple vacuum inlet 6.Turn control valve to “OFF” CLICK on instructions Steps to see illustration picture
Transfer System 500 series Instructions Exit │Introduction│Chemical Transfer│ Pressure Extinguisher Service│Cartridge Extinguisher Service│Trouble Shooting│ ║ BasicEmptying ║ Basic Filling ║ Emptying on flip stand ║ Sampling ║ BASIC EMPTYING OPERATION of a cartridge extinguisher 1.Remove cover from extinguisher and attach evacuator to extinguisher (using coupling if necessary) 2.Turn control valve to “IN” and push start switch 3. While still in the upright position, couple vacuum inlet to evacuator outlet, then turn extinguisher upside down 4.Periodically depress extinguisher discharge lever during transfer until complete 5.Return extinguisher to upright position and uncouple vacuum inlet 6.Turn control valve to “OFF” CLICK on instructions Steps to see illustration picture
Transfer System 500 series Instructions Exit │Introduction│Chemical Transfer│ Pressure Extinguisher Service│Cartridge Extinguisher Service│Trouble Shooting│ ║ BasicEmptying ║ Basic Filling ║ Emptying on flip stand ║ Sampling ║ BASIC EMPTYING OPERATION of a cartridge extinguisher 1.Remove cover from extinguisher and attach evacuator to extinguisher (using coupling if necessary) 2.Turn control valve to “IN” and push start switch 3.While still in the upright position, couple vacuum inlet to evacuator outlet, then turn extinguisher upside down 4. Periodically depress extinguisher discharge lever during transfer until complete 5.Return extinguisher to upright position and uncouple vacuum inlet 6.Turn control valve to “OFF” discharge lever CLICK on instructions Steps to see illustration picture
Transfer System 500 series Instructions Exit │Introduction│Chemical Transfer│ Pressure Extinguisher Service│Cartridge Extinguisher Service│Trouble Shooting│ ║ BasicEmptying ║ Basic Filling ║ Emptying on flip stand ║ Sampling ║ BASIC EMPTYING OPERATION of a cartridge extinguisher 1.Remove cover from extinguisher and attach evacuator to extinguisher (using coupling if necessary) 2.Turn control valve to “IN” and push start switch 3.While still in the upright position, couple vacuum inlet to evacuator outlet, then turn extinguisher upside down 4.Periodically depress extinguisher discharge lever during transfer until complete 5. Return extinguisher to upright position and uncouple vacuum inlet 6.Turn control valve to “OFF” CLICK on instructions Steps to see illustration picture
Transfer System 500 series Instructions Exit │Introduction│Chemical Transfer│ Pressure Extinguisher Service│Cartridge Extinguisher Service│Trouble Shooting│ ║ BasicEmptying ║ Basic Filling ║ Emptying on flip stand ║ Sampling ║ BASIC EMPTYING OPERATION of a cartridge extinguisher 1.Remove cover from extinguisher and attach evacuator to extinguisher (using coupling if necessary) 2.Turn control valve to “IN” and push start switch 3.While still in the upright position, couple vacuum inlet to evacuator outlet, then turn extinguisher upside down 4.Periodically depress extinguisher discharge lever during transfer until complete 5.Return extinguisher to upright position and uncouple vacuum inlet 6. Turn control valve to “OFF” CLICK on instructions Steps to see illustration picture
Transfer System 500 series Instructions Exit │Introduction│Chemical Transfer│ Pressure Extinguisher Service│Cartridge Extinguisher Service│Trouble Shooting│ ║ BasicEmptying║ Basic Filling ║ Emptying on flip stand ║ Sampling ║ BASIC FILLING OPERATION of a cartridge extinguisher 1. Turn control valve to “OUT”, press start switch 2. Remove stopper and place extinguisher fill head on extinguisher (System will automatically turn-off when extinguisher is full) 3. Depress discharge lever twice during first part of filling operation (This will prevent chemical from entering the discharge hose) 4. Remove extinguisher fill head, replace stopper, turn control valve to “OFF” CLICK on instructions Steps to see illustration picture