Download
1 / 34
340 likes | 414 Views
Day 25: INTRODUCTION TO WORD. Akhila Kondai akhila.kondai@mail.wvu.edu November 13, 2014. ANNOUNCEMENTs. MyITLab Lesson E is due on 11/17/2013 (Monday)

E N D
Day 25:INTRODUCTION TO WORD AkhilaKondai akhila.kondai@mail.wvu.edu November 13, 2014
ANNOUNCEMENTs • MyITLab Lesson E is due on 11/17/2013 (Monday) • If you’ve missed any previous MyITLab lessons, try to go back and do them for half the points any time between now and dead week (Monday, December 1, 2014).
Introduction to word • Word processing software enables you to produce documents such as letters, resume, reports, and research papers. • Outline: • The Word Interface and Ribbons • Spell & Grammar Check • Show/Hide Nonprinting Symbols • Mini Toolbar
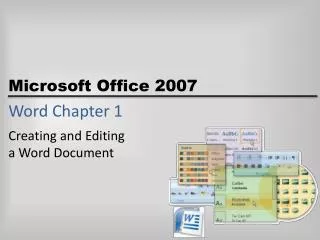
Microsoft Word First Look • Open Word • A look at the Interface • Mouse over for screen tips!
Ribbon Title bar Group Home tab Vertical Scroll bar Quick access toolbar Horizontal ruler Vertical ruler Zoom slider Status bar View buttons
Entering Text • Type ‘I have 5 balls and the 5 balls where thrown out.’[Enter] • Type ‘Univrsity Avenue’ [Enter]
Grammar & Spell Check • Blue underline Check Grammar • Red underline Check Spelling • Right click to see what Word wants to tell you . .
Show/Hide • Click on the show/hide icon to see where your paragraphs are at. • Characters shown when selecting the show/hide icon will not show up when printing. • .. indicates that you used two spaces • . you used one space • Turn it off
Mini Toolbar • Highlight something that you typed • Bring the mouse over it to see the bring up the Mini Toolbar
Formatting & Tools • Text Selection • Font and Font Size • Bold/Italic/Underline • Alignment
Selecting Text • Select a word by double clicking on the word • Select a line by clicking in the selection bar next to the line • Select a sentence by clicking at the beginning of the sentence and dragging till the end of it. • Select a paragraph by triple-clicking in the paragraph!
Font and Font Size • Select the first line • Change font type to any type you want • Change font size to 24 for example
Italics, Bold, Underline • Select Text Use “B” for bold Use “I” for italics Use “U” for underline
Alignment Justified Left aligned Right aligned Centered
Copying, Cutting, and Pasting • Moving Text • Drag and Drop • Copy/Cut & Paste • Demonstrating example . . . • Select your last name and the click and drag it to put it before your first name. • Select your last name and right click and copy and paste it anywhere in the document. (or Ctrl+C Ctrl+V) • Select your last name and right click and cut and past it anywhere in the document. (or Ctrl+X Ctrl+V)
Cover Pages • Serve to add a more professional look to documents • Are often required later in your academic career • Can set your paper or document apart from others
Adding cover page and page numbers • Inserting a page number. • Insert tab->Header and Footer group->Page Number • Adding a cover page • Insert tab->Pages group->Cover Page • Select a style and replace “Type the document title” with “Floating Buffalo National River” • Press Tab and replace “Type the document subtitle” with “First River Outfitter” • Click on the Author field and replace the content with your name
HEADER AND FOOTER • Go to Insert Tab -> Header / Footer
PAGE BREAK • A soft page break is inserted when text fills an entire page, then continues onto the next page. • A hard page break forces the next part of a document to begin on a new page. • Ctrl + Enter • Insert Tab -> Page Break Show/Hide will let you see these
Check spelling and grammar • Review Tab -> Spelling and Grammar
WATERMARK • A watermark is a text or graphic that displays behind text. • Often used to display a very light logo for a company, and also frequently used to indicate the status of a document. • Design-> Watermark
Word options • Changing word options. • File tab->Options • Click Save on the left of Word Options dialog box. Reduce the time that currently displays next to “Save AutoRecover information every 10 minutes” to 3 • Click Quick Access Toolbar. Click “Print Preview and Print” from the list of commands. Click Add and then OK
Document Presentation • Change Text Appearance • Non-Breaking Spaces and Hyphens • Highlighting Text • Line Spacing And Justification • Tabs and Indent a Paragraph • Borders and Shading • Bulleting and Numbering • Create Columns Text Formatting Features Paragraph Formatting Features
Document Presentation • Style Properties • Modify Heading Style • Outline View • Insert Pictures • Text Wrap • Picture Styles • Graphic Properties Styles Graphical Objects