Download
1 / 23
260 likes | 536 Views
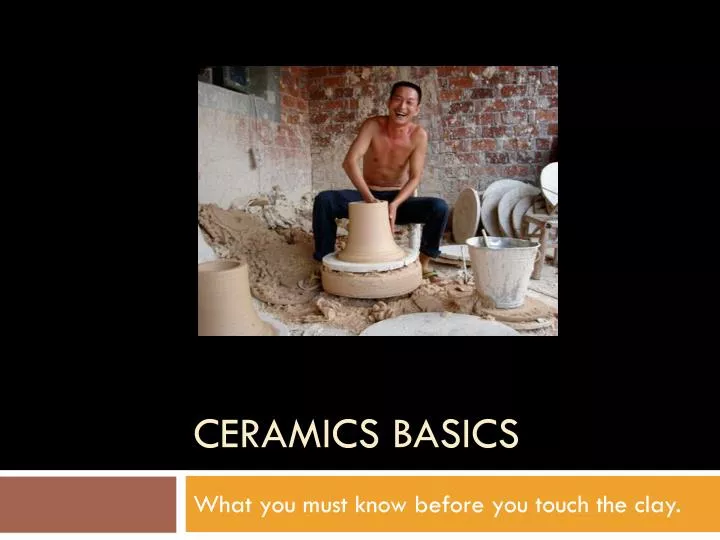
Ceramics Basics. What you must know before you touch the clay. Name That Clay. Red and white earthenware clay Earthenware – opaque, porous, low-fire clay Fired to Cone 05 or 06 Will not be waterproof unless glazed Red Earthenware also known as “Terra Cotta”. Name That Clay: A Timeline.

E N D
Ceramics Basics What you must know before you touch the clay.
Name That Clay • Red and white earthenware clay • Earthenware – opaque, porous, low-fire clay • Fired to Cone 05 or 06 • Will not be waterproof unless glazed • Red Earthenware also known as “Terra Cotta”
Name That Clay: A Timeline Greenware Fire Wet Clay Leather Hard Bone Dry Fire Glazeware Bisqueware Glaze
Step #1 ALWAYS Wedge • Wedging – the process of throwing clay onto a hard surface repeatedly at different angles in order to remove air bubbles and promote malleability (the flexibility/workability of the clay • Always wedge for at least two minutes • For stubborn pieces or putting pieces back together, use the “slice and slap” method (at least 20 cuts) • Works best on a plaster wedging board or other moisture loving surface
Tools: Slip • The “glue” used in ceramics while a piece is still in its green state • Essentially watered down clay or liquid clay • Must be used whenever joining clay together • Also can be used to cast a mold or decorate a piece • Use same slip type as clay • Tip: Best slip? Just add white vinegar!
Methods: Hand-Building • Pinch Forming
Methods: Hand-Building • Coil-Building
Methods: Hand-Building • Slab-Building
Methods: Hand-Building • Drape or Push Molding
Rules to Avoid Disaster • Always score and slip when adding pieces of clay together • Try to add a coil to your seam when appropriate to strengthen that seam • Always wedge thoroughly • Always provide an opening for air to escape a hollow piece (or a hollow area of a piece) • Never exceed ½” in width (if you do, alert Mrs. Roberts) • Never touch bone dry pieces except when loading them into the kiln • Always cover your piece in damp paper towels and plastic bags before leaving for the day • Never ever ever put plaster in the kiln • No adhesives in the kiln
Rules to Avoid Class Ruin • Always dump sludge buckets outside (never in the sink!) • Always wash tools, and always wash them in the sludge bucket (not the sink, unless all clay has been removed) • Always rinse hands in sludge bucket before washing them in the sink • Never throw clay. Ever. • Always wedge your leftover when you are done
The Kiln • “Oven” for clay • Cone 05 = 1886 deg • Electric Sitter Kiln • 2 hours on low (lid propped) • 2 hours on medium (lid propped) • Finish out on high until Cone 05 is reached (lid shut) Pyrometric bar melts at Cone 05 and breaks the circuit “Ramping” – act of turning up the heat in the kiln
Why me? WHY?!?!? • Most kiln accidents are avoidable
The Root of Explosions: Moisture • “States of Matter”: Gasses take up more room than liquids • Expansion of water becoming steam causes destruction
Reducing your chance of incident? • Allow your piece to dry uncovered at least one week before being fired • Keep it thin: It dries faster this way, also the core actually dries • Wedge like a maniac: No air bubbled = no big steam pockets • No grenades: Always poke holes into hollow pieces as a steam outlet
Keeping It Holy • Does not have to be large opening – a pin prick will do (Cross sections)
“It don’ won’ stick!” • Score and slip all attachments • Scoring – The act of applying a texture to the surface of clay for the purpose of adhering two clay bodies together • Kiln will successfully remove all attachments if not scored and slipped • Score both piece attaching and attachment point
Finishing: Glaze • “Paint” of ceramics • Cannot be mixed to create new colors • Finish created by a series of chemical reactions catalyzed by heat • When raw, is powdery, matte, and usually not end color • DO NOT GLAZE THE BOTTOM OF YOUR PIECES! • Clear glaze can be used to enhance the intensity of intricate design work • 2 to 3 coats; Mix well!
Finishing: Underglaze • Matte finish • Colors stay true • Can be mixed to create new colors • Great for detail painting • Must be fired before clear glaze can be applied