Download
1 / 27
290 likes | 540 Views
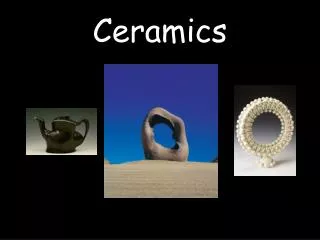
Ceramics. By Mrs. Breckenridge. Ceramic Vocabulary. Wedging. Before you begin to work with your clay you need to wedge it. This is a method of kneading the clay. You knead the clay to get rid of all air pockets in the clay. Air pockets in clay can destroy a project when it is fired. .

E N D
Ceramics By Mrs. Breckenridge
Wedging • Before you begin to work with your clay you need to wedge it. This is a method of kneading the clay. You knead the clay to get rid of all air pockets in the clay. Air pockets in clay can destroy a project when it is fired.
Slab/Slab Building • A slab is clay that has been rolled out flat into a sheet of clay. It needs to be about ½- ¾ of an inch. Slabs are great for building or for creating attachments to add to your projects.
EXAMPLE Slab Building Project
Coil/Coil Building • Coils are long strands of clay which can be used to build artworks out of or to make designs to add to your projects. • They too need to have about a ½ - ¾ inch diameter. • It is like rolling snakes or spaghetti out of play dough when you were a kid.
EXAMPLE Coil Building Project
Hand Building Free building for example making pinch pots and attaching them
Kiln/Kiln Room • The kiln room is the room in the back of our classroom. The kiln is the machine that fires our ceramic artworks. • Students are not allowed in the Kiln room without being asked by me to go in to the Kiln room. • ONE STUDENT AT A TIME!
Fire/Bisque and Glaze Your artworks will go through 2 firings. The first is a bisque fire which hardens your clay to a state hard enough for glazing. The second is glaze firing which is when you add glaze to your bisqued artwork and it goes through a firing during which will harden your glaze and give it a shiny look.
Clarification of the states of your clay • Clay- Your clay will be pliable while you are actively working with it and properly storing it. If you add too much water your clay will crack easily while it dries and it won’t hold its shape, but if you don’t use enough water your clay may dry out too quickly while you work. • Leather Hard Clay- This is when it has been drying out and it is almost dry but still has some water in it. This clay is brittle but this state is good for carving in. • Bone Dry Clay- This clay is completely dry and ready to be bisque fired. • Bisqueware- This is clay that has been bisque fired and is ready to be glazed. • Glazeware- This clay has been glazed and is ready to be fired.
Slip • FIRST YOU SCORE IT, THEN YOU SLIP IT! • It is your glue in ceramics. • Clay suspended in water used to join clay together like a glue. It should be of a yogurt consistency.
Combs • These can also be used to score your project when attaching pieces of clay. • They can also add texture.
Needle Tool • This tool can be used to add texture. • It can be used to score your clay. • The flat end can be used to add texture. • What it is NOTused for: • Writing • Drawing designs • You need something with a wider point to draw or write.
Ribbon Tool • This tool is used for carving in to your clay.
Ribs/ Metal and Wood • Ribs are used to smooth areas in your clay. • The metal ribs can be used to cut your clay. • Metal ribs can also be used to scrape clay off of your table when you are cleaning.
Random Tools • Pretty much anything can be used as a tool when working with ceramics so experiment with tools especially for creating texture.
Something new this year to make sure they look nice when they are done… • When it is bone dry go over it with your hand or a metal rib and scratch off any parts that are bumpy or sticking out. These will be sharp when they are fired and it is hard to take them off once they are bisque fired.
Each project will be planned before you begin. This includes making detailed sketches of what you will make before I will give you clay. If you do not finish it in the amount of class time given, it is homework. If you don’t bring it in by the next day you will be working on a written project about an artist instead of doing a ceramic project. Work Time - Planning Working Safety
Procedures Continued • Work Time • This time is for working. You will work at your table. Your supplies will be at your table. There is no reason to be out of your seat. You will be working from the start of work time until it is time to clean up. • Safety • Always practice safety with the tools in our classroom. Be considerate of everyone’s safety as well as your own.
Do not wash clay in the sinks because it will clog the drains. • To clean your tables you will scrape any clay off with the metal rib, then you will wipe your tables with a sponge (be sure to squeeze out the excess water), The last thing you will do is wipe your tables down with a wipe. • All supplies need to be returned to the bin and placed neatly on your table. (7th grade will put the bins away in the kiln room when you put your projects away) Clean Up Time Sinks Tables Supplies
At the end of class your project needs to be properly wrapped up so that it doesn’t dry out. If your clay dries out because you did not wrap it up to store it properly you will be doing the written assignment. • Projects will be stored in the kiln room, I will call you buy table to put your projects on the shelves, you will have 1 minute to get in, put it away and get back to your table. • When you have put your project away and cleaned your table you will return to your table to work on your journal. End of Class
“Chinese seal carving started in ancient Chinese times, during the Qin dynasty (221-210 B.C). The Chinese seal carving was originally used as an imperial seal – a seal used by the emperor to, in effect, put his stamp of approval on documents. The royal seal was called the Xi (which can literally be translated into “the imperial seal”). These Chinese seal carvings were used only by royalty.” • “The Chinese culture is a culture that reveres its artists. Talented artists (poets, painters, and even calligraphers) are acknowledged for their skills in a way that is uncommon in many other cultures. It is common in most cultures to see artists sign their work; however, Chinese artists adapted the carved seal to use the seal to mark their art. These artists created unique seals that became identified as their Chinese signature stamp. Every time they stamp their work with the seal, they are putting their signature to their work. There is a great deal of pride in finding a seal that is a unique and artistic expression of their work.” • Examples of name stamp: • http://www.gotheborg.com/marks/index_jap_marks.htm?http://gotheborg.com/marks/20thcenturyjapan.shtml • Above quoted from: http://www.char4u.com/article_info.php?articles_id=8 Our First Mini Project This seal will be used on all of your artworks
6th Grade Project • #1 Double pinch pot animal with slab and coil attachments • #2 Something that serves a function (ex. Can hold something)
7th Grade Project Choices • Story Mask • Double Animal (like a liger) • 3D Ceramic Shapes Project