Download
1 / 5
60 likes | 329 Views
EKG Sensor. PS-2111. Identify fluctuations in electrical current that occur before, during, and after heart contractions. Compare EKG results for before/after exercise, males/females Determine heart rate. Compare EKG results to a “typical range”. Compare to examples of abnormal EKG images.

E N D
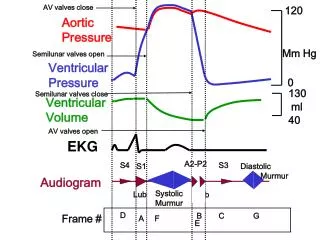
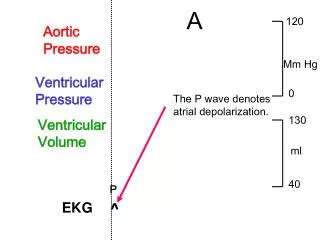
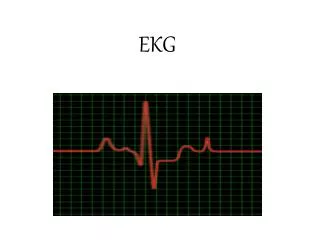
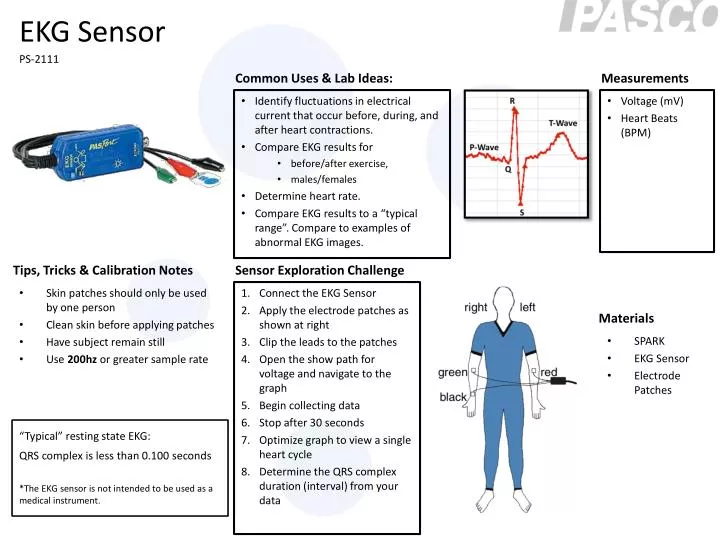
EKG Sensor PS-2111 Identify fluctuations in electrical current that occur before, during, and after heart contractions. Compare EKG results for • before/after exercise, • males/females Determine heart rate. Compare EKG results to a “typical range”. Compare to examples of abnormal EKG images. Voltage (mV) Heart Beats (BPM) Connect the EKG Sensor Apply the electrode patches as shown at right Clip the leads to the patches Open the show path for voltage and navigate to the graph Begin collecting data Stop after 30 seconds Optimize graph to view a single heart cycle Determine the QRS complex duration (interval) from your data Skin patches should only be used by one person Clean skin before applying patches Have subject remain still Use 200hz or greater sample rate SPARK EKG Sensor Electrode Patches “Typical” resting state EKG: QRS complex is less than 0.100 seconds *The EKG sensor is not intended to be used as a medical instrument.
Hand Grip Heart Rate Sensor PS-2186 Compare resting heart rate to heart rate after exercise. Determine recovery time following exercise. Use data to help determine and understand: • Maximum heart rate and target heart rate • Heart rate and fitness level Compare heart rate results for: • Sitting/standing/laying down • Jogging vs. squatting Beats per minute Connect the sensor to the SPARK, an orange light should be on Use the show path to obtain a graph display Grip the heart rate sensors, wait until the red light flashes indicating the heart beats (this can take 30-60sec) Start collecting data Let collection continue for 60 seconds to get your resting heart rate Stop data collection Use the statistics tool to determine your mean resting heart rate Start collecting data and see how much you can elevate your heart rate by jogging in place for 60 seconds Stop data collection Use the statistics tool to determine your maximum beats per minute during your exercise Clean paddles after each use Wait for the red beats light to flash for at least 30 seconds before beginning data collection Hold with normal grip strength, with the metallic side of the grip touching the center of the palm Use extension cable to avoid accidentally pulling equipment off the lab table A sample rate of one sample per 5 seconds works well SPARK Hand grip heart rate sensor
Breath Rate Sensor PS-2187 Compare breath rate at rest, during exercise, and recovery after exercise. Compare different types of exercises: • Jogging vs. sprinting (in place) • Jogging vs. stepping up/down Relate recovery time to fitness level. Breath rate (bpm) Breath rate avg (bpm) Connect breath rate sensor to the SPARK Connect new unused clip to the sensor tubes Attach clip to a new unused dusk mask Select breath rate and enter the show path then navigate to the graph display Set the data collection to rate at 1hz and to stop after 60sec Place the mask on your face and attach strain-relief clip Breath normally and wait for EXHALE light to illuminate Begin collecting data For the 2nd run of data, jump up and down or jog in place Compare your breathing rate from each run Each mask clip must only be used by one person If EXHALE light does not illuminate, adjust fit of the mask Use sensor extension cable if test subject will be moving SPARK Breath rate sensor Clip (PS-2658) Dust mask
Force Sensor PS-2152 Muscle Fatigue experiments: Compare sustained squeezing pressure to repeated squeezing. Compare dominant hand to non-dominant hand Compare hand at normal temperature to hand held in ice water Compare males to females Newtons Connect the sensor to the SPARK Navigate to a graph display of force vs. time Put the middle and ring fingers of your dominant hand through the finger holes of the sensor. Press the “zero” button. Place your thumb on the rubber bumper and begin squeezing. Start recording data. Adjust the scale of the graph. Stop recording data after 60 seconds. Do one or more additional runs, changing one factor. Compare the results. Try to maintain a force of 40 N for at least 60 seconds. • If this isn’t possible, try to maintain a force of 30 N. Press the “zero” button before beginning data collection for each run. SPARK Force sensor
Spirometer PS-2152 Determine the volume of one normal breath. Determine the maximum amount of air in the lungs. Relate the results to conditions such as asthma and emphysema. Flow rate (L/s) Total flow (L) Max flow rate (L/s) Connect the mouthpiece to the handle (look for pin alignment) Connect the sensor to the SPARK Select total flow and enter the show path, then navigate to the graph display Hold mouthpiece away from any air currents and start data collection. Wait for READY light to illuminate Place in mouth between your front teeth and seal it with your lips Breath in the following sequence • -Breathe quietly for 4 breaths • -Inhale deeply, followed immediately by exhaling through the mouth with maximum effort. • -Breath quietly for two breaths. Stop data collection Compare one normal breath to the maximum exhalation. Compare the normal breaths before/after maximum exhalation. Each mouth piece must only be used by one person Do not wiggle mouthpiece when removing it Use nose clip or have test subject close their nose Practice 2-3 times before saving data Prompt test subject to avoid distractions Test subject should stand/sit comfortably SPARK Spirometer sensor Disposable single use mouthpiece