Download
1 / 48
850 likes | 1.68k Views
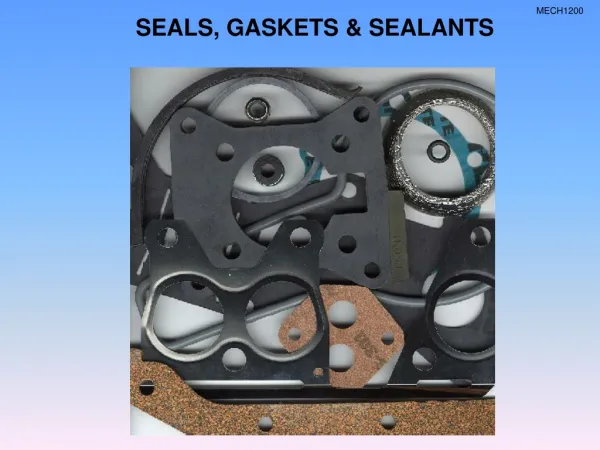
11 – Seals and Gaskets. The intent of this presentation is to present enough information to provide the reader with a fundamental knowledge of seals and gaskets used within Michelin and to better understand basic system and equipment operations. 11 – Seals and Gaskets. Types.

E N D
The intent of this presentation is to present enough information to provide the reader with a fundamental knowledge of seals and gaskets used within Michelin and to better understand basic system and equipment operations.
11 – Seals and Gaskets Types
11 – Seals and Gaskets Types of Seals Static seals Static seals are usually flat seals, but can be O rings or sheet gaskets. The static joint neither moves nor is in contact with moving parts. O-rings The O ring is the most widely used seal in farming or industrial hydraulic equipment. It is usually made of synthetic rubber and is used both for static parts and moving parts. O rings are designed to be positioned in grooves where they are compressed (about 10%) between two surfaces in the case of static applications.
11 – Seals and Gaskets When they are subject to very high pressure, they are reinforced by support rings to prevent their expulsion from the groove. Support rings are usually made of fiber, leather, plastic or synthetic rubber. Flat seals or sheet gaskets Obviously, flat seals can only be used in static assemblies. Their sealing properties depend on their ability to mold themselves to the imperfections that exist on the faces of the joint. Proper sealing depends on this feature. Such seals are made of various substances. Some are metallic, and have no specific shape.
11 – Seals and Gaskets O-rings When O-rings are used on moving parts, they should be in contact with very smooth surfaces. They cannot be used if this entails straddling an opening or where angles are under pressure. Nor should they be installed on rotating shafts because of wear problems. Dynamic seals Dynamic seals are either moving or subject to motion. They include seals for shafts, piston rods and packings. In the latter case, some oozing is necessary to ensure lubrication. There are a number of types of seals, of which O rings, "V" or "U" packing, spring loaded lip seals, metal to metal seal and packings.
11 – Seals and Gaskets Pressure When there is longitudinal movement and pressures are high, support rings are used to prevent the deformation of the O ring. Dynamic O-ring deformed by pressure O-ring with support rings
11 – Seals and Gaskets “V” and “U” packing “V” and “U” packings are used to ensure water-tightness of mechanical components which have a longitudinal motion, such as piston cylinders, jack screws. They are usually made of leather, natural or synthetic rubber, plastic and other materials. These packings must be installed with the concave side, or lip, facing that part of the system that is under pressure. The pressure will force the lip against its mating part, thus ensuring a good seal. Such packing can comprise a number of “V” or “U” shaped rings to make a homogeneous packing held tightly in a packing assembly or stuffing box. “U” Packing “V” Packing
11 – Seals and Gaskets Spring-loaded lip seals These seals are an improvement over the common "V" or "U" packings. The lip of the seal is covered by a spring which forces it against the part's complementary surface. Generally, this seal is equipped with a metallic envelope which fits into a hole in the housing to which it is affixed. This type of seal is often used to ensure the tightness of moving shafts. The lip of the seal normally faces the liquid containing side. Sometimes, double‑lip seals are used to provide a seal in both directions. Spring Loaded Lip Seal
11 – Seals and Gaskets Metal-to-metal seals (metallic segments) Metal to metal seals used for pistons and piston rods are similar to piston segments found in motors. They may or may not be extensible. They are used on moving parts and are usually made of steel. Unless their adjustment is very tight, non extensible seals will leak too much. Extensible seals (used in pistons) and packings (used for piston rods) create some friction and are subject to small amounts of leakage. This figure shows the drawing symbols for a Single Lip Seal, a Single Lip Seal with Anti Dirt Lip (sometime referred to as a double lip seal), and a Double Lip Seal. Metallic Seal
11 – Seals and Gaskets Packings Packings found in stuffing boxes are used for moving parts. They are made of plastic, asbestos, cotton, rubber, malleable metals or alloys, or a combination of some of the above. Packings are often used in the same way as "V" or "U" packings. They are sold in rolls or pre cut spiral segments of standard sizes. They are used to provide tightness under low pressures only. It is very important that such packings be properly lubricated, otherwise they may scratch or wear moving parts, lead to overheating and diminish tightness. Packing
11 – Seals and Gaskets Dynamic seals (labyrinth) Dynamic seals (labyrinth) are used to isolate bearings completely by holding the lubricant in and keeping out any outside contaminants, such as dust, water, steam, corrosive gases, etc. There is no friction between dynamic seals and a shaft or with other internal parts. Therefore no wear of either the seal or the shaft. Dynamic (labyrinth) seals comprise a stator and a rotor. The stator is pressed into the bearing housing and an O ring ensures extra tightness. There is some play between the stator and the shaft. The shape of the labyrinth keeps the lubricant inside the housing. The shaft drives the rotor through the action of one or more O rings. The rotor fits inside the stator which creates a labyrinth. This labyrinth prevents penetration of contaminants. Because of the back up motion caused by the grooves in the labyrinth seal, there is always some play (about 0.05 mm) between the rotor and the stator; therefore there is no mechanical contact. Labyrinth Seal
11 – Seals and Gaskets Contaminants that get into the assembly lose their kinetic energy inside the labyrinth and are channeled into a ring groove. From there, they are ejected and exit the seal by gravity through an opening. This is caused by the particular shape of the rotor. Generally, the stator is made of Teflon coated brass, whereas the rotor is made of stainless steel. There are, however, other combinations of materials. The following figure shows a typical Labyrinth seal installation.
11 – Seals and Gaskets Mechanical seals When it comes to the seal of the pulser in centrifugal pumps, mechanical seals advantageously replace seals made of packing. The figure below shows one of the numerous models available on the market. The mechanical seal is made of a fixed component, which includes a clamp set on a stationary face made of ceramic, silicon, carbon or other material, and sheathed in rubber to help maintain tightness. There is some play between the shaft and the clamp to prevent contact and avoid shaft wear. The mobile part is set and kept against the shaft with the help of an extensible sheath and maintained in position by a set collar. It is installed in the cavity where the packing was positioned in other models. The key component of the mobile part is the mobile face, made of carbon or another substance, which slides while it rotates on the stationary face to maintain the pump's tightness. The following is an example of a typical Mechanical Seal installation. Mechanical Seal
11 – Seals and Gaskets Choosing Seals and Packings in Function of Specific Applications The builder of a mechanical system must take into account a number of factors when choosing seals and packings. Each seal or packing application comes with its own constraints, which is why there are so many types of seals and packings. Choosing the exact replacement seal or packing is very important. At all times, the manufacturer’s specifications, as given in spare part catalogues, must be complied with. Static seals The choice of static seal is governed by the type of fluid to be contained. Generally, users count on the guidance of representatives to solve tightness problems in systems and machinery. Nevertheless, one can choose the appropriate seal on the basis of the following two charts:
Choice of Dynamic seals for Specific applications The choice of a dynamic seal depends directly on its application & the liquid that must be contained.
11 – Seals and Gaskets Substitute products for seals Lacquers They are used to seal metal to metal seals and threaded fittings in small scale jobs. They dry slowly and cure to hardness to seal and repair paper, felt, cardboard or rubber seals. They are easy to apply with a paint brush or a roller. Lacquers usually hold well against solvents, gasoline, aromatics, alcohol, water, oil and synthetic lubricants. Silicone sealants (Silicone RTV, Permatex) Silicone sealants are used for seals of all sizes and shapes. They are used to insulate power cables, and adhere to wood, glass, metal, plastic (including polystyrene and rigid PVC), ceramic, leather, fabric, vinyl, rubber, concrete and masonry. They fill openings, repair leaks and worn out rubber components. They seal joints, caulking, packings and weather stripping. They are dry to the touch within an hour and curing is complete 24 hours later. They harden as they dry, while retaining enough resilience for all assembly and sealing applications. They are easy to use. Silicone sealants should always be used according to the manufacturer’s directions.
11 – Seals and Gaskets Storage and Installation
11 – Seals and Gaskets Storage and Handling Of Seals And Packings Seals and packing should always be handled with care and must be replaced as soon as required. Most seals are fragile and can deteriorate easily. In order to avoid such problems, they must remain in their original packaging up to the moment when they will be installed. They should be stored in a cool, dry place, away from dirt and other contamination. Seals require as much care as precision bearings. Generally, all seals or packings which were removed during repairs should be replaced. It is preferable to spend a bit of money on new seals than to redo a repair because there is some leakage. Disassembly and Installation of Sheet Gaskets, and Tightening Techniques When repairing a pump or a piece of equipment in need of new gaskets, it is important to check the following points before ordering pre‑cut sheet gaskets or making some in the workshop: check to see if the system is tight; check that the sheet gasket was properly fitted to the surfaces of the seats so that it could compensate for any seat deformations; check that the weakening of the gasket was not caused by temperature; check that the gasket has not lost the elasticity it needed to maintain proper tightness when the equipment was in operation; check that the gasket is not cracked or crazed; All the above matter in determining whether the gasket met the specifications for the equipment.
11 – Seals and Gaskets Disassembly of sheet gasket It is very important, during disassembly, to open the breakers in the electrical box controlling the pump and comply with the plant's Lockout/Tagout procedures. When removing a gasket, certain precautions should be taken to avoid breaking the gasket if possible. That way the gasket could either be reused or serve as a template for a new one. Installation of a sheet gasket Here are some simple precautions leading to a satisfactory seal: the gasket must be properly centered and the surfaces of the seats be thoroughly clean; the surfaces of the seats must be as straight as possible, otherwise they will need to be machined; the tightening of bolts is the most important operation and calls for: positioning of bolts and tightening until they just fit on the cover, but without applying pressure; moderate tightening of the bolts from one side to the other, in the sequences suggested in figures 12-17, 12-18, 12-19 and 12-20, so as to make the pressure uniform over the whole area of the gasket.
11 – Seals and Gaskets the tightening operation is completed with a torque wrench so as to make sure that all the bolts will have been tightened to the pressure recommended by the company; after 12 to 24 hours of operation, the bolts should be checked and retightened with a torque wrench. NOTE: Never use a lubricant or an anti stick product to prevent the gasket from sticking or sliding during the tightening operation. • Figure 12-17 • Figure 12-19 • Figure 12-20 • Figure 12-18
11 – Seals and Gaskets Flanged gasket Flanged gaskets are preferable to sheet gaskets for certain applications: they seal better than shaped sheet gaskets and allow for contact between the metal parts of flanges by filling in only those areas where leaks can occur, that is where there is no contact between the metal components; they allow fabrication on the work site of gaskets of any size or shape. This means that there is less of a need for storing pre shaped seals or for cutting shapes out of a sheet of metal; they do not require over tightening of flange bolts, since there is no seal in need of compression; they become elastic when flanges expand under the effect of heat, which ensures the integrity of the seal; they give a seal that will hold for quite a long time against solvents and chemicals; they do not shrink, do not evaporate and do not dissolve; they are easy to scrape off flanges after disassembly and require neither grinding nor chipping, even after months of use; they harden after assembly, once the sealant is held between the flange components; they can be applied manually or with automatic tools.
11 – Seals and Gaskets Disassembly, Cutting and Assembly of A Seal Where the Motion is Circular Disassembly of packing When disassembling a packing, it is important to ensure that: the motor has been turned off and padlocked according to the plant's Lockout/Tagout procedure; the intake and exit valves are shut and padlocked; the pressure inside the pump reads "zero"; the nature of the fluid that was pumped is known, so as to take proper precautions to protect hands and eyes against chemicals (acid or corrosive). The packing and the old gasket have to be removed with an appropriate tool. A hook or a cork screw mounted on a flexible rod.
11 – Seals and Gaskets The packing box and the packing assembly must be inspected, as well as the shaft and the sleeve. Damaged parts must not be saved for the sake of a few dollars. That would mean savings to the detriment of production. Fitting of the packing Make measurements to determine the size of the appropriate packing. To this end, measure the inside diameter of the packing box (dia. B), subtract the diameter of the shaft (dia. A) and divide the result by two. NOTE: Proper dimensions are important.
11 – Seals and Gaskets In order to determine the number of rings required, measure the depth of the housing and divide by the thickness of the packing. When fitting the packing, place the rings one at the time. To make matters easier lubricate the shaft a bit as well as the outside of the ring with a manufacture‑approved lubricant. Never use a screwdriver or any other pointed object to push the packing in place; instead, use a split sleeve, such as a pipe of equal diameter that has been slit, or a gland. The joints of the rings must be at 90 of one another. In the case of lantern rings (steel housing and water housing) one must ensure that they are installed under the drain tap of the water‑intake pipe. When placing the rings, it is important to leave enough space for the gland. When making replacement rings, do not use the shaft as a support or as a guide to cut the rings, since there is a risk of scratching the shaft, which would lead to premature wear of the packing. It is recommended to use a wooden rod with a diameter equal to that of the shaft. When cutting rings, roll the packing around the rod and make the cut along the axis of the rod.
11 – Seals and Gaskets When the gland is first compressed, the rings are only compressed a bit. Then, the gland must be loosened to allow the rings to expand, after which the gland is tightened a bit again. Next, turn the shaft by hand to ensure that the packing is not too tight. Adjustment and start-up When the pump is started, the water must be allowed to escape from the stuffing box. Then the bolts of the gland are retightened until the desired flow is obtained. Usually, the bolts of the gland are tightened 1/6th of a turn every 15 minutes.
11 – Seals and Gaskets Disassembly and Assembly of a Seal Where the Motion is Longitudinal When a seal is being removed, a careful examination will often reveal damages that were caused during its assembly. Moreover, the proper choice of seal and of its support will help minimize damages during assembly. Therefore, maximum care must be taken when removing a worn seal so as to be able to determine the cause of failure. Assembly techniques Design differences regarding supports and their positioning relative to the cylinder make the assembly of a seal a more or less difficult job. Whichever method is used when installing a seal, the following points must always be verified: the means of sealing and all surfaces with which it is in contact must be free of all foreign matter; the seal and the area in which it sits must be lubricated before assembly, and the lubricant must be compatible with the material of which the seal is made; all sharp edges against which the seal may rest must be softened beforehand, or covered with tape, or the seal must be positioned using a special tool; in order to determine the roughness of the cylinder skirt, run a fingernail along the skirt to feel it. Should there be roughness, it is because the lip of the seal is worn; improper installation, which is one of the major causes of defects; the seal was installed in an inadequate groove, or the wrong seal was installed.
11 – Seals and Gaskets Installation of O-rings The O‑ring is positioned in a groove which is usually 135% the size of the O‑ring cross section. This allows for some deformation of the O‑ring due to flattening or to swelling caused by the fluid with which it is in contact. The shape of the groove also allows for a slight rocking motion by the O‑ring, so as to lubricate the surface. There must be minimal play so as to prevent the bulge of the seal to slip into the play area.
11 – Seals and Gaskets 500 lb/in. 1000 lb/in. 1500 lb/in. 3000 lb/in. Pressure O rings are pegged at 1500 lbs./in.2 when the grooves are well designed, and up to 3000 lbs./in.2 if anti bulging rings are used. The following figure shows the progressive deformation of an O ring as pressure increases.
11 – Seals and Gaskets As the pressure goes beyond 1500 lbs/in2, the seal is forced between the two parts and jams. To prevent such problems, support rings are positioned on either side of the O ring. This allows for a rise in pressure up to 3000 lbs/in2.
11 – Seals and Gaskets Installation of “V” seals Synthetic "V" packings are molded with a slight lip angle which pre‑charges the packing. It is important not to over‑tighten the packing, while avoiding poor or loose adjustment. "V" packing must not be positioned face to face on a double action piston. The female adapter must rest against a solid base, not on series of face to face "V" rings.
11 – Seals and Gaskets Installation of “U” seals Packing cup "U" rings are used as inside or outside seals in low pressure hydraulic or pneumatic systems. Those made of leather are equipped with a central support to prevent the collapse of the lips. Those made of synthetic rubber and Teflon are designed with a pre stress lip section and do not need central support. One such ring will alone support effective pressures of 1000 to 1500 lbs./in2. For greater pressures, support rings must be installed. "U" rings are not used in multiples as is the case with "V" rings. Packing cup "U" rings that are used as piston seals do not require outside support. They are positioned on the piston and pushed into position in the retaining groove. In such a case, they replace the packing and require less maintenance.
11 – Seals and Gaskets Cup seals The cup seal has a single lip and is classified as an asymmetrical seal. Under low pressure, the cup seal can become tight on the lip side, but normally it only becomes tight when the diameter of the heel expands to the inside diameter of the cylinder. The cup seal is forced against the piston by a lock plate.
11 – Seals and Gaskets Wiper seals (of piston rods) Pneumatic and hydraulic cylinders used in dusty and dirty surroundings must be so designed that the piston and its packing are protected from abrasion. To this end, a rubber sleeve, similar to that used on car brakes, is well suited for small, short stroke cylinders. For large cylinders, a cleaning mechanism is generally used, in the packing gland, to prevent abrasive substances from becoming incrusted in the packing. A synthetic rubber or plastic wiper seal placed in the packing gland will protect the cylinder against dust. Metallic wiper seals are used to protect cylinders against hard abrasive substances.
11 – Seals and Gaskets Gasket Making Methods
11 – Seals and Gaskets Gasket Making Techniques Cutting a sheet gasket Usually, plants order pre cut sheet gaskets from the manufacturer to ensure that spare parts are always on hand. However, sometimes it is necessary to make a sheet gasket. The technique for making a sheet gasket varies depending on the shape of the gasket. Cutting a circular gasket The easiest and most accurate method for cutting a circular gasket is by using a compass mounted knife which allows for a precise cut along the circumference.
11 – Seals and Gaskets Procedure for cutting a circular gasket 1. Determine inside and outside diameters of the gasket 2. Locate and mark the center of the gasket 3. Punch a pilot hole in the center of the gasket. The diameter of the pilot hole should the same size as the guide pin on the compass knife. 4. Adjust the compass knife to the proper diameter (ALWAYS cut the outside diameter first) and set the cutter blade slightly greater than the thickness of the gasket material being cut. 5. At this stage you need a cutting board with a hole the same diameter as the guide pin on the compass knife. Insert the guide pin through the pilot hole in the gasket material and into the hole in the cutting board. 6. Ensuring that the compass knife is flat on the gasket material and the cutting board apply a slight downward pressure to the compass knife and rotate it in the direction of the cutting blade. 7. Reset the diameter of the compass knife to the inside diameter and repeat the above process.
11 – Seals and Gaskets Cutting holes into a sheet gasket Holes can be cut in a sheet gasket by using a hollow punch set. Procedure for cutting holes in a sheet gasket 1. Determine the diameter of the hole to be cut and select the proper size cutting head. 2. Locate and mark the center of the hole(s) to be punched. Cutting Head
11 – Seals and Gaskets Guide Pin 3. Punch a pilot hole in the center of the hole. The diameter of the pilot hole should be the same size as the guide pin on the hole punch. 4. Install guide pin into the striker handle. Striker Handle
11 – Seals and Gaskets 5. Install the cutting head onto the striker handle.
11 – Seals and Gaskets 6. Insert the guide pin through the pilot hole in the gasket material and strike the handle sharply with a hammer. Note: Smaller diameter circular gaskets can be cut by installing two different size cutting heads onto the striker handle.
11 – Seals and Gaskets Procedure for cutting an irregular shaped gasket There are several methods for cutting irregular shaped gaskets. The more common methods are as follows: Tracing the gasket onto the gasket material 1. Lay the object needing the gasket onto the gasket material and trace around the outer edges of the part. 2. Next trace around the inner edges of the bolt holes. Be very careful that the part doesn’t move during this step. 3. Cut the holes using a hole punch as described earlier.
11 – Seals and Gaskets 4. To cut the inside of the gasket, lay the gasket material onto the part and insert the screws/bolts through the holes to hold the material in position. Using a ball peen hammer gently tap around the inside edge of the part (figure 12-47). This will make an impression on the gasket material that can be used to cut the inside hole using an Exacto knife or box cutter blade. NOTE: Be very careful when tapping the part to ensure that you DO NOT roughen the edge of the part. This could result in the part not mating properly with the adjoining part. 5. The outer edge can be cut using the same knife used in step 4, or you can use scissors or shears.
11 – Seals and Gaskets Exit End of Chapter Eight