Download
1 / 20
200 likes | 226 Views
Learn the basics of character rigging in 3D art and animation, including mesh preparation, joint chains, IK handles, control circles, blendshapes, skinning, display layers, and animating rigging.

E N D
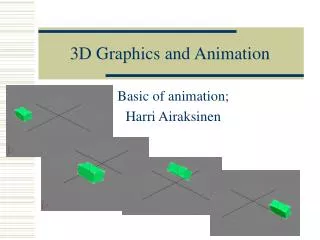
Introduction to 3D Art and Animation Lesson I (week 8): Intro to Character Rigging: Mesh Prep, Joint Chains, IK Handles, Basic Control Circles, BlendShapes, Skinning, Display Layers, and Animating
Rigging 1: Prepare the Mesh [1]. PREPARE THE MODEL: a) Position the mesh in the Bind Pose (T-Pose): Arms out straight horizontally, fingers spread. The feet should be spread so they are under/past shoulders. Torso and head are typically upright, and limbs are mirrored. b) Locate Character Center at world center: on zero line (in Front and Side Views) to stand on 0/0/0. c) Modify > Freeze Transforms and Edit > Delete by Type > History. d) If you have not already done so, create a Display layer (bottom of Channel Box) called Char_Meshes and add your character to this layer, for easy hiding or freezing. e) Finally, in each Viewport Shading menu set the shading to X-Ray Joints, so we will be able to see the joints that we create inside the character mesh.
Rigging 1: Prepare the Mesh [1]. PREPARE THE MODEL: NOTE: To combine the two sides of the model (which should usually only be done if the unwrapping is complete): Make sure your character is front-facing and you have Modify menu > freeze transformations. If pivot is not on center line, hit [d] to move it there. Select your mesh, Edit > Duplicate Special Option box: copy (not instance) and -1 scale on the X axis (first column). Select the mesh, [shift] select the copy, hit [Combine] in the Modeling Toolkit. In the Front View, carefully select AROUND the center vertices, non-uniform scale on X-axis to push them together to make one clean center line, and then apply Edit Mesh > Mergewith a value of 0.01 to weld all those vertex pairs at once.Select the center line (or the entire model) and Mesh Display > Soften Edges.
Rigging 2a: Creating Joints [2]. CREATE JOINTS STRUCTURE: In the Animation Module, in the Skeleton menu, open the Joint Tool options. • Set joint orientation from x/y/y to x/y/z. • Create a solo joint by left-clicking in the side/front/topview and hitting [Return]. • Parent a joint by selecting the child, then [Shift]+select the intended parent, hit [p]. • Unparentby selecting just the child and hit [Shift]+[p]. • Hold [d] to move a joint without moving its children. Create 3 initial chains (see next pages), all of which will be named and connected into one basic joint system: • the leg • the torso/neck/head • the arm/finger
Rigging 2b: Leg and Torso Joint Chains (a) LEG:In the Side View: draw 5 joints for thigh, knee, ankle, ball, toe. The knee should be a bit forward to the leg is a bit bent. In the Channel box, select each and name them. In the Front View select the thigh joint and move/rotate to center it (and the leg-chain) into the character’s left leg. PLACEMENT NOTE: Limb joints (leg, arms, fingers) should be placed where the mesh is meant to bend, roughly centered inside the mesh so they grab the mesh around them equally when the mesh is “Skinned” (connected to these joints). (b) TORSO: In the Side View: draw a solo hips joint in front of thigh, hit [Enter]. Make a Root joint at waist, chain up through spine1, spine2, chest (centered between arms), neck (at neck base), head (below ear), and hat (at head mesh top). Hit [Enter] to end the chain. Select the hips joint, [Shift]+select the Root joint, and hit [p] to parent.
Rigging 2c: Arm and Hand Joint Chains, p1 (c) ARM: In the Front View: draw a chain of 10 joints: clavicle, shoulder, elbow, wrist1, wrist2, hand, and four finger joints down the middle finger: 3 knuckles and the finger tip. Top View: hold [d] to move the elbow joint back, so the arm is a bit bent, like the leg. Be sure the two wrist joints are close together and at the mesh wrist, and that the elbow is half way down the arm. (d1) HAND: In the Top View: Unparent the hand (select and hit [Shift]+[p]) duplicate the hand chain for 5 fingers ([cmd]+[d]). Rotate each hand joint to angle the fingers, hold [d] to move single joints into position. Note thumb starts behind hand joint. Select each 1st finger knuckle, unparent [Shift]+[p] and delete all but the original hand joint. Select all five finger1 knuckles, [Shift]+select remaining hand last, and [p] to parent all fingers/thumb to this hand joint. Select the hand joint and [Shift]+select wrist2 joint, [p] to parent hand to wrist2, completing the Hand Joint links. See next page for more notes. PLACEMENT NOTE: Again, limb joints (legs, arms, fingers) should be placed where the mesh is intended to bend, generally centered inside the mesh so they can grab the mesh around them equally when the mesh is “Skinned” (connected to these joints).
Rigging 2d: Arm and Hand Joint Chains, p2 (d2) TO FURTHER EXPLAIN THE HANDS: The main idea of the hand joint hierarchies is that we create the hand and middle finger joints as part of the original arm chain, then we un-parent the hand from the wrists in order to duplicate it, to get other fingers and thumb. The reason we duplicate at the hand joint and not at the first finger joints is that each of those fingers needs to be rotated, and a lot of rotation on a joint that we plan to keep (the first finger joints) causes problems to that joint (it does not actually rotate, only its children do, which leads to animation problems later). SO, we duplicate at the hand joint, rotate and move each finger using these extra hand joints, and when all fingers are correctly oriented and positioned, we select each first finger joint (except on the original, middle finger) to unparent those extra hand joints. Then we select and delete those extra hand joints. Finally, all four of the added fingers/ thumb get parented to the original hand joint, and this solo hand joint gets parented back to the wrist2 joint. DISPLAY NOTE: Are your joints too big to easily see where they are placed inside the hand? You can change their Display size under the main Display menu > Animation > Joint size. Try reducing the size to 0.2
Rigging 2e: Mirror Arms and Legs (e) ATTACH/MIRROR LIMBS, SO ALL JOINTS ARE CONNECTED: In the Front View: Select the thigh joint and Modify/ Prefix Hierarchy Names to add “L_” to all joints in the chain. Select the thigh, [Shift]+select the hips, and hit [p] to parent. Under the Skeleton menu open the Mirror Joint options: choose the YZ plane, Search for “L_”, Replace with “R_”, and hit [Apply] to mirror the leg. Do the same with the clavicle joint: Modify/ Prefix Hierarchy Names “L_”, parent to the chest, mirror the arm. When you are done, all joints should be connected in a single linked system, leading to the Root as the ultimate parent.
ANIMATION NOTES 1: BASIC JOINT RIG You now have a full basic joint rig, and you can animate it by keying and moving the root and rotating all the other joints! As usual with Maya animation, we set keys by selecting an object (a joint) and hitting [s] to Key all tracks for that joint (OR we can select the joint and then select a specific track in the Channel box and RightClick that track to choose “key selected,” but we recommend simply hitting [s]). IMPORTANT: Be sure to set a key for all joints in their initial “Bind Pose”at frame 1 (this is the pose where each joint fits neatly inside the mesh, located at world center, where you created the rig). Keyframes for actual posing and animation on the character should start at frame 10, and the film render should also start at frame 10. NOTE ON SELECTING: if you just select the Root node, the entire rig turns green as if it were selected, but in fact Maya is just showing you that all of those other joints are ultimately parented to the Root, and will move and rotate with the Root. They are not actually selected, and if you hit [S] only the Root will be keyed. To select the entire rig so all joints are actually selected and can be keyframed together, you can either [Shift]+ select each joint (they turn white as they are truly selected), OR you can type a great bit of code into the lower-left MEL bar: select -hi Select the Root, type in this code, hit [Enter]: all joints are selected, and you can hit [s] to Key them all. You can also create a custom shelf to include a button for this code or buttons with Selection sets of the joints (see page 11 or Maya Tips on our website).
Rigging 3a: Adding Controls: IK Handles (a) ADDING IK HANDLES FOR EASIER LIMB MOTION While we COULD animate with just a basic joint rig, ROTATING each joint like in a stop-motion film, it is often easier to animate hands and feet with “Put It There” functionality: IK handles to MOVE the hands and feet so the arms and legs are automatically “solved” to follow the motion. Hide the mesh display layer. In Rigging module, find Skeleton menu > Create IK Handle, open option box. Check that “Current Solver” is set to “Rotate-Plane Solver” and close. Note the “last tool” option in left-side toolbar (middle) now shows the Create IK Handle tool, so it can be easily re-applied for each of the limbs. With Create IK Handle active, click the left thigh joint and then the ankle joint to draw the IK handle. The cross-icon at the ankle can now be moved to move the entire leg! Re-click the Create IK Handle button in the toolbar, click on the left shoulder joint and then the wrist joint to do the same for an arm, and then do the same for the right-side limbs.
Rigging 3b: Adding Controls: NURBs Circles (b) ADD 5 CONTROL CIRCLES FOR EASIER ANIMATION: IK cross-handles are small and hard to select. Worse, they are not visible when the mesh is displayed, even with X-Ray joints turned on. We want a big, easy-to-grab object for those handles, and the same for the all-important Root that we will move with every motion. A solution is to make CONTROL CIRCLES. In the Curves/Surfaces shelf, create a NURBS Circle. Hit [w] for move and hold [v] for snapping, and snap that Circle to the left ankle joint. Hit [Ctrl] or [Cmd] + [d] to duplicate the Circle, and hold [v] to move-snap it to the right ankle joint. Repeat with more duplicates to snap Circles to the Root joint and each wrist1 joint, for a total of 5 Circles. Name each (CNTRL_Root, CNTRL_FootLeft, etc). Select the two Hand Control Circles, and lift them up a bit above the joints. Select the two Foot Controls and push them down to the ground. Leave the Root Control at exactly the root joint. Select all five Circles and Modify menu > Freeze Transformations in order to “zero out” their locations at Bind Pose. Finally, we parent the Root joint to the Root Control Circle and each of the IK handles to their Control Circles (select child, [Shift]+select parent, hit [p]), and now we have easy controls for those five critical points on the rig!
ANIMATION NOTES 2: 5 CONTROL CIRCLES You now have a hybrid rig with Controls and Joints, and you can animate it by keying [s] and moving the 4 Limb Control circles, Moving or Rotating the Root Control Circle, or rotating certain joints: the Body Core (hips, spine1, spine 2, chest, clavicles, neck, head), the Hands (wrist2, hand, fingers), and toes. IMPORTANT: Be sure to set a key for all 5 CONTROL CIRCLES, the CORE, FINGERS, and TOES joints in their initial “Bind Pose”at frame 1. Keyframes for actual posing and animation on the character should start at frame 10, and the film render should also start at frame 10. NOTE ON SELECTING: You no longer want to use select –hi for selecting all joints, because the arm and leg joints (shoulder, elbows, wrist1) should only be animated by the Control circles. Therefore, you will want to create Selection Sets to easily select the entire intended hybrid rig and key that specific combination of joints and controls: 1. Far left of Shelves, hit the gear icon to make a new shelf, "MyShelf." 2. Select all5 Control Circles and all 8body Core joints: Head, Neck, Clavicles (x2), Chest, Spine1, Spine2, and Hips.3. Create menu > Sets > Quick Select Set, name it "Body" and choose [Add to Shelf]. Repeat for the two hands, wrist2s, and 10 fingers in a Quick Select Setcalled "Fingers." You can now click those new shelf buttons to select the joints and then hit [s] at the frames you want to keyframe.
What about Knees & Elbows? If you use IK handles on your limbs, then you should not keyframe the shoulders, elbows, or wrist1 joints directly. All arm animation is by the IK handle (keyframes on its control circle). You may want added controls to rotate knees & elbows: Control Circles connected with Pole Vector CONSTRAINTS. A Constraint, like parenting, makes one object in control of another, but it limits that control to a specific set of parameters and is applied in reverse: Parenting: select child, [shift]+select parent, hit [p]. Constraints: select controller, select controllee, apply constraint. To add Elbow and Knee controls: • Create new NURB circles for the elbows (behind the elbows) and knees (in front of the knees). Apply Modify > Freeze Transformations. • In the Rigging module, find the Constrain menu > Pole Vector • Select the left knee control circle, [Shift]+ Select the left leg IK handle, and hit Pole Vector. You can now move the circle side-to-side in order to turn the left knee. Repeat for the other limbs. Like in the Eleven Rig, these controls are not parented to the rest of the system, and will need to be dragged along in any animation.
Rigging 4a: Facial Rigging: Mesh Targets (a). FACIAL RIGGING WITH MULTIPLE MESH “TARGETS” AND BLENDSHAPES: Facial Rigging is NOT expected for this intro course, but for those excited to try it, we recommend using BlendShapes (as opposed to rigging with clusters or more joints): 1. Break off the head: Select the Mesh of your (unskinned) character, in Face component mode select the head down to where neck meets clothing. Hit Edit Mesh menu > Detach and Mesh menu > Separate. Hit Edit > Delete by Type > History and Modify menu > Center Pivot. Name this original head mesh “Head”. 2. Duplicate the head model for the target expressions you desire. A short performance with lip sync needs at least 6 “targets”: 3 mouth phonemes for AAA, OOO, EEE, an eyes blink, and at least two big full-face emotions. 3. Adjust each target mesh by transforming components (try isolating each mesh in all views: [Ctrl] or [Cmd] + [1]). 4. Name each target: “AAA,” “Blink,” “Angry,” “Happy,” etc.
Rigging 4b: Facial Rigging: BlendShape (b). FACIAL RIGGING WITH MULTIPLE MESH “TARGETS” AND BLENDSHAPES: 3. Apply BlendShape: Select all of these adjusted “target” heads, and then [Shift]+select the original, unchanged Head mesh last. In the Rigging module, find Deform menu > Blend Shape and open options. Enter a name for the BlendShape node and hit [Create]. You can now animate sliders for each BlendShape target by keying and sliding them in the Channel Box under Head’s “Inputs,” or without even selecting Head by opening Windows menu > Animation Editors > Shape Editor. Further changes to the target meshes auto-update these sliders! IMPORTANT NOTES: To remove a Blendshape node, at frame1 set all sliders to 0 and Edit > Delete by Type > History. You can then create new targets and re-apply a BlendShape. Skinning (next slide) for the head should be applied separately from the body, and should be added AFTER any BlendShape nodes.
Rigging 5a: Skinning The Mesh (a) CONNECT THE MESH TO THE RIG WITH “SKIN”: In order for the rig to move your character model, you need to connect them with “Skinning.” In the Rigging module, find Skin menu >Bind Skin and choose the option box. Set “Max Influences” down to 3 (so a maximum of 3 joints can influence any vertex in the mesh, so the knee joints are unlikely to grab the chin vertices, etc). For very rotund characters, you may want to change the “Skinning Method” from Classic linear to Dual quaternion, but for most rigs we leave that alone. Just select the mesh, then [Shift]+ select the Root joint, and hit [Bind Skin] You can now test out the connection between the rig and the mesh by moving the Control Circles and rotating the core or hand joints to see how the mesh reacts! Note that only the joints are actually connected to the mesh, so the IK handles and Control circles can be deleted and re-created without affecting the skinning. WARNING: Be sure to hit undo [Ctrl] or [Cmd] + [z] after each move/rotation test on the joints to be sure you maintain your initial “Bind Pose”
Rigging 5b: Adjusting The Skin (b) ADJUSTING THE SKIN WITH PAINT SKIN WEIGHTS: You are not stuck with how the skin applies: The default Skin should do a decent job of deforming your mesh If you located joints where mesh is meant to bend and centered in the mesh. BUT at elbows and knees you might see a bit of “noodle arm” where creases looks more like pipe curves, and the face might deform when the head rotates. All this can be solved with Painted Skin Weights. 1. Select the mesh, find the Skin menu > Paint Skin Weights option box. Select the joint whose power over the mesh you want to adjust, like the head. We then paint on the mesh to change control for that joint. Value=1 means full control, Value=0 means no control. The head joint should have full control of the entire head mesh down to the chin (it should share the neck). Hold [b] and LeftClickDrag to increase the size of your brush.
Rigging 5c: More Skinning Notes (c) SKINNING NOTES: NOTE 1: We do not apply Skin to the hair mesh, eye spheres, teeth, etc. These should be parented directly to the head joint. The same goes with bracelets (to the wrist joints), scarves (to the neck), etc. NOTE 2: Sometimes you may need to remove and re-apply the skinning. This is pretty easy if you have maintained your “Bind Pose” by having a keyframe for that initial pose at frame 1 on all Joints and Control Circles, even if you have already created a lot of animation after frame 10: STEP 1: Move the timeslider to frame 1. If you see your bind pose, move on to step 2. Otherwise, stop and contact the teacher for help (we will fudge the rig back to a semblance of bind pose at frame 1 and then select the mesh to delete the history, thus baking that pose as the new mesh bind pose). STEP 2: Select the mesh, and in the Rigging Module, hit Skin menu > Unbind Skin to break the connection. You can now make any changes you want to the mesh or rig, and then re-Skin (select the mesh, [Shift]+select the Root node, Skin > Bind Skin).
Rigging 6: Display Layers (j) DISPLAY LAYERS: At bottom of the Channel Box find Display Layers. You will create four Display Layers for your character. These will allow you to hide or unhide parts of the rig to more easily build out all the connections.For each Display Layer, select the objects it is meant to hold, then RightClick the Display Layer to add those objects: 1. Char_Meshes:All current and future meshes including the body, eyes, hair, and separated head if you choose to use Blendshapes for facial animation. 2. Char_Joints: All joints created so far, and all future joints (Reverse Foot) and IK handles. 3. Char_Controllers: All future Control circles (rigging powerpoint #2). These are the only things in the rig meant to be animated, so all else can eventually be hidden/locked. 4. Char_BlendShapes: If you choose to use Blendshapes for facial animation, the duplicate head “Target” meshes go in this Layer.
Delete History and Saving Do NOT apply DELETE HISTORY to joints– only to meshes. To guard against crashes and loss of work, please Save and Save As a new file everyhour (so you can never lose more than an hour’s work): YourName_Character01.mb, YourName_Character02.mb, etc. Save your work to an online repository every day (Dropbox.com, Google drive) so you have a backup in case your computer fails.