Download
1 / 45
450 likes | 553 Views
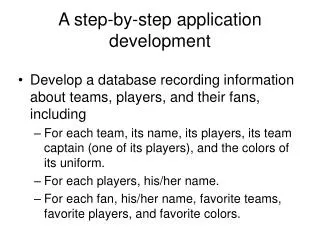
TankReporter 2.0 A Step by Step Example. Scope and Result. Step 1: Define Preferences. (Command: File → Preferences ). Define the Units of Measurements. Step 2: Define Asset (Tank). Command: File → New Asset → New Tank Critical Fields: Dimensions Tank Parts (Bottom, Shell, Roof).

E N D
TankReporter 2.0 A Step by Step Example
Step 1: Define Preferences (Command: File→ Preferences) Define the Units of Measurements
Step 2: Define Asset (Tank) • Command: File → New Asset → New Tank • Critical Fields: • Dimensions • Tank Parts (Bottom, Shell, Roof)
Step 2: Define Asset (Floor) Define Pattern and make adjustments using the Plates Layout option
Step 2: Define Asset (Shell) Define Courses information and make adjustments using the Plates Layout option
Step 2: Define Asset (Roof) Define Pattern and make adjustments using the Plates Layout option
Step 3: Define Components For example: Define Stairs either using grid or Mouse
Step 4: Define Inspection General Information Enter the General Information of the specific inspection: Inspection Start and End Date Report Preparation Date Tank Number Inspection Type Specification used Office conducting the test Client Information Override if needed the report name
Step 5: Define the General Tank Data Enter the Tank Data Most of the information are automatically imported by Asset information. Modify any secondary information here (like Coating, Manufacturer, etc.). The secondary info will be used in the report.
Step 6: Define the Shell Courses Information Define the Shell Courses Information The Geometric information are from the Asset information. Select Joint Efficiency and Course Material (or alternative define the Allowable Stress and Hydrostatic Allowable Stress). This is critical for the calculations.
Step 7: Define Inspection Equipment • Define the Equipment used in the inspection • Select from the list of Available Equipment in the database (right list) and press the symbol to add it to the Inspection Equipment used (left list). • Use filters (Equipment Type and Lab) or sort by any column in the list to easily identify the right equipment. • Use the Up / Down arrows • ( and ) • next to the list to change the order of the Inspection Equipment. This affects only the report.
Step 8: Define Inspection Personnel Define the InspectionPersonnel • Select from the list of Available Personnel in the database (right list) and press the symbol to add him to the Inspection Personnel (left list) • Use filters (Lab) or sort by any column in the list to easily identify the right person. • Use the Up / Down arrows • ( and ) • next to the list to change the order of the Inspection Personnel. This affects only the report.
Step 9: Define Job Information • Define the Job Information • Enter the PO, Work Order Number and Report Number. • This is essential for the report.
Step 10: Check the General Data • For the Forms in the Steps 5-10, there is a button “Report”. • Click it to Check the report produced for each form. • The output is identical with the respective sections of the final report.
Step 11: Enter Inspection Data Start filling the actual data. Use the command: Inspection → Inspection Data Check the check box Show General Info, if you want to consult the general information, previously entered. You do not need to entere all of the data at once.
Step 12: Import Inspection Photos Import Photos Press the + symbol and select photos from your disk. The photos will be saved in the application database. Enter Caption (for the report and add any comment)
Step 13: Generate Drawings Generate Drawings Press the + symbol and which parts and details will be added in the drawings.
Step 14: Fill the API Check Lists • Select check list (the application proposes the appropriate based on General Info) • Navigate in the different sections • Fill the condition • Write the Findings • Propose any recommendations
Step 15: Collect the Recommendations (1) • Recommendations • The application initial collects the recommendations the filled in the check lists. • Then the user could edit or enter more.
Step 16: Collect the Recommendations (2) If a specific template is used for the current client, a different form will be used
Step 17 : Inspection UT Data Input • Access the Inspection Data Input form (use Data Entry button (see step 11)) • Here the user can insert information pertaining to the Plate UT data of the Tank Shell • Each button on the right, brings up a form for • UT Data for the Tank Parts • Floor MFL Scan data • Each button on the left, brings up a form for • Tank Components (Nozzles, Manholes etc.) • UT Data for the Tank Components • Shell and Edge Settlement Data • Tank Shell Verticality Readings
Step 18 : Tank Shell Plate UT Data After the basic configuration data have been given in the previous form, enter manually the UT thickness data for each T.M.L. • The Courses are given in a top- down fashion • The individual readings per course are given in a down-top fashion • The Scan lines are considered to be CCW
Step 19 : Tank Floor Plates UT Data • Basic configuration data • Number of Readings per Plate • The UT thickness data can be entered • either Manually • or by pasting them from an Excel Spreadsheet
Step 20 : Floating Roof Plates UT Data • Basic configuration data • Number of Readings per Plate • The UT thickness data can be entered • either Manually • or by pasting them from an Excel Spreadsheet
Step 21 : Chime UT Data • Define the • Number of readings • Reference location for the readings • Offset of 1st reading from the reference • Automatic or manual spacing • Direction of readings creation • Comments • (optional) Width Data
Step 22 : Rim UT Data • Define the • Number of readings • Reference location for the readings • Offset of 1st reading from the reference • Absolute or relative distances between reading locations • Automatic or manual spacing • Direction of readings creation • Comments
Step 23 : Floor Scan Data (M.F.L.) • Magnetic Flux Leakage (M.F.L.) data for the tank floor
Step 24 : Tank Shell Appurtenances • Supply information for the Nozzles and appurtenances of the tank shell • Perform validation on the input data (UT readings for shell plates are necessary)
Step 25 : Tank Shell Appurtenances UT Data • Supply UT and other data for the nozzles and appurtenances of the tank shell • Perform validation on the input data (UT readings for shell plates are necessary)
Step 26 : Floating Roof Nozzle UT Data • Supply UT and other data for the nozzles and appurtenances of the tank floating roof
Step 27 : Shell Settlement Data • Enter data for • Reference point for the Stations location • Offset from reference for 1st station • Tank shell Material Information • Configuration data • Readings Units • Readings
Step 28 : Edge Settlement Data • Enter data for • Reference point for the Stations location • Offset from reference for 1st station • Breakover Point • Floor Cone type • Configuration data (e.g.) • Rod height • Distances from shell • Readings Units • Readings • Weld type and angle
Step 29 : Legs and Sleeves UT Data • Supply information for the Legs of the shell • Supply UT Configuration data • Supply UT data for • The Legs of the Tank • The Sleeves of the Legs
Step 30 : Calculations • API 653 Calculations • Tank Shell Tmin and Remaining Life (per course) • Fixed & Floating Roof Remaining Life (based on min UT) • Hydrostatic Test (per Course) • Tank Shell Verticality and Roundness • Tank Shell and Edge Settlement Surveys • Hydrostatic Test • External UT and Visual Inspection Intervals • MRT
Step 31 : Shell Remaining Life and Tmin • Supply the Date of the current readings • One of the two options for control parameter • Desired Remaining Life • Max Filling Height • (optional) Update Course information • Calculate
Step 32 : Floating Roof Remaining Life • Supply • Previous value for thickness • Date this value was obtained • Date the current value is taken • The minimum allowed thickness • The current thickness is the minimum from the UT readings of the roof • Calculate
Step 33 : Shell Settlement Survey • No user input is required in the form
Step 34 : Hydrostatic Test Height • Requires the course information and Tmin calculations to have been performed • No user input in the form
Step 35 : External UT Inspection Interval • Requires the Tmin calculations to have been performed • No user input in the form
Step 36 : External Visual Inspection Interval • Requires the Tmin calculations to have been performed • No user input in the form
Step 38 : Edge Settlement Survey • No user input is required in the form
Conclusion • Return to the Inspection General Information (see step 4) • Press “View Inspection Report”