Download
1 / 82
820 likes | 826 Views
Developing a Web Site. Maureen Smith Professor, Saddleback College Tutorial 2. Lesson Plan. Review How to create an Index page and FTP Tutorial 2 – Developing a Basic Web Site Session 2.1 Session 2.2 Session 2.3 Review. Session 2.1.

E N D
Developing a Web Site Maureen Smith Professor, Saddleback College Tutorial 2
Lesson Plan • Review • How to create an Index page and FTP • Tutorial 2 – Developing a Basic Web Site • Session 2.1 • Session 2.2 • Session 2.3 • Review
Session 2.1 • In this session, you will create a web site for digital photography enthusiasts
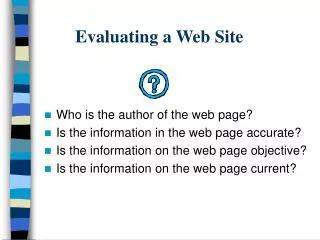
Exploring Web Site Structures • Web sites use several different structures • Examining them can help you decide how to design your own sites
Before you set up links for a site, it’s worthwhile to map out exactly how you want the pages to relate • Called storyboarding • A diagram of the site’s structure
Every Web site begins with a single home page (index.html) that acts as a focal point for the site • You add links to other pages in the site, creating the overall structure
Linear Structures • An online version of a famous play would have links between individual scenes • This would use a linear structure in which each page is linked with the pages that follow and precede it in an ordered chain
Linear works best for pages with a clearly defined order • But difficult as the chain of pages increases in length • Can modify to make it easier to return immediately to opening page, rather than backtracking, by using an augmented linear structure
Each page contains an additional link back to opening page Augmented linear structure
Hierarchical structures • A hierarchical structure starts with a general topic that includes links to more specific topics • Each specific topic includes links to yet more specialized topics, etc • Users can easily move from general to specific and back, but not from specific to specific
Mixed Structures • As a site becomes more complex, may use a combination of structures • Includes both hierarchical and linear • See Figure 2-5 • Search results can point to any page and will need a way to quickly understand what your site contains and how to get at it
So each page should contain at minimum a link to home page • May want to use a site index—a page containing an outline of entire site and its contents • See Figure 2-6 for a confusing structure
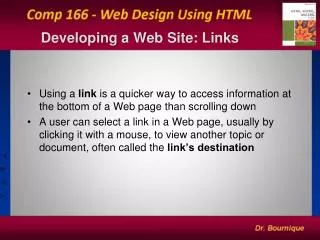
Creating a Hypertext Link • Gerry wants his site visitors to be able to move effortlessly among three documents he’s created • Need to link each page to the other two • See figure 2-8 • To create the link, enclose the content in an <a> tag and use href attribute to identify the link target
<a href=“tips.htm”>Photography tips</a> • Words will be underlined to show it is linked to another document; click the text and the browser will load the linked document (tips.htm) • Use lowercase filenames and avoid special characters like blanks and slashes
Rename the three data files as home.htm, tips.htm, and glossary.htm • These document names are already at the top of each file and you will mark them as hypertext links to each other • Let’s begin with the names in the home.htm file • See tutorial2/home1.htm, tips1.htm, and glossary1.htm
Specifying a Folder Path • So far you specified only the filename and not the location of the file • Browser will search the same folder as the document containing the hypertext link • But large sites with hundreds of documents often place them in separate folders for easier management • As we add more files, will want to use folders
Absolute Paths • The absolute path shows exactly where the file is on the computer • In HTML, you start every absolute pathname with a slash (/) • Then you type the folder names on the computer, starting with the topmost folder in the folder hierarchy and progressing through the different levels of subfolders • Separate each folder name from the next with a slash
The pathname, from left to right, leads down through the folder hierarchy to the folder that contains the file • After you type the name of the folder that contains the file, you type a final slash and then the filename • See Figure 2-12 • If on different drives, must include drive letter as well
/C|/faculty/dube/class/chem.htm • Don’t have to include drive letter if destination document is on same drive as the document containing the link
Relative Paths • If a computer has many folders and subfolders, absolute pathnames can be long, cumbersome, confusing • For that reason, most Web authors use relative pathnames in their hypertext links • A relative path gives a file’s location in relation to the current document
Unlike absolute pathnames, a relative pathname does not begin with a slash • To reference a file in a folder above the current folder in the folder hierarchy, relative pathnames use two periods (..) • To specify a different folder on same level (sibling folder), move up folder tree using double period and then down using name of sibling folder
See Figure 2-13 • Should almost always use relative paths • Are portable—if you move files to a different computer or server, can move entire folder structure without changing relative pathnames you created • If you use absolute, would have to revise each link to reflect new location
Changing the Base • The browser resolves relative pathnames by default based on location of current document • Can change by specifying a different base in document’s head • <base href=“path” /> • where path is folder location that you want browser to use Finished 2.1!
Linking to Locations within Documents • Let’s add more links to Glossary page • Contains a list of digital photography terms • Very long, lots of scrolling • Let’s use the list of letters (a to z) to jump to a specific section of the document by clicking A to Z
Using the id Attribute • To jump to a specific location within a document, first need to mark that location • One way is through the id attribute <h2 id=“H”>H</h2> • Assigns the id name “H” to the h2 heading “H” • id names MUST BE UNIQUE
If you assign same id name to several elements on the page, the browser uses the first one it finds • XHTML docs will be rejected with duplicate ids • Not case sensitive—no difference between top and TOP
With only a partial list of terms, let’s mark only sections A through F • We’ll use id names classes, grading, app, and safety • See tutorial2/glossary2.htm • For longer docs, it’s also helpful to jump directly from bottom of a long page to the top, rather than scrolling
So let’s add an id attribute marking the element at the top of the page • See tutorial2/glossary3.htm
Linking to an id • Once you’ve marked an element with an id, can create a hypertext link to that element <a href=“#id”>content</a> • Where id is the value of the id attribute of the element <a href=“#A”></a>
Use this code to change the entries on Glossary page to hypertext links pointing to the section of the glossary corresponding to the selected letter • See tutorial2/glossary4.htm
Creating Links between Documents • Let’s create links from words used in the articles to glossary entries so readers can quickly access definitions for those terms • Articles are not on the same page as his Glossary, so we need to link those pages with specific glossary entries <a href=“glossary.htm#D”>”D” terms in the Glossary</a>
This creates a link to the D section in the glossary.htm file • Assumes they are in the same folder • On the home page he wants to showcase a Photo of the Month • Includes digital camera settings used in taking the photo • Many settings are described on the Glossary page
Let’s create a link between setting name and the glossary entry • Use the id attribute • See tutorial2/glossary5.htm • Then go to the Home page and create links from these terms in the Photo of the Month description to their entries on Glossary • See tutorial2/home2.htm
Working with Linked Images and Image Maps • Standard practice to turn a site’s logo into a hypertext link pointing to the home page • Quick reference point to home page rather than searching for a link <a href=“reference”><img src=“file” alt=“text” /></a>
Introducing Image Maps • When you mark an image as a link, entire image is linked to same destination file • However, HTML also allows you to divide an image into different zones, or hotspots, each linked to a different destination • Gerry wants this with the CAMshots logo • Would also like hotspots
If user clicks anywhere within CAMshots circle on left side of logo, user jumps to Home page • Clicking either Tips or Photo Glossary in the logo takes user to Tips page or Glossary page • See Figure 24 • To define hotspots, you create an imagemap that matches specified regions of image to a specific destination
Client-Side Image Maps • Client-side image map is handled entirely by the browser on user’s computer • Defined with the map element <map id=“map” name=“map”> hotspots </map> • Where map is name of image map and hotspots are locations of hotspots within the image
Each image map has to be given an id and a name • Both are needed to satisfy HTML and XHTML; will work in all browsers • Map elements can be placed anywhere in body of page because they are not actually displayed by browser • Used as references for mapping hotspots to inline images; commonly placed below
Defining Hotspots • Individual hotspots are defined using the area element <area shape=“shape” coords=“coordinates” href=“reference” alt=“text” /> • Where shape is the shape of the hotspot region, coordinates are the list of points that define boundaries, reference is the file or location that hotspot is linked to
Hotspots can be rectangles, circles, or polygons; “rect”, “circle”, or “poly” • Fourth shape is “default” representing remaining area not covered by hotspots • No limit to number • Can overlap (browser will open the link of the first hotspot defined in map) • Hotspot coordinates are measured in pixels (dots)
When used with coords attribute, the pixel values exactly define location/size of hotspot region <area shape=“rect” coords=“x1, y1, x2, y2” … /> • Where x1, y1 are upper-left corner of the rectangle and x2, y2 are lower-right corner • Always expressed relative to top-left corner
Circular hotspots are defined as <area shape=“circle” coords=“x, y, r” … /> • Where x and y are coordinates of center of the circle and r is circle’s radius • Polygonal hotspots are defined as <area shape=“poly” coords=“x1, y1, x2, y2, x3, y3, …” …/> • Where x1, etc. are each corner of shape
With polygons you can create a wide variety of shapes as long as you know the coordinates to each corner • To define default hotspot <area shape=“default” coords=“0, 0, x, y” … /> • Where x is width of the image in pixels and y is the image’s height
Any spot in the image not covered by another hotspot will activate the default hotspot link • Use Photoshop or Paint to determine hotspot coordinates • Gerry wants an image map • See tutorial2/home3.htm That’s a lot of typing!
Now that you’ve defined the image map, next task is to apply it to the CAMshots logo
Applying an Image Map • To apply an image map to an image, add the usemap attribute to the <img> tag <img src=“file” alt=“text” usemap=“#map” /> • Where map is the id or name of the map • See tutorial2/home4.htm
Might have noticed a border was added around the image • Hypertext links are usually underlined and inline images have a lined border • If it detracts from the appearance, it can be removed style=“border-width: 0” • See tutorial2/home5.htm
Now that you have an image map for the logo on the home page, can create similar maps for logos on Tips and Glossary pages • See tutorial2/tips2.htm • See tutorial2/gloss6.htm • Use copy and paste That is so cool!!!