Download
1 / 39
390 likes | 401 Views
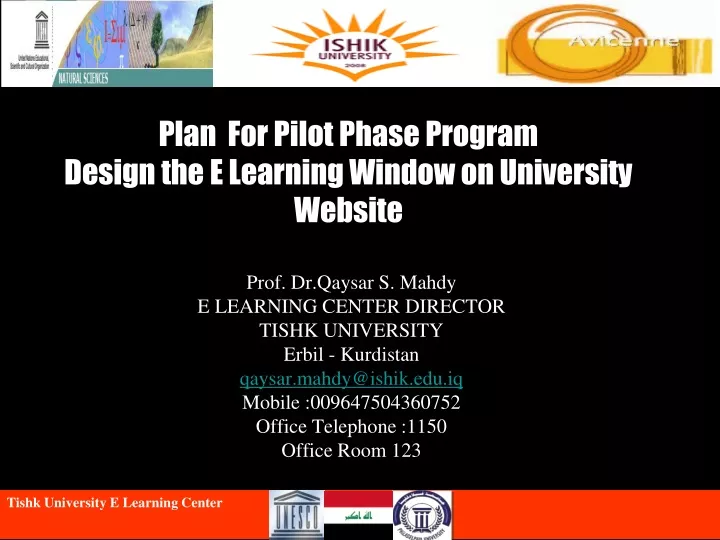
Tishk University E Learning Center. Plan For Pilot Phase Program Design the E Learning Window on University Website. Prof. Dr.Qaysar S. Mahdy E LEARNING CENTER DIRECTOR TISHK UNIVERSITY Erbil - Kurdistan qaysar.mahdy@ishik.edu.iq Mobile :009647504360752 Office Telephone :1150

E N D
Tishk University E Learning Center Plan For Pilot Phase ProgramDesign the E Learning Window on University Website Prof. Dr.Qaysar S. Mahdy E LEARNING CENTER DIRECTOR TISHK UNIVERSITY Erbil - Kurdistan qaysar.mahdy@ishik.edu.iq Mobile :009647504360752 Office Telephone :1150 Office Room 123
Outline • In this presentation we will discuss our plan to activate the E Learning process in all university departments in the following topics ; • 1. The university president vision and headlines to activate the E learning process in our university . • 2. The Window for Electronic Learning (E Learning) . • 3.Assigning Plan for Video Lecture Production . • 4. Training &Requirements for the Production process of the video lecture. • 5. Procedure of producing the video lecture according to the UNESCO standards . • 6.Hybrid process of E Lecture with the traditional lecture on the university website . • 7.Design the Moodle on our university website to upload and present the produced E lecture on the university website . • 8.Future plan. • 9.Discussion .
2. The Window For Electronic Learning ( E Learning ) In order to launch the video lectures we have designed the Moodle platform on our university website. This window will be available to all our academic staff and students to upload and download their video lectures.
3.Assigning Plan for Video Lecture Production . • Hybrid Course production , this plan will be supporting lectures to our students and it will not substitute the traditional lecture . • It will be available on the university website and the lecturer and students will have admin access to these supporting lectures. e lecture for his course .
3.1. Assigning one subject from each department. • The department is requested to assign one lecturer and coordinate with the E learning team members in each which are certified by Salahaddin E Learning center department.
E Learning Team Members For example we will inform the heads of departments about the E Learning expert in his department as follows ; • 1. Dr. Hamdi Serin Education Faculty, • 2.Mamosta Bilal Ahmed Faculty of Eng. / IT depart. • 3.Mamosta Musa M.Ameen Faculty of Engineering / Computer Eng. depart. Apologized. We need to substitute . • 3. Mamosta Aws Yahya Faculty of Business. • 4. Mamosta Hogar Haydar Law Department. • 5. Dr. Muhammed Aziz Faculty of Dentistry ,Apologized We need to substitute . • 6. Mr. Omar Ismail Moodle & Data Base developer ,IT Services Depart., • 7. Eng. Halal Abdulrahman , Moodle & Data Base developer , IT services Depart. • 8. Eng. Yasar Yilmaz , Network Expert , IT Services Depart. • 9. Eng. Usman Eschanove studio expert , IT Services Depart. • 10. Eng. Karzan Abdulmajeed Technical expert , IT Services Depart. • 11. Eng. Kewan H. Taher , Technical expert , IT Services Depart.
Production Plan of Video Lectures • Planning to launch 200 e- lecture on the university website. • Assigning one e lecturer for the assigned subject. • Each lecturer from each department and from each level produce one video lecture. • We have 22 departments , each department assign one lecturer from each level to produce one video lecture for each level. • Number of levels from 4-5 levels • Faculty of Dentistry and Pharmacy and Architecture Eng. Has 5 levels . i.e. 15 levels • Other 19 departments each has 4 levels , 76 levels . • Total number of levels 81 levels. • This means 81 video lectures as a first shot and so on.
4. Training &Requirements for the Production process of the video lecture. • Temporary Training requirements ; • 1. Computer lab available in Computer Eng. Depart. • 2.22 Pcs or Laptop , • 3.22 Webcam good quality to be installed with the Pcs, • 4.Installing Windows Media Encoder in each Pc or Laptop, • 5. Record narration for slides recording ,
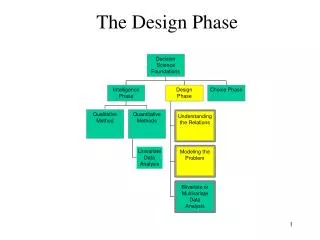
Procedure of producing the video lecture according to the UNESCO standards . • The procedure has the following steps ; • Open Image Folder , • Open Audio folder , • Open Video folder, • Open Timesheet folder .
Record the power point lecture slides • 1. Each lecturer prepare his power point lecture slides from 15-20 slides in very good design , clear words with suitable size , with colors , without copy past writing , • 2.Arrange the time for each slide presentation with clear voice understandable wording , quite and not rapid , • 3. Open the main bar of Microsoft power point ,
4. Training &Requirements for the Production process of the video lecture. For temporary requirements, we need the following ; • Computer lab with 22 desktops which is available in computer engineering depart., with Microsoft power points, • Twenty small Web Camera , • Developed professional Camera. • Software Windows Media Convertors, • Each lecturer prepare the 15-20 sides power point lecture to record his video lecture.
5. Procedure of producing the video lecture according to the UNESCO standards . In order to produce very modern video lecture according to the UNESCO & Bologna standards and accreditation . • Each video lecture time must be no more than 20 minutes. • Number of the PP slides must be from 11-15 according to the content of each slide.
The Five Steps Leading to the Creation Of aThe Five Steps Leading to the Creation Of a Multimedia Sequence with TIMESHEET SMILE TECHNOLOGY • 1st Step: Preparing of the documents • Create a folder “ TIMESHEET SEQUENCE ” containing the following: • Your audio/video file, • Your audio file (extracted from the audio-video file), • The PowerPoint file, • The logo (Background Ishik University Logo ), • All documents to be created together according to software program which is called • TIMESHEET SMILE TECHNOLOGY .afterwards.
2nd Step: Creating PNG Slides by Using Slide Show of the Power Point Menu Bar • Create the PNG slides (from the PPT file) as follows. • Open the PPT file and choose the Slideshow button ; • Right click the Slideshow and choose the start record narration to register the time of each PNG slide. • The PNG slides will be saved in a folder having the same name as the PPT file (without the PPT extension).
3rd Step: Creation of the Video Folder by Using the Windows Media Encoder • Start the WME to open new video folder by webm format , (give it a name). • Adjust the Camera and time in order to register the video and audio in synchronization with the registration of each slide. • Save the produced film in webm format with its name. • Convert the ppts slides into image format by using the record narration in slideshow window ).
4th Step - Creation of a Multimedia sequence by using TIMESHEET TECHNOLOGY • Choose the model ‘TIMESHEET technology ’, • Drag and drop the 1st slide, • Click on Add and drag and drop the second slide and so on till the last slide, • Save the document, • Close the document.
4th Step - Creation of a Multimedia sequence by using TIMESHEET TECHNOLOGY • Convert the video file into a new video files in three formats ogv , ogg, ,. • Open anew folder with a name Video folder to collect the thee video files. • Convert the audio files into the new formats . • Open the audio folder and put the audio files into it. • Convert the PNG slides into Image file and collect the PNG slides in one folder with a name IMAGE folder, • Open the Timeline folder which calculates the beginning and ending of each slide’
5th Step – Exporting of a Multimedia sequence to the SMILE & TIMESHEET TECHNOLOGY • Open new TIMESHEET sequence and put the video folder , the Image folder , Audio folder , and timeline folder into it. • Insert the video files , audio files , Timeline ,and Image files titles into the TIMESHEET & SMILE program .
5th Step – Exporting of a Multimedia sequence to the SMILE & TIMESHEET TECHNOLOGY • Modify the program file by inserting the title of each slide, • Insert the time line of each slide of the sequence, • Insert the PNG slides as image, with the new formats files • Insert the video files titles in three formats , ogv, webm and wmv. • Modify the Timleshhet.smile file by the time of each PNG slide. • Insert the audio files formats , m4a,mp3 and ogg . • Save the modified file in the course folder .
Avicenna Virtual Campus in Iraq Software and tools installation (Timesheet ] • Install RealPlayer • Install Real Producer • Install Windows Media Encoder • Install Video converter • Install Audio converter • Install iTunes for QuickTime supporting • Install Java TM Media Framework • Install Timesheet • Install SMILE
Avicenna Virtual Campus in Iraq Creation of a Multimedia Slide Presentation using “New Slide Show” A) Timing • Execute PowerPoint • Go to Windows Media Encoder • Execute the video • Click on “verification…” • Save the slides with the timing
Avicenna Virtual Campus in Iraq Creation of a Multimedia Slide Presentation using “New Slide Show” (cont) B) Creating the presentation • Execute Windows Media Encoder • In the File Menu, of the power point , open New Slide Show • Choose a title for the slide show • Open your video by executing the Windows Media Encoder • Using the URL import your slides • Click on start production of the WME • Execute in playback to check the video and audio.
Creation of a Multimedia Slide Presentation using “New Slide Show” (cont-2) C) Inserting the Logo • Opening the .smil file with Timesheet. • Right_click the root-layout and select “add after", then select region, then select “all allowed attributes". • Select the id attribute and give it a value (ex: region 1).
6.Hybrid process of E Lecture with the traditional lecture on the university website . • Our plan is to upload the video lectures on the main university website in hybrid mode with the actual lecture as a supporting lecture and will not be instead of the actual lecture . • Therefor we will offer additional details about his course,
7.Design the Moodle on our university website to upload and present the produced E lecture on the university website . • We have designed the Moodle platform and Electronic window on the main website in order to give the students the possibility to read , study his lecture on line any time and every where. • We will present some video lecture which are published and recorded in E Learning center of Salahaddin university. • The Moodle platform will give the possibility for our lecturers and students to upload and download their courses.
8.Future plan. Our future plan will consist the following activity ; Complete the Moodle for all our departments and faculties, Installing the E studio , Training our academic staff on how to produce their courses by themselves, Training our lecturers on how to produce their e Quiz and E assessment for their course, Publish their courses on the main website .
Avicenna Virtual Campus in Iraq THANK YOU FOR YOUR KIND ATTENTION