Download
1 / 40
430 likes | 2.02k Views
Chapter 10. Orthogonal Projection and Multiview Representation. Objectives. Discuss the principles of orthogonal projection Show how orthogonal projection is used to create multiple views of an object for formal engineering drawing. Objectives (cont’d.).

E N D
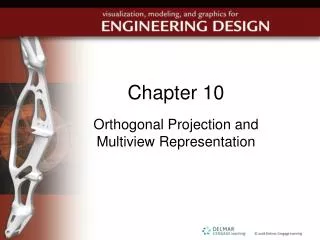
Chapter 10 Orthogonal Projection and Multiview Representation
Objectives • Discuss the principles of orthogonal projection • Show how orthogonal projection is used to create multiple views of an object for formal engineering drawing
Objectives (cont’d.) • Explain why orthogonal projection is necessary to represent objects in formal engineering drawing • Create a multiview drawing from a 3-D object
Introduction • Best way to communicate appearance of an object is to show its image • Images in engineering drawings must be interpreted the same way • Enough views must be provided so that all features can be clearly seen and accurately measured
A More Precise Way to Communicate Your Ideas • Products must be represented so that there is no misinterpretation • How would you communicate what you want built to those who build it? • How would you ensure that different people interpret and build the product the same way every time?
Problems with Pictorials FIGURE 10.03. Distortion of internal lengths in pictorials. These different lengths on the same object represent the same length, which is the diameter of the holes in the cube. FIGURE 10.02. Distortion of true lengths and angles in pictorial presentations.
Viewing Planes • When you visualize an object, its appearance changes based on viewing direction • Viewing plane is transparent plane fixed in space between you and the object • 2-D image of 3-D object • Depends on viewing angle
Orthogonal Projection FIGURE 10.04. Using orthogonal projection to create an image of an object on a viewing plane. The object in (a) is in front of the viewing plane. The object in (b) is behind the viewing plane. In either case, the projection lines are perpendicular to the viewing plane, as shown in (c).
A Distorted Reality FIGURE 10.06. The top photograph was taken from up close. The bottom photo was taken from a long distance and enlarged so feature sizes could be compared. Can you see the lack of perspective in the long-distance photo?
Choice of Viewing Planes FIGURE 10.08. A single view of a part may have many different Interpretations.
Choice of Viewing Planes (cont’d.) FIGURE 10.09. Two viewing planes that are orthogonal to the first (front) viewing plane (a) can be unfolded (b) to present the images on a single plane (c). The imaginary hinges for the two viewing planes are at the intersections of these planes with the front viewing plane.
Size and Alignment FIGURE 10.10. Viewing planes completely unfolded showing proper size, location, and orientation of the images on a single plane.
The Glass Box FIGURE 10.11. Viewing an engineered part through a glass box (a) that opens (b) to present the images on a single plane (c).
Standard Views • Six standard views (six principal views) • Front • Top • Left side • Right side • Rear • Bottom
The Preferred Configuration FIGURE 10.13. The preferred presentation configuration showing the front, top, and right-side views of an object. Other views are added only when necessary to show features that cannot be defined in the preferred configuration.
The Necessary Details • Hidden lines and centerlines • Hidden lines are obscured features or edges • Denoted as equally spaced dashed lines • Centerlines identify centers of circular holes • Centermarks are end views of centerlines • Identified by right-angle cross
The Necessary Views FIGURE 10.16. For a part with a constant but significant thickness, including a second view is a good idea to emphasize the 3-D nature of the part.
The Necessary Views (cont’d.) FIGURE 10.17. Different interpretations of a drawing with two views. A third view is necessary.
Hidden Lines versus More Views FIGURE 10.20. Hidden and internal features on a part. Using hidden lines makes the left side and bottom views optional.
Hidden Lines versus More Views (cont’d.) FIGURE 10.22. Overuse of hidden lines causes confusion. Exercise judgment. It might be better to create another view, such as a rear view in this case.
First-Angle Projection versus Third-Angle Projection FIGURE 10.23. Viewing an object in front of opaque panels for first-angle projection. The images are projected onto the panels (a), which open (b) to present the images on a single plane (c).
First-Angle Projection versus Third-Angle Projection (cont’d.) FIGURE 10.24. The six standard views, using first-angle projection, presented on a single sheet.
First-Angle Projection versus Third-Angle Projection (cont’d.) FIGURE 10.25. Drawing interpretation using first-angle or third-angle projection may lead to different parts.
Strategies for Creating Multiviews from Pictorials • Step 1: On pictorial, specify viewing directions and create a sheet with areas reserved for appropriate orthogonal views • Step 2: Find the maximum size of the object in each of the three directions and in each view, sketch the limits of a rectilinear box
Point Tracking • Step 3: Define an anchor point • Step 4: Locate a vertex adjacent to the anchor point and draw that edge • Step 5: Successively locate other vertices and draw the edges between those vertices • Step 6: Convert hidden lines
Point Tracking (cont’d.) • Step 7: Add internal features • Step 8: Check model validity
Edge Tracking • Step 3: Define an anchor edge • Step 4: Locate an edge adjacent to the anchor point, and draw that edge • Step 5: Successively locate other adjacent edges • Steps 1, 2, 6, 7, 8 same as point tracking
Surface Tracking • Step 3: Define an anchor surface • Step 4: Locate a surface adjacent to the anchor surface and draw its boundary • Step 5: Successively locate other adjacent surfaces and draw those boundaries • Steps 1, 2, 6, 7, 8 same as point and edge tracking
Surface Tracking (cont’d.) FIGURE 10.54. Considering the existence of oblique surfaces, how would you create a multiview drawing of this object?
Surface Tracking (cont’d.) FIGURE 10.55. Define the foundation space, viewing directions, and anchor surface.
Surface Tracking (cont’d.) FIGURE 10.56. Continue the process of surface location for the noninclined surfaces. Since the oblique surfaces do not intersect, their boundaries are automatically formed by the normal surfaces.
Breaking the Rules—and Why It Is Good to Break Them Sometimes • Threaded parts FIGURE 10.66. The schematic representation of an externally threaded part. The note specifies the metric size of the thread.
Features with Small Radii FIGURE 10.68. The representation of small radii on a part.
Small Cutouts on Curved Surfaces FIGURE 10.69. The true projection and an acceptable shortcut for small holes and slots on a curved surface. The shortcuts should not be used for large holes and slots because the geometric inaccuracies would be too obvious.
Small Intersections with Curved Surfaces FIGURE 10.70. The true projection and an acceptable shortcut for small protrusions from a curved surface. The shortcuts should not be used for large protrusions because the geometric inaccuracies would be too obvious.
Symmetrical Features FIGURE 10.71. The true projection and an acceptable shortcut for an object with prominent symmetry. This property is emphasized by the use of a projected view that is modified to appear symmetrical.
Representation of Welds FIGURE 10.72. The acceptable presentation of two parts that are welded together to make a single part. The note specifies the size and location of the welds.
When Six Views Are Not Enough • Features at odd angles • Internal features FIGURE 10.98. An object such as this one cannot be fully described by the six standard views. FIGURE 10.99. An object with internal features such as this one cannot be fully described by the six standard views.
Considerations for 3-D Modeling • Pictorials and multiview drawings easily created from solids model • Advantage: speed and accuracy in creating orthogonal views • Disadvantage: dependence on software
Summary • Introduced orthogonal projection and the use of the standard views of an object • Discussed the rules for view creation, orientation, scale, and alignment • Used hidden lines for additional emphasis of certain features on the object • Used extra views as necessary for completing description of features