Download
1 / 65
650 likes | 737 Views
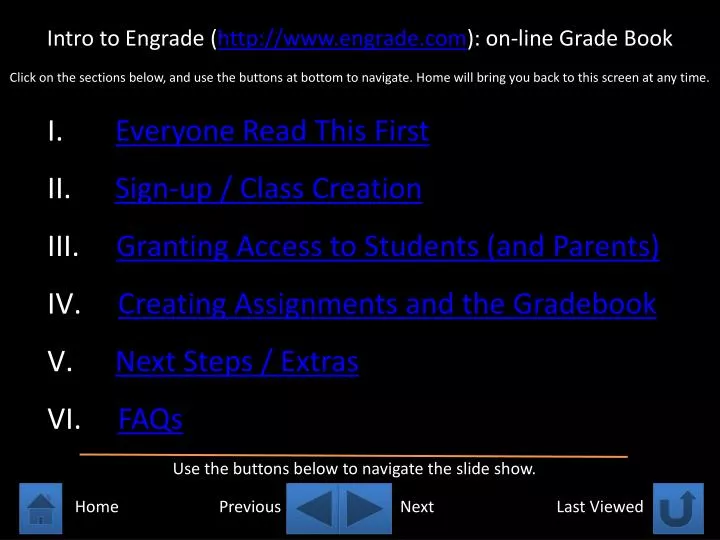
Intro to Engrade ( http://www.engrade.com ): on-line Grade Book. Click on the sections below, and use the buttons at bottom to navigate. Home will bring you back to this screen at any time. Everyone Read This First Sign-up / Class Creation Granting Access to Students (and Parents)

E N D
Intro to Engrade(http://www.engrade.com): on-line Grade Book Click on the sections below, and use the buttons at bottom to navigate. Home will bring you back to this screen at any time. Everyone Read This First Sign-up / Class Creation Granting Access to Students (and Parents) Creating Assignments and the Gradebook Next Steps / Extras FAQs
Everyone Read This First • Engrade is an easy site to begin using, to navigate, and to use. • If you’re comfortable doing so, go to the website, sign-up, and explore on your own. • If you want to experiment before signing up, I have created a dummy account for people to use: • username = whstest; password = whstest • I might suggest using your name when you create a class in the dummy account to keep it / them separate from other teachers’: DeH Latin 1 • I might also suggest bringing your laptop to a computer lab to have the tutorial next to you while experimenting (or use command-tab to toggle between applications) • Navigating the PowerPoint: • You can use the mouse or arrow keys to scroll directly through. • You can use the Table of Contents to browse. • If you get lost / something unexpected happens, hit Last Viewed or Home to start over / try again.
Sign-up & Class Creation • First, you need to make an account. • Remember, you can use the dummy account to explore a bit first if you want (username = whstest; password = whstest) • Second, you’ll create classes. • Third, you’ll populate those classes.
This is the name that will appear to students, so I made this Mr. D rather than Ed DeHoratius
Grading Period is equivalent to our 1st, 2nd, 3rd, 4thquarters. You’ll set this at quarter 1 at first, and then make a new one for quarters 2, 3, and 4 (minus most of these additional steps). Grade Level and Subject Area don’t seem to dictate or change anything, so leave blank if you want. I have one mixed class, so I don’t set anything for that class.
This is the default grade scale; all WHS teachers will change this to our agreed upon scale. This is not where you set the grading criteria for your class but only where you set Engrade’s reference point for converting number grades to letter grades. Use this button to add seven rows; there are 12 rows to our scale.
Here are the seven added rows. Now tab through each blank to change the # ranges and letters. Use assignment categories to set different criteria for different categories, e.g. you might want to drop the lowest quiz grade but not the lowest test grade, so you’d make (on a different screen or below) a category for quizzes and a category for tests.
If you use weighted grades, click ‘Yes’ here (more on that later). Setting Assignment Categories does not necessarily mean weighted grades; I use categories with points. It merely sets different criteria for those different categories.
This is what weighted grades would look like (note the ‘Yes’ is checked). You can still set different criteria (HW & Quizzes drop one but Tests do not), but you can weigh each category as well. Scroll Down when Finished.
This is perhaps your most important decision; it determines how decimals are handled. I would recommend either nearest whole or down or up to next. Part of your decision, though, will be impacted by the next menu (next slide).
This menu determines whether students see both their letter grade and their percentage (Yes), or just their letter grade (No). If you choose No here, you have a bit more flexibility in the Rounding menu (i.e. setting rounding to the nearest half wouldn’t show a student that she has an 89.5; it would only show that she has a B+). I don’t know whether teachers can see the percentages if students don’t (if this is set to No).
Enter students in this format: FirstNameLastName ID# [ID#is a # that you assign them]. • I use students’ WHS ID for their ID# here (I pull it from iPass). • The ID# will be used in conjunction with your username and a random code that Engrade generates to give students (and others) access.
Granting Access to Students (and Parents) • Engrade allows students (and parents) to see their grades in real time. • They gain access to their grades by a combination of… • …their own account and… • [You have no control over this account; they set the username and password themselves.] • …an access code provided by you. • Parents gain access similarly. • I will explain the process to parents at parents’ night and suggest that they ask their students for their log in information. • If for some reason the parent can’t get it, I say they can email me for the access code. I’ve never had a parent email me for the access code. • The distribution of the access codes is the most annoying part of the process; I’ve not found an easy way to do this (so bring the suggestions on).
From the Options menu, click on ‘Manage Students’. • On that screen, you’ll use the Options menu as well (see next slide).
Print Flyers prints a list of students and their access codes for physical distribution. The problem? Flyers refers to thin strips of paper that are easily lost. Send Email Invitations asks for students to input their email address (and I would have students do this at my computer during the first day of class), and sends them an invitation to join Engrade and that includes their access code. I’ve never done this, but it seems the most efficient way to distribute codes, and I will probably do it this year. Parents gain access in the same way: they make their own account and use their student’s access code to access their student’s grades. (Distribution of codes to parents I would assume would have to happen via email.)
This takes you back to the screen where you input students’ names & IDs. Use this screen to edit your gradebook, i.e. deleting a student who has dropped from your class, or adding a student. You can’t change a student’s ID# (and it will warn you of this) or any grades prior to the change will be lost (because they are associated with the old ID#).
This is what the Print Flyers flyer looks like (cut along the dotted lines when printed).
This is what the student will see once they’ve logged in and accessed the class with their code. All classes that they access with different codes will appear here.
This is what the teacher will see. You can see that Ed has logged in to the course, but the others have not.
Creating Assignments & the Gradebook Click here to access your gradebook.
This is what your gradebook with no assignments will look like. • Click on ‘New Assignment’ to create an assignment.
4 assignments total: 1 ungraded, 3graded. • M = missing; counts in the grade as a 0. • E = excused; doesn’t count in the grade. • [blank] doesn’t count in the grade.
With only 2 grades, Ed’s M (and Pat’s 8.5 and Scott’s 9) don’t impact the grade because they are designated as quizzes and we set the quiz category to drop the lowest grade. • If they were tests, then both grades would impact the final grade because we set tests to not drop the lowest grade.
With the third grade in the mix, however, one of Ed’s two M’s is dropped but the other, counted as a 0, impacts his grade, as are impacted Pat’s and Scott’s grades. • Allyson, however, because she has an E, only has two grades that count, one of which drops, and so her grade remains the 100 (Pat’s does because his 8.5 drops and the other two grades are 10/10).
What the students sees when they log on: just the current grade. • (And other courses with the current grade would be listed here as well.) • Clicking on a course name brings the student to an assignment-by-assignment view (next slide).
This is the gradebook Options menu, used with a real class of mine so that there are more assignments to see.
This is the Timeline, a chronological view of assignments and grades with grades color coded by success (or lack thereof).
This is the classwide distribution, i.e. the grade distribution for the current grades of each student in the class.
This is the Print Student Reports screen. • Each of these prints on a separate page. • I use a screen shot tool to capture the report, paste that image into Word, and write comments below.
This is the Print Missing Report. It will only include assignments designated by an M. • Blank assignments are not considered missing.
This is the Print Blank Grid screen (with names, of course, to the left of the ID numbers).
Next Steps / Extras • Engrade includes other functionalities as well (though I’ve not used many of them): • Quizzes • Attendance • Discipline • Calendar
These are the 3 assignments already entered. Engrade automatically adds assignments to the calendar.
A Calendar Event is a non-assignment (e.g. Review in Class). • Assignment will take you to the New Assignment screen that we looked at before. • Any new assignment will be added to the calendar, whether made here or via the Gradebook.
Review Session is a Calendar Event; Test is an Assignment (note the different icons next to them.