Download

1 / 15
150 likes | 269 Views
Presenting with Prezi.com: Using Mind Maps for Virtual Lectures. James Falkofske St. Cloud Technical and Community College, MN www.PedagogyOnline.com. The Problems with PowerPoint. 6x6 format “does not cut it” online Not event context Not enough narrative

E N D
Presenting with Prezi.com: Using Mind Maps for Virtual Lectures James Falkofske St. Cloud Technical and Community College, MN www.PedagogyOnline.com
The Problems with PowerPoint • 6x6 format “does not cut it” online • Not event context • Not enough narrative • Difficult to show relationships of ideas • Click, clickity-click, click, click… “I’m DONE!”
What is Prezi.com? • FREE (emails with a .edu get 500MB online storage) • Online Web 2.0 • Animated • Mind-map organized • Allows seamless navigation “big picture” to “tiny detail”
Benefits • Visually stimulating • Has the potential to put all the content of a module on 1-page • Easy to build (students can develop projects too!) • Easy to distribute (just a simple link or embed) • Can be downloaded (persistent object)
Demonstrations – Feel free to explore • http://prezi.com/nl9dljup4tmm • http://prezi.com/at49xbv3aidh/podcasting/ • http://prezi.com/6tbf1-deb_dj/building-online-training-with-adobe-presenter-and-adobe-captivate/
Zebra Extra • Clicking the + button opens additional options. • Easily resize and move groups of objects by using the SHIFT key to select more items. • Push items forward and backward (can create very complex shapes from shape elements. • Duplicate to create extra “same sized” items for edit.
Choose Sharing Model • Viewable by: • Public & allow copy • Public • Private • Invite Editors…
FIRE IT UP! • You will need an email address with .edu • www.Prezi.com • Email address IS your Username • (when your school email domain changes… it is PAINFUL!)
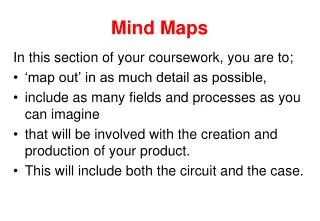
Design Recommendations • LAYOUT is important! • Outline your ideas graphically • Create relationships spatially (closely-related ideas = closer proximity) • Size provide “relative importance” • Hiding the details (hide text inside of text) helps clean the interface • Group frame sets of elements (helps to “create a picture” for viewers) • Group-frame images (to avoid pixelation) • Don’t make people dizzy
Design Tips • Write everything in Word – then Cut & Paste • Create some frames (containers) to figure out positioning • Figure out items which should have same relative size and tilt, set zoom view to that proportion, and enter all text-boxes at same time(avoids lots of “resizing” time) • Pre-size graphics (conserve your 500MB) • Gather all text and graphics files in same directory • Path to “container views” then zoom to elements (path forces “just that item” to fill the screen)
Media? • Audio embed through YouTube (with Closed Captions) • or add your transcript adjacent to Audio/Video • Links to YouTube videos through hyperlinks (in text-edit box)
Make it “All Yours” • Text • Pictures and graphics • Videos
Converting PowerPoint to Prezi – Tips • Save As >> Outline / RTF (easier to edit text) • On images – Right-Mouse-Click >> Save As Picture (filename appropriately)