Download
1 / 26
290 likes | 456 Views
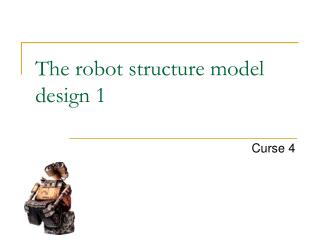
The robot structure model design 2. Curse 5. Ac. Tk. Tr. MSt. Modeling: the robot. q(t). T(t). (t). x(t). V(t). Agenda. Building the model with SimMechanics What is SimMechanics Modeling Mechanical Systems Simulating and Analyzing Mechanical Motion

E N D
Ac Tk Tr MSt Modeling: the robot q(t) T(t) (t) x(t) V(t)
Agenda • Building the model with SimMechanics • What is SimMechanics • Modeling Mechanical Systems • Simulating and Analyzing Mechanical Motion • Essential Steps to Build a Model • Example • Example1 • Example2 • Example3
What is SimMechanics • SimMechanics software is a block diagram modeling environment for the engineering design and simulation of rigid multibody machines and their motions, using the standard Newtonian dynamics of forces and torques.
Modeling Mechanical Systems 1. Specify body inertial properties, degrees of freedom, and constraints, along with coordinate systems attached to bodies to measure motions and forces. 2. Set up sensors to record motions and forces, as well as actuators and force elements to initiate motions and apply forces, including continuous and discontinuous friction. 3. Start the simulation, calling the Simulink solvers to find the motions of the system, while maintaining any imposed constraints. You can also generate, compile, and run generated code versions of your models. 4. Visualize the machine while building the model and animate the simulation while running it, using the SimMechanics visualization window.
Simulating and Analyzing Mechanical Motion • SimMechanics software provides four modes for analyzing the mechanical systems you simulate: Forward Dynamics, Trimming, Inverse Dynamics, and Kinematics. • You can also convert any mechanical model, in any mode, to a portable, generated code version.
Forward Dynamic • In the Forward Dynamics mode, a SimMechanics simulation uses the Simulinksuite of ordinary differential equation (ODE) solvers to solve Newton’s equations, integrating applied forces/torques and obtaining the resulting motions. • The ODE solvers project the motion of the DoFsonto the mathematical manifold of the kinematic constraints and yield the forces/torques of constraint acting within the system. T q
Trimming • The Trimming mode allows you to use the Simulinktrimming features to search for steady or equilibrium states in mechanical motion. • These states, once found, are the starting point for linearization analysis T T
Linearization • You can use the Simulink linearization tools to linearizethe forward motion of a system and obtain its response to small perturbations in forces/torques, constraints, and initial conditions.
Inverse Dynamic • A SimMechanics simulation can solve the reverse of the forward dynamics problem, determining the forces/torques needed to produce a given set of motions that you apply to the system. q T
Code Generating • SimMechanics software is compatible with Simulink Acceleration modes,Real-Time Workshop® and xPC Target™ software. • They let you generate code versions of the models you create originally in Simulink with block diagrams, enhancing simulation speed and model portability.
Essential Steps to Build a Model 1. Select Ground, Body, and Joint blocks. From the Bodies and Joints libraries, drag and drop the Body and Joint blocks needed to represent your machine, including a Machine Environment block and at least one Ground block, into a Simulink model window. • The Machine Environment block represents your machine’s mechanical settings. • Ground blocks represent immobile ground points at rest in absolute (inertial) space. • Body blocks represent rigid bodies. • Joint blocks represent relative motions between the Body blocks to which they are connected.
Essential Steps to Build a Model 2. Position and connect blocks. Place Joint and Body blocks in proper relative position in the model window and connect them in the proper order. The essential result of this step is creation of a valid tree block diagram made of Machine Env — Ground — Joint — Body — Joint — Body — ... — Body • With an open or closed topology and where at least one of the bodies is a Ground block. Connect exactly one environment block to a Ground. • A Body can have more than two Joints attached
Essential Steps to Build a Model 3. Configure Body blocks. Click the Body blocks to open their dialog boxes; specify their mass properties (masses and moments of inertia), then position and orient the Bodies and Grounds relative to the World coordinate system (CS) or to other CSs. You set up Body CSs here.
Essential Steps to Build a Model 4. Configure Joint blocks. Click each of the Joint blocks to open its dialog box and set translation and rotation axes and spherical pivot points.
Essential Steps to Build a Model 5. Select, connect, and configure Constraint and Driver blocks. From the Constraints & Drivers library, drag, drop, and connect Constraint and Driver blocks in between pairs of Body blocks. Open and configure each • Constraint/Driver’s dialog box to restrict or drive the relative motion between the two respective bodies of each constrained/driven pair.
Essential Steps to Build a Model 6. Select, connect, and configure Actuator and Sensor blocks. From the Sensors & Actuators library, drag and drop the Actuator and Sensor blocks that you need to impart and sense motion. Reconfigure Body, Joint, and Constraint/Driver blocks to accept Sensor and Actuator connections. Connect Sensor and Actuator blocks. Specify control signals (applied forces/torques or motions) through Actuators and measure motions through Sensors. • Actuator and Sensor blocks connect SimMechanics blocks to normal Simulinkblocks