Download
1 / 31
310 likes | 431 Views
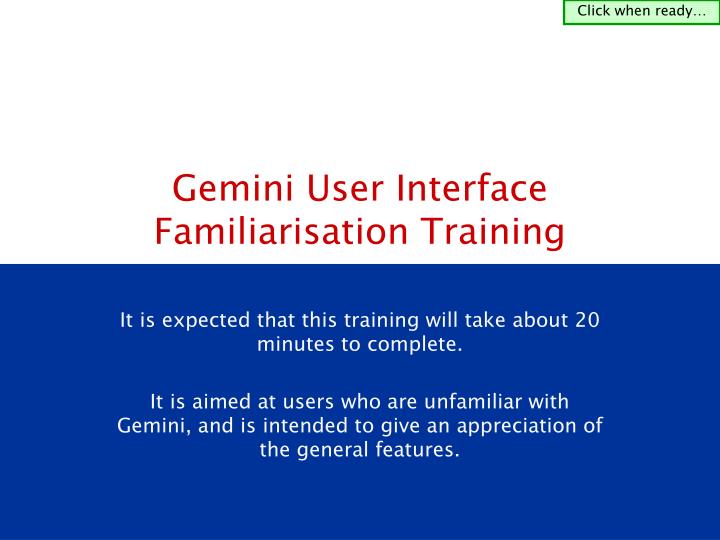
Click when ready…. Gemini User Interface Familiarisation Training. It is expected that this training will take about 20 minutes to complete. It is aimed at users who are unfamiliar with Gemini, and is intended to give an appreciation of the general features. Please wait…. Click when ready….

E N D
Click when ready… Gemini User Interface Familiarisation Training It is expected that this training will take about 20 minutes to complete. It is aimed at users who are unfamiliar with Gemini, and is intended to give an appreciation of the general features.
Please wait… Click when ready… How to Use this Training • This package has been put together in a simple presentation style format, for you to go through at your own pace. • An area in the top right of every page will tell you whether to “wait” for the slide to finish building, or to “click when ready” to advance the slide when you are ready to proceed. • It’s that simple! So, please click to start the presentation.
Please wait… Click when ready… Accessing the system • External users access Gemini via Citrix. • Open an instance of Internet Explorer and enter the URL. • The Citrix log on screen will be displayed.
Please wait… Click when ready… Citrix Log In Enter your Username here. Enter your Password here. Click on the Log In button
Please wait… Click when ready… Gemini Icon • A list of applications available to you will be displayed. Click on the Gemini icon.
Please wait… Click when ready… Gemini Log In Screen • The Gemini Log In screen will be displayed. Enter your User ID in here. Enter your Password here, as with most systems, each character you enter will be represented by an asterix *. If you want to change your password, click this before entering anything else, as it loads a new screen where you will have to enter your old details and type in a new password. Gemini will force you to change your password every 30 days, and following a ‘password reset’ by the help-desk. When you are ready, click Submit to enter the system. If you get the password wrong three times your account will be locked; you will have to call the helpdesk to get it unlocked.
Please wait… Click when ready… Gemini System Menu • A successful log in will take you to the Gemini System Menu screen where you can select which system you want to access. To access the main Gemini system click on the Gemini button. To access the NTS Exit Capacity Reform system click on the NTS Exit button.
Please wait… Click when ready… Homepage Usually when you access the system a pop up will be displayed informing you that a new message has arrived. If you want to read the message you can click on the OK button else click on the Cancel button.
Please wait… Click when ready… Homepage • The relevant system Home Page is now shown, displaying the menu items linked to your default role. • Navigate to this page if you need to change roles during a session. • Navigate to this page to log out of the system.
Homepage – System Info Please wait… Click when ready… Please wait… Click when ready… The name of the system you are in is displayed here. The top panel appears on every screen. Some elements are dynamic and depend on selections you make. This denotes which environment you are in. This shows that you are on the Homepage. When you access a screen from a menu this will be replaced by a Breadcrumb Trail and the name of the menu the screen belongs to.
Homepage – User Info Please wait… Click when ready… Please wait… Click when ready… Please wait… Click when ready… Please wait… Click when ready… This provides access to System Messages. This will be explained in more detail later. This displays the User Name of the person who has logged in. This displays the BA Short Code for the logged in user. This allows the user to select a User Role. When you log in it will display your default roll. The drop down facility allows you to access any other roles available to you. This will be explained in more detail later.
Homepage – Menu Bar Please wait… Click when ready… Please wait… Click when ready… Please wait… Click when ready… Please wait… Click when ready… Please wait… Click when ready… This icon prints the screen (please note this does not output a formatted report, though it will print all the data shown on one page – even if you would have to scroll to get to see it). This icon allows you to access your favourites. This will be explained in more detail later on. Click on this icon to exit the system. It will take you back to the Gemini System Menu. The menus that you have access to will be displayed in the menu bar. Which menus are displayed will depend on the User Role selected. This will be explained in more detail later. These are general navigation buttons. A different set of buttons will be displayed once you access a screen.
Homepage – System Messages Please wait… Click when ready… Please wait… Click when ready… Please wait… Click when ready… • Gemini has a message inbox, to allow users to view key system messages. • If you have unread messages, you will be informed of this upon Log In (as seen in a previous slide). If you are already logged in to the system a pop up message will appear whenever a new message arrives. To view the message Inbox click on the green circle. The red number indicates how many unread messages there are.
Message Inbox Please wait… Click when ready… Please wait… Click when ready… Please wait… Click when ready… A message becomes ‘read’ when anybody in your group opens it. That person’s ID is saved and visible in the Read By column. The full message is displayed. If you want to close the message before reading another click on the red cross. The message Inbox is displayed. To read a message click on the text. When you have finished click on the Close button and the system will return you to the previous screen.
Homepage – User Role Please wait… Click when ready… Please wait… Click when ready… In order to change your role (which can only be done on the homepage) click the User Role drop down list and select the correct role from the list available. • This user role list will only contain roles that you are allowed access to. • Once it is selected, the screen will reload with new menu options.
Accessing a Screen Please wait… Click when ready… Please wait… Click when ready… Please wait… Click when ready… Use the menus to navigate to the screen you wish to access. Hover the cursor over the menu name (in this case Deal). The cursor will change into a pointing hand and the menu items will appear. • If you need to close the menu, take your mouse off it, and it closes after a couple of seconds. Where you see the >> symbol this indicates that this item is a sub menu rather than a screen. Hover over the name of the sub menu to see the items linked to it. The path you’ve followed will be shaded a darker blue. Hover over the items in the sub menu and then click on the name of the screen you want to access.
Screen – System Info Please wait… Click when ready… The selected screen is now displayed. The navigation buttons have changed. The icon has been replaced with the icon. Click on the arrow icon to return to the homepage. This is the Breadcrumb Trail. It shows the menu/sub menu path followed to reach the current screen. This is the name of the menu that the screen belongs to.
Favourites Icons Please wait… Click when ready… These icons enable you to control your favourites list. If there is a particular screen that you often use you can use this feature as a quick way to navigate straight to that screen. If you want to add the screen you are in to your favourites list click on the icon
Adding Favourites Please wait… Click when ready… Please wait… Click when ready… Please wait… Click when ready… A pop up will be displayed. The system will populate this field with the name of the screen but you can amend this. If you are happy with the name click the Add button. It now appears in the list. The New Folder button allows you to create a new folder within your favourites list. You can then use this to organise your favourites. Once a folder has been created you can save the screen to that folder by clicking on the folder name before clicking on the Add button. In order to save it you should click on the OK button. If you change your mind and decide you don’t want to add the screen to your favourites list you can click on the Cancel button. The screen won’t be saved to your favourites list.
Favourites Icons Please wait… Click when ready… These icons enable you to control your favourites list. If there is a particular screen that you often use you can use this feature as a quick way to navigate straight to that screen. If you want to access a screen already saved in your favourites list click on the icon. If you want to add the screen you are in to your favourites list click on the icon.
Viewing Favourites Please wait… Click when ready… A pop up will be displayed. To navigate to a screen that is saved in the list click on the name of that screen. It will take you straight to that screen. If you decide you want to tidy up the list or remove items there is a facility to do so via the Organise button. Another pop up will appear that allows you to rename items, remove items and move items. Please note the favourites list is dynamic and will only show the screens relevant to the User Role selected on the homepage.
Screen – Layout Please wait… Click when ready… The results of your query will be displayed here. A screen has three areas. The grey area at the top contains the items you can select in order to perform a query. Many screens also have a bar at the bottom. This may display messages specific to your query plus more buttons.
Screen – Query Fields Please wait… Click when ready… The fields that appear in the query criteria differ in format. There are drop down fields where you can select one item from a list of values. There are drop down fields where you can select one or more items from a list of values. There are free text fields where the user enters the values. There are date fields where the user can enter the value or select the date from a calendar facility. There are display only fields. An asterix next to the field label denotes that this is a mandatory field and so you must populate it before running your query.
Please wait… Click when ready… Please wait… Click when ready… Please wait… Click when ready… These three fields are display fields and so the user cannot edit them. Performing a Query It’s happened again! The selection for the Request Window Period field has resulted in a number of other fields appearing along with their possible values. Select an item from the list. Select a value for this field. Some screens are dynamic such that other fields appear dependent on values selected for the first fields. This is an example of a field where you can select more than one value from the list. Where there is a long list you can quickly get to the other items by clicking in the field and then typing the first letter of the value you are looking for. It will then display the first item with that initial within the box.
Please wait… Click when ready… Query Results Notice how another icon has appeared. Once you’ve selected all your query criteria click on the Query button. The results are displayed here. Notice how a button has now appeared at the bottom of the screen.
Please wait… Click when ready… Please wait… Click when ready… Screen – Generate Report Depending on which type of report you require select the relevant radio button. The report will be launched in a separate window. You will then be able to print and/or save the report. The Generate Report button provides the facility to create a report. The report will contain the query data as well as the results for the query that you have just executed on the screen. The report can be in pdf or csv format. When you click on the Generate Report button this pop up will appear.
Please wait… Click when ready… Please wait… Click when ready… Screen –Report Icon This icon is also a reporting facility. This is different to the Generate report button in that this creates a report containing all the text values on the screen. This will include text from the top section e.g. User Name. Where a query has returned a large number of records that has resulted in pagination this facility will not display the data from the other pages whereas the Generate Report button will. This is an example of the report.
Please wait… Click when ready… Please wait… Click when ready… Please wait… Click when ready… To change the year you can manually edit the field or use the icons. It will default to the current month. To change the month use the drop down facility or the icons. Screen - Calendar Look Up To close the look up without selecting a value click on the Clear button. Date fields within the query criteria can be populated manually or the calendar look up can be used. If you choose to manually populate the field it will accept any standard format. - 1.1.01 gives 01-Jan-2001 - 04/04/2003 gives 04-Apr-2003 - 8-jan-04 gives 08-Jan-2004 If you want the current date you can click on the Today button. To use the look up facility click on the calendar icon. The field is now populated with the selected date. To select a date click on the relevant value in the calendar panel. If the month displayed is the current month the current date will be shown in red.
Please wait… Click when ready… Please wait… Click when ready… Click this button to view the details behind a record. The three dots indicate that more data is saved than can be shown. Roll your mouse over them to view the full detail. Click anywhere to then close it. Click this button to modify the details for a record. General - Buttons Across the screens you will see a variety of action buttons. Some will be specific to a process while others are more generic. The exact results of each button will depend on the screen it is attached to. Below are some of the more generic ones you’ll see. Click this to perform a query. Click this to clear any entries you have made, and clear any queried results. Click this to close the screen you are in. Click this to cancel your current action e.g. if you are in an add screen you will be returned to the previous screen without saving any data. Click this to add data. Click this to save any data changes you have made. Click this to generate a report of your query results.
Please wait… Click when ready… Please wait… Click when ready… Please wait… Click when ready… Please wait… Click when ready… Please wait… Click when ready… Logging out A message will be displayed for a few moments. Once the message has disappeared you will have logged out the system. Now click on this icon. On the Homepage click on this icon. It will take you back to the Gemini System Menu screen. To log out first click on the home icon which will take you to the Homepage. A confirmation pop up will appear. To exit the system click on the OK button.
That concludes this User Interface Familiarisation Training Thank you