Download
1 / 47
490 likes | 708 Views
CCD Imaging and Processing. The cameraMatching scope with cameraTaking the imageProcessing the imageFinal results. The Camera. Choosing the cameraMany different options to start imaging withDigital camera - easiest way to startResearch the web for choicesNice results achieved with Olympus,

E N D
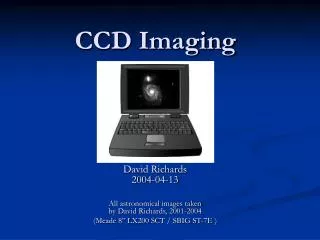
1. CCD Imaging and Processing - AA3 A Tutorial by Alan Chen
Member of:
CFAS: Central Florida Astronomical Society
Chiefland Astronomy Club
2. CCD Imaging and Processing
The camera
Matching scope with camera
Taking the image
Processing the image
Final results
3. The Camera Choosing the camera
Many different options to start imaging with
Digital camera - easiest way to start
Research the web for choices
Nice results achieved with Olympus, Nikon and others
SLR�s coming into popularity (like the Canon D60) but expensive
Webcam - excellent for planets (check QCUIAG)
True CCD version (not CMOS based)
Philips Toucam Pro, Vesta Pro, Older Logitech/Connectix
Video camera - I.e. StellaCam-EX: deepsky capable
True CCD camera for astro-imaging
4. The Camera True CCD camera
Several major CCD camera vendors
Apogee - high end cameras (i.e. more expensive)
Utilizes SITE chips - very sensitive as a result of back illumination
FLI - high end cameras (i.e. more expensive)
Also utilizes back illuminated chips, but has more inexpensive offerings as well from Kodak
SAC - very inexpensive to start with
SAC8 the best choice, but requires parallel and USB ports
Older models use vid cam technology for summed exposures
Lacks strong software support, but still relatively new
5. The Camera True CCD camera
Several major CCD camera vendors
SBIG - probably the largest and most recognizable
Wide range of cameras based on Kodak chips
Excellent standalone autoguiders (STV, ST4)
Starlight Express - great values in a true ccd camera
Wide range of cameras based on Sony chips
All are good choices and span prices ranges for all levels of imager
6. The Camera Starlight Express - my choice in 2001!
MX7C - why was this a good choice for me?
An excellent first camera
Good for starters and advanced imagers
Relatively simple to operate, especially for color images
Affordable by CCD standards
750x582 resolution tops in its price range
Small and compact - 2� dia
Light weight
Balance kit not necessary for the LX200
Approximately the weight of a good 2� eyepiece
Primary SBIG equivalent considered: ST-7E
7. The Camera Starlight Express
MX7C - why was this a good choice for me?
One shot camera - color matrix filters - CMY
Synthesizes RGB from the filtered signals
Much less overall imaging time involved for color
Color filter wheel not required
Probably not as accurate a color balance as RGB imaging
Color synthesis routines much improved recently in Astroart
Self-guiding capability with Star2000 interface
Uses the same chip for imaging and guiding
Sensitivity reduced by 50% as a result
Full frame can be used to locate a suitable guidestar!
Simple software interface to self-guide
8. The Camera Starlight Express
Today�s alternate choices I would consider
MX716 - very sensitive and low cost - the best value on the market today
SXV-H9 - very sensitive megapixel camera
Extremely low noise/dark current
Dark frame not used by many SXV imagers
SXV-H9C - good sensitivity, especially for color
Uses an RGBG (Bayer Matrix) - not CMYG
Color resolution will be much improved
Extremely low noise/dark current
Primary SBIG equivalent to consider: ST2000XM
9. Matching Scope and Camera General guidelines
Sampling - depends on seeing
Good seeing (i.e. <2 arc-sec) can tolerate higher resolution sampling rates
Sampling rate (arc-sec/pixel) = 206 x (pixel size)/(focal length)
Pixel size is dependent on the camera
FL can be varied by focal reducers and barlow lenses
Scope and camera should provide a typical sampling rate of between 1 and 3 arc-sec/pixel
12�LX200 @ f/3.3 = 1.7 arc-sec/pixel (good match!)
Rates>2 is undersampling and rates<2 is oversampling
High resolution imagers use 1/3 to 1/4 the seeing value to maximize resolution (i.e. down to 0.5 arc-sec/pixel!)
10. Taking the Image Imaging process
Setup the optics/camera
The all-threaded setup is preferred and offers flexibility
11. Taking the Image Imaging process
Setup scope, camera, laptop and align
No hot plugging - turn everything on after full setup
12. Taking the Image Imaging process
Choose and locate first object
For LX200, slew to it using HPP (nice ccd feature)
HPP targets a nearby bright star to center
Use this opportunity to focus CCD camera on star
Finally slew to object
For other setups, manually locate or goto
Focus on a nearby star when convenient
Note: Astroart is referenced in this presentation
Great support for all Starlight cameras and others makes
Relatively inexpensive (~$150) - version 3 is current
Handles both camera control and image processing
13. Taking the Image Take a quick 5 to 30 second image of the object
14. Taking the Image Select a star anywhere on the image to fine focus
15. Taking the Image Select the focus box - star is rough focused
16. Taking the Image Good focus has been achieved
17. Taking the Image Autoguider setup
Separate guide scope with Mintron 12V1 low lux vidcam
Star2000 equally effective with similar setup process
Scope setup under �Telescope Control�
Correction speed (pixel/sec)
Correction range (�Ignore�)
Backlash (set to zero if setup on the scope)
18. Taking the Image Set the exposure time (240s in this case)
19. Taking the Image To take the image, select the image or sequence tab
Image generates a single image (i.e. 300 sec here)
Sequence allows multiple images to be taken and saved (i.e. 5 images of M101)
20. Processing the image Astroart has it own internal color synthesis routing
21. Processing the image
22. Processing the image
23. Processing the image
24. Processing the image Batch processing: selecting the images
25. Processing the image Batch processing: results in LRGB separation
Process dark files at the same time
26. Processing the image Pre-processing: selecting stars to autoalign
Pull up the first luminance frame in the sequence
Select 2 stars on opposite sides of the frame (a �+� will show on the star)
27. Processing the image Pull up the Pre-processing window - choose Auto alignment
Select �Two stars� - ideal to remove image rotation
28. Processing the image The default range is 20 - increase this to 40 if there�s substantial movement of the stars from frame to frame (drift)
29. Processing the image Pre-processing: select files to combine
Include darks (in this case for luminance frames)
30. Processing the image Pre-processing: 14x4min. images combined
31. Processing the image DDP processing - compresses signal range
32. Processing the image DDP processing - result of ddp filter
33. Processing the image Unsharp Mask filtering - use Adaptive
34. Processing the image Unsharp Mask filtering
Sharpens the fine nebulosity and tightens the star images
35. Processing the image Stretching the image with a histogram
36. Processing the image Color processing
Repeat the procedure as in slide 29 to combine all of the R-frames together, then the G-frames and finally the B-frames
Again, use the appropriate dark frame and save files
Upon completion, there should be one L, R, G and B frame (4 total frames)
37. Processing the image Color processing - Pull up Trichromy from the Color menu
38. Processing the image Color processing
Selecting OK brings up an RGB image complete with color!
A color balance window also pops up
Adjust the colors as required to suit
39. Processing the image Color processing
Under the Color menu, bring up LRGB Synthesis
Select the luminance frame to combine (L_m16sharp.fit in this example)
40. Processing the image Color processing - LRGB combined result
41. Processing the image Color processing
Use color balance and saturation commands to further enhance the image
Flipped image for orientation
42. Processing the image Color processing - tweaking in Corel Photopaint
43. Processing the image Corel Photo - resampling to square the pixels
44. Processing the image Corel Photo - Eliminating image defects
45. Processing the image Corel Photo - Using the clone tool
Replaces the circled region with nearby attributes
46. Processing the image Corel Photo - selective Gaussian blur
47. Processing the image Corel Photo
Tweak colors as required
Save as TIF or with compression as a JPEG
48. M16 - The Eagle Nebula: final result