Download
1 / 46
460 likes | 708 Views
TurningPoint Student Response System (SRS). The How, What & Why of TurningPoint. Questions:. Do not hesitate to ask questions along the way! I love questions and there is no such thing as a dumb or bad question ( unless it’s the one you don’t ask). . “That was easy!”.

E N D
TurningPoint Student Response System (SRS) The How, What & Why of TurningPoint
Questions: • Do not hesitate to ask questions along the way! I love questions and there is no such thing as a dumb or bad question (unless it’s the one you don’t ask). “That was easy!”
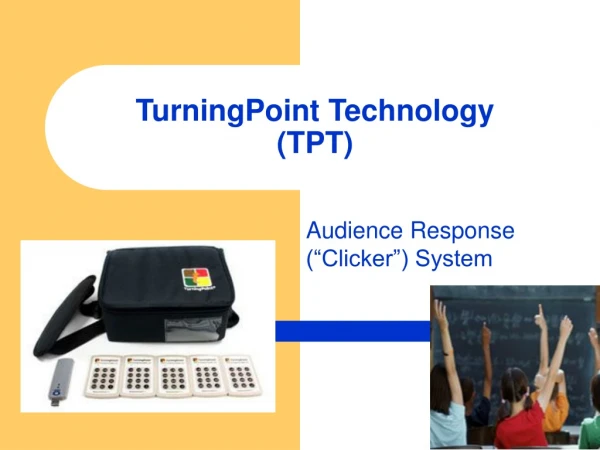
What is TurningPoint? • Software in conjunction with the student response cards create a wireless audience response and voting system • Enables real-time assessments of student participation within Microsoft PowerPoint
How does all of this work? The TurningPoint system consists of two (2) parts: • Software • Hardware
Software • The TurningPoint software allows the teacher the ability to create and manage material and/or questions desired to present to students in order to determine their knowledge based on a desired subject.
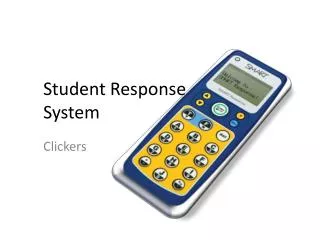
Hardware • The hardware consists of a student response kit which includes: 32 student response devices and a USB RF (radio frequency) receiver. The receiver is plugged into the laptop to activate a wireless system allowing each response device to “talk” to the laptop sending the information to the software program.
What am I going to use this for? • Collect statistics for general classroom information • Collect individual student progress • Administer tests and quizzes • Assessing the learning process • Assessing the teaching process • View curriculum standards
How can I use this effectively? • Pre-unit surveys – What do your students already know? • Checkpoint quizzes – Are your students understanding the concepts your are teaching? • Post-unit quizzes – Have your students mastered the skills and information of the unit? • Competitions • Skills practice as a game • Opinion surveys – What is the class view on a topic or question? • Fastest Responder – a great motivational tool and effective way to engage students
What are the end results of using this technology? • Students are engaged! • Provides instant feedback to students and teachers • Inspires competition and teamwork • Interprets data into measurable results, such as scores, charts, graphs • Helps make learning interesting, focused and fun!
What does a TurningPoint kit look like? • Each kit comes with: • A black carrying case • “32” student response devices • A USB RF (radio frequency) receiver • And, software (version 2008).
How many kits are at my school? • The standard has been: • 13 kits per middle school. • One kit for every five classrooms – elementary and high Note: Some schools have elected to purchase additional kits. However, the county purchased based on the standard above.
Time to get started….. • We are going to learn the four (4) basic steps to creating a successful TurningPoint presentation.
Step One • Set-up • Take the USB receiver out of the TurningPoint kit and plug into the laptop • From the desktop, find the “TurningPoint” icon and double click to open Stop! Hands-On exercise coming up….
The USB RF receiver is a “key” component. If the USB receiver is “not” plugged into the laptop prior to opening the TurningPoint software, the student response devices will not work. Once the software has been launched, identify the TurningPoint toolbar. TurningPoint is simply a PowerPoint plug-in and the only difference you will note in appearance is an extra toolbar. The toolbar can be identified by the TurningPoint icon to the far left.
Hands-On • Remove the RF receiver from your kit and plug it into a USB port on your laptop. • Launch the TurningPoint software • Locate the TurningPoint toolbar • STOP!
Step Two • Create Presentation Slides • From the TurningPoint toolbar click on “Insert Slide” Just follow along – there is a hands-on exercise coming up!
By clicking on the drop-down tab, a menu of various slides are offered. If you wish to create a presentation that consists of only questions and answers but wish to graph those answers, choose a graph slide. Or, for simple yes/no or true/false questions, choose from the menu selection here. You can even choose the “generic slides” option that will allow you to create a question with multiple answers.
Hands-On From the TurningPoint toolbar, locate the “Insert Slide” option From the drop-down menu, select a “True/False” slide Create a question When finished, insert another slide, but this time insert a generic slide with “three” answers Create a question Insert your answers STOP!
Step three • Creating a participant list allows the teacher to collect student specific information (i.e., administering a test). Both the teacher and the student can have immediate feed-back. • There are three different types of participant lists: • Anonymous – simply just that….there is no way to track a student’s response (i.e., “How many prefer lunch at 11:30?”) • Auto – data can be collected via the device ID only. • Created Participant List – this is a participant list that a teacher can create using the students from each individual class (example: princeblock1; princeone, princetwo, etc.) Follow along as I create a participant list……
Creating your very own participant list! From the TurningPoint toolbar, find the tab marked “Participants”. There is a drop-down box that will allow you a menu choice of obtaining a participant list. To create your own, choose the “Participant List Wizard”
Next, choose the “custom template” option Then click “next”
You will be prompted to enter a name for this “template” (the default will enter a date and time stamp unless you rename your template). Remember, a template is something that serves as a master or pattern from which other similar things can be made. You can reuse this template for similar classes. Some examples might look like: T. Prince Template English Classes Math Classes History Class, etc
There are many fields you can add to make up your custom participant list. However, it is recommended that you keep it simple for starters. Last name and first name are great starters for your custom template. To choose the fields you wish to incorporate into your custom participant list – click on a specific field from the box on the left “Available Fields”. Next, click on the arrow to move it over to the box titled, “Selected Fields”. When finished, click “next”. Hint: You can also double click on an available field to move it to the “Selected Field” box.
Adding a group to your participant list is optional. This is a great tool for tracking certain information such as: gender, race, NCLB, free/reduced lunches, etc...). But we are going to leave this blank and just click “Next”.
Now, we are prompted to name our participant list. Remember, we originally created and named a template (the master copy containing all of the information we want to use in future participant lists). Here we are going to name our actual participant list. Click “Finish”
Finally, we are going to add our Device IDs, Student Last Names and First Names. When we have entered this information, we will click “Done”.
Step 1: Open one Excel spreadsheet Step 2: On page one of the Excel spreadsheet, type in the device IDs Step 3: On page two of the Excel spreadsheet, type in column A, student’s last name and in column B, the student’s first name. Step 4: Name page one according to the kit # labeled on the outside of the TurningPoint kit (i.e., kit 1, kit 1, kit 3, etc.) Step 5: Name page two according to class period (i.e., Period 1, Period 2, etc.) Step 6: Save document as “TurningPoint Kit Set-Up” This should be done prior to creating your participant list…
Device ID? Huh? Each student response clicker has a unique device ID. For this particular clicker, the Device ID is: 087E41
Hands-On • Create a participant list using the device IDs from four of your clickers. • Input the following students: • Roger Rabbit • Elmer Fudd • Minnie Mouse • Petunia Pig Stop!
Step Four“Bells & Whistles” This is where we learn how to dress up our interactive slides with things like setting the correct answer, correct answer indicators, timers, etc. Believe it or not, these little things that we add to dress up our slides are the very things students find fun and engaging!
Setting a Correct Answer • Once our slide is created, we want to set the correct answer. • Step 1: Highlight the correct answer from our answer list • Step 2: Right click and click on “set as correct”. It’s that easy!! By setting a correct answer value, you can show the correct answer after each polling. This is just another way for students to have that instant feedback.
Hands on • Create a generic slide with three answers. • Set the correct answer • Stop!
Correct Answer Indicator A Correct Answer Indicator gives a visual cue to the audience to indicate the correct answer after polling for a question is finished. A Correct Answer Indicator appears during a presentation when you advance the slide after displaying the chart.
When setting an answer as the “correct answer” and while the answer is still highlighted, from the TurningPoint toolbar, click on “Insert Object”. STEP 1: From the TurningPoint toolbar, click on the “Insert Object” Tab. STEP 2: Click on “Correct Answer Indicator” Step 3: Choose your correct answer indicator
Hands-On • From the last slide created, set a correct answer indicator. • Stop!
Countdown • A Countdown Indicator gives the audience a visual cue that polling for a question is about to close. The Countdown Indicator shows the number of seconds remaining and counts down to zero. A countdown can have a maximum length of 999 seconds. The indicator appears during a presentation when you advance the slide during polling. When the countdown expires, the Countdown Indicator disappears and polling is automatically closed.
Reset • You can use the same presentation to create a new set of responses. The Reset menu on the TurningPoint toolbar gives you the option of deleting the results in order to redo a session or present a new session. You also have the option to redo only one question slide in a session. • Note - you cannot undo the Reset function, so be certain that you wish to delete the results. • Reset before each session and after any changes are made to the presentation. • This is as important as having the RF receiver plugged in prior to launching the software!
20 Let’s see what it all looks like together:How many different participant list types are there? • One • Two • Three • Four
TurningPoint is made of two parts. • True • False Yep! It is made up of software and hardware.
In order for the student response clickers to work, the RF receiver should be plugged into the laptop after the software has been launched. • True • False False. The RF receiver should be plugged in PRIOR to launching the software. This would be a troubleshooting tip!
Answer Now The TurningPoint system consists of how many components? • One • Two • Three Two: hardware & software
What time of day do you prefer? • Morning • Afternoon • Night
Extra! • No need to re-create the wheel if you already have a PowerPoint presentation you have either created or used from another source. • Import it and insert your interactive slides.
Hands-On! • From the internet, type in “branches of government.ppt”. • Download a PowerPoint presentation into TurningPoint • Insert two interactive slides within the presentation. • Stop!
Understanding Your “Showbar (or Polling Toolbar) Advance to next slide Non-response grid Response Grid – see which participants have responded Re-poll option Display graphing options Displays answer values in either percents or numbers Closes the Showbar for the duration of the session.
Denotes open or closed polling session green = open Red = closed Reflects number of responses submitted during polling session Allows the showbar to be moved anywhere on the screen Expands the showbar to display responses, user feedback and polling status Insert a slide with a dropdown box to select slide type Opens “participant monitor” (an “in the moment” assessment of content knowledge)