Download

1 / 64
640 likes | 805 Views
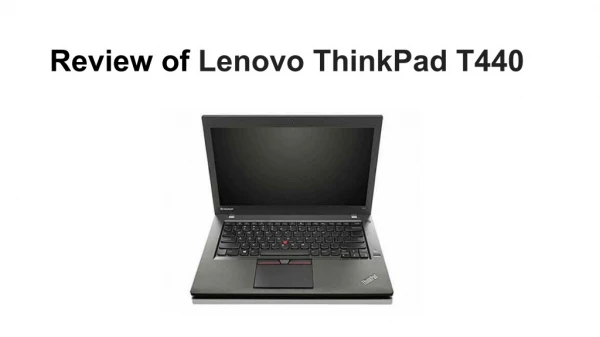
ThinkPad Tablet Training. IMPORTANT INFORMATION – Power On. Turning the Tablet on You have to hold the power button down for approximately 5 seconds to boot the system. You will feel a vibration/buzz when it boots up. Unlocking the Tablet Place your finger on the lock icon.

E N D
IMPORTANT INFORMATION – Power On • Turning the Tablet on • You have to hold the power button down for • approximately 5 seconds to boot the system. • You will feel a vibration/buzz when it boots up. • Unlocking the Tablet • Place your finger on the lock icon. • A larger circle with a lock will appear. • Slide the icon to the outside of the circle • to unlock the tablet
Screen Power • There are two ways to conserve power on the tablet: • Screen Power – the backlight can be powered off by tapping the power • button. This onlytuns off the backlight. The apps are still running and • more importantly, the wifi is still connected. Tapping the power button • again will restore the backlight. • The screen backlight is set to automatically power off after 2 minutes. • This can be configured in the Screen Settings menu • Power-off – to power down the tablet, you need to press and hold the power button for approximately 5 seconds
System Location – Front View Front Cover, Gorilla Infinity Glass Front-facing Camera Ambient Light Sensor Home, Back, Menu,Search Buttons Front Cover Frame Polished, Glossy UV, black Multi-touch Display 1280 x 800
System Location – Buttons and Connectors Back Button Menu Button Search Button Home Button SIM Card Slot, Media Card Slot Emergency Reset Hole Dock Connector Headphone/Microphone Jack Micro USB Connector, Power Connector Mini HDMI Port
System Location – Back View Back-facing Camera 5M Silk Print Back Cover Built-in Microphone ThinkPad Logo LED Stylus Pen Slot
System Location – Bottom View SIM Card Slot Media Card Slot Reset Hole Headphone Microphone Mini HDMI Port Micro USB Connector Power Connector Dock Connector SIM Card Slot, Media Card Slot Emergency Reset Hole
System Location – Top View Stylus Pen String Hole Volume Control Buttons Stylus Pen Slot
System Location – Left and Right View Power / Screen lock Button Right View USB connector Keyboard folio connector Integrated Mono Speaker Left View
Lenovo Tablet – SetupWizard Out of Box Experience (OOBE)
SetupWizard 1st page – Language and Timezone • First Screen after booting the system • This screen allows you to choose your language and timezone • Click on a Language and/or click on “Set date and time”
SetupWizard 1st page – Language and Timezone • After clicking on “Set date and time” • By default, the “Use network-provided time” is ON, which means the Date and Time boxes are inactive
SetupWizard 2nd page – License Agreement • Must click the “Accept” button before you can proceed • License Agreement accepted, next button becomes highlighted
SetupWizard 3rd page - On-Screen Keyboard • User can either practice typing in the area above or “Skip”
SetupWizard 3rd page - On-Screen Keyboard • If you start typing the “Skip” changes to “Next” • You can minimize the keyboard by hitting the down arrow in the bottom left of the screen
SetupWizard 3rd page - On-Screen Keyboard • In order to get special characters, hold down a key to see and select an alternative character
SetupWizard 4th page – Wifi • When you first get to this screen it will be scanning for Wifi signals for a moment • The Wifi button is not clickable until a Wifi signal is found • After a Wifi signal is found, the Wifi button will become clickable to connect to a Wifi network
SetupWizard 4th page – Wifi and 3G • If the user clicks on the Wifi button, they will be prompted with a list of wifi networks they can attempt to connect to. • The user cannot connect to an EAP network during the Setup Wizard
SetupWizard 5th page – Google Account Setup • This page will allow the user to sign in to or create a Google account, as well as accept or decline Google Location options
SetupWizard 5th page – Google Account Setup • Clicking on either of the checkboxes bring up additional consent boxes
SetupWizard 5th page – Google Account Setup • Clicking on either of the checkboxes bring up additional consent boxes
SetupWizard 5th page – Google Account Setup • If you click on “Google Account Setup”, you get to this screen • Either enter your Google credentials or click “Create Account”
SetupWizard 5th page – Google Account Setup • If you click “Create Account”, you get here then you can continue to walk through account creation
SetupWizard 6th page – Welcome page • This page informs the user of a few of the options with their Indigo system. The user can click “Done” when they are satisfied with their new purchase.
SetupWizard – Customization Page • After clicking “Done” on the “Welcome Page” the install will finalize. Customizations run for a very short time. You will then be taken to the Android Home Screen
Lock Screen -To unlock the device, place your finger on the lock symbol. A circle will appear around the lock, drag the lock outside of the circle.
Home Screen • The Android OS is made up of five “screens”. Above is an example of the home screen. You can tell what screen you are on by the dots at the top. The dots only appear when you touch the screen.
Navigation Widgets List Google Search Apps List Android Market Apps Back Home Settings Open Apps Favorites Widgets
Android Layout • You can get to this area by holding your finger on the screen for a few seconds (not on an app icon or widget) – or by pushing the Widgets list “+” button at the top right of the home screen • The Android environment on the Tablet is broken up into 5 screens (see red box above). The default home screen is the center screen. • The home screen can be modified from this area • Widgets and Wallpaper can be modified here as well
Navigation The five home screens are customizable with the apps you want To see a full list of every App installed on the device, click on the Apps icon in the upper right
User Guide – READ THIS!!! Swipe your finger on the screen to move through the list of Apps. Find, Open, and READ the User Guide to familiarize yourself with your Tablet. It contains information on how to use the Tablet and navigate the Android OS.
Lenovo User Interface Key Features • The “Launcher” on the default Home Page is used for your most commonly used apps • Common across devices (LePad and LePhone have similar look) • Flexible design; user can easily change page layouts, move apps • Random page access
Lenovo App Shop • Native Client Application - cannot be uninstalled • Apps in the App Store have been tested and certified for use on the Thinkpad Tablet • UI design for easy discovery • Tablet Applications in catalog to grow rapidly in 2H11 • Hosted by a 3rd Party Application Aggregator - MobiHand • Customer App Store for custom internal and third party apps.
AppShop Install Error Your first download attempt from the Lenovo AppShop may produce a security error. This is to protect your Android device from installing applications from sources other than the Android Market. You will need to change a setting to allow downloading from the Lenovo AppShop.
AppShop Install Error • You need to put a check mark in the Unknown Sources option. You will then be • able to download from the Lenovo AppShop.
Function – Start the Utility • Find the “USB File Copy Utility” icon in the application page, And click it. • Devices connected to the tablet listed on the top left of the GUI. The three supported storage device icon The Lenovo USB File Copy Utility
Function – Open device Two supported storage device exists now.(Internal_SD, USB_Drive) Click USB drive icon. USB device files explores on the right like this.
Function – Select/Unselect files • Click the gray bar which contains a check box of a file/folder. The gray bar change to green and the checkbox to be checked. • When some files already checked, click the green bar. The green bar change to gray and the checkbox to be unchecked. Click or touch this to select/unselect files
Function – Select/Unselect all files • Click the “check all” check box on the top right of the main GUI. All files is selected(unselected) Select(Unselect) ‘Check all’ checkbox.
Function – Copy select files to device root directory 2. Click ‘Copy’ button 3. Select device you want to copy to.(Root directory) 1. Check some files
Function – Copy select files to device root directory 4. Copy progress. 5. Copy success. And you will see the new files.
Function – Copy select files to another directory • Put finger on anyone of the selected files, drag it to the top of another folder or drag to another opened device’s field and drop it. • If drop on a folder, files will copied into the folder, if drop to other filed but not on a folder, files will be copied to current opened folder.(files cannot be copied to the current folder they exist) 1. Drag files to a folder in the same directory.
Function – Copy select files to another directory 2. Drag files from root directory to root directory.