Download
1 / 91
920 likes | 1.05k Views
The eGOHS Application Process. Young Adult (YA) Application. “Every Life Counts – Strive for Zero Deaths and Injuries on Georgia Roads.”. Revised March 2011. YA Table of Contents. 2. Purpose. “Every Life Counts – Strive for Zero Deaths and Injuries on Georgia Roads.”. 3.

E N D
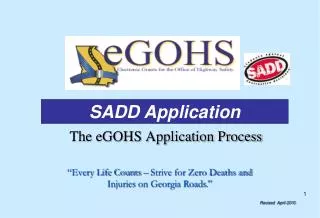
The eGOHS Application Process Young Adult (YA) Application “Every Life Counts – Strive for Zero Deaths and Injuries on Georgia Roads.” Revised March 2011
Purpose “Every Life Counts – Strive for Zero Deaths and Injuries on Georgia Roads.” 3
Workshop Objectives To provide potential Grantees with the knowledge and skills necessary to correctly: • Create a user account and login to the eGOHS system • Create an Application • Important Dates 4
Administrative Details Security Levels Agency Authorized Official (AO) Highest level in Agency/Jurisdiction (i.e. Mayor, Commissioner, Principal) Able to Review and Submit the Application Sign off on claim forms (optional with Electronic Signatures) Project Director (PD) Agency Administrator / Project Director - App Grant Administrator – Grant Able to Create/Initiate: Application, MAR, Claims, and Amendments Able to Submit MAR, Claims and Amendments Financial Officer (FO) Agency Staff / Fiscal Officer - App Financial Officer – Grant Able to Create Claims and work on them Alternate Signer (AO designee) Able to View Application / Grant only 5
Creating A New User Account If You Do Not Already Have an eGOHS username and password: 1. Access the eGOHS homepage at www.egohs.org or by visiting the GOHS website at www.gahighwaysafety.org 2. On the eGOHS homepage, click the “Create a new user account” link 6
This is the Add Contact Information Page. Complete your contact information but leave the Agency for last. Please note: Your address should be your permanent location. Make sure you include your email address and all areas with an asterisk*. Click the Find Agency button if your school is in the eGOHS System, otherwise, click Register. 7
This is the page where you will Search for your Agency If Agency information does not populate, enter a portion of the name you are searching for. You may be able to Search on the Agency’s Name, Address, City, State, Zip Code and/or County. Select the appropriate agency in the Add Agency Section, if your agency is not found, click “No Agency Found”. 8
Confirm User Registration If you clicked Register, your contact data will automatically populate from the information you entered at that point. Enter your chosen password twice and click confirm. 9
Confirmation You will then get the Confirmation Screen with Instructions. Your Security Level may be released (generally with 24/48 hours) if you have any existing application/ grant or if a Request for Proposal (RFP) is available. You will be notified via email. Note: Your information will remain in the eGOHS without being released if there are No RFPs available. You will be notified via email. 10
eGOHS Login Home Page Login Login to eGOHS using your Username and Password and click Login. 2. Please Note: Your password can be changed at time. 11
Forgotten Passwords • Click on the Forgot Your Password Feature. • The help screen will appear and request your first and last name, and email address. • Click Send. • GOHS will verify the system request and then issue a password to you. • This password may be changed at a later date if needed. 12
Start Menu Explanation • Quick Links Section • Search for Agency Information by clicking on the appropriate link to search for that data. • View All Agency Applications • View All Agency Grants • View All Agency Claims • Maintain Your Account • View Your Agency Information (Edit and Make Changes to the agency as needed) • Edit Your Contact Information (Change your Password, Address, etc.) First Time Applicants will have no activity here. 13
Creating/Initiating an Application Start Menu • Once you have logged in, the “Start Menu” page will appear (your main application page). • First Time applicants will not have any activity under the Task List: Actions Required Section. • Click on the Initiate an Application button to use the dropdowns. First Time Applicants will have no activity here. 14
Types of Grants • SADD = Students Against Destructive Decisions • School (K-12) Only • TEN = Traffic Enforcement Network • ATTEN - WCTEN • ECTEN - MATEN • CATEN - SCTEN • SWTEN - SRTEN • SETEN - CGTEN • WRTEN - MGTEN • Law Enforcement Liaisons • YA = Young Adult • State Universities/Colleges/Tech Schools (Peer-to-Peer Projects) • GA = General Applications • City Government • County Government • Emergency Medical Services • Individual Consultant/Contractor • Non-Profit Organizations • Police Department • Public Health • School (K-12) (5 or more schools) • Sheriff’s Office • State Agency • State Universities/Colleges/Tech Schools (Not Peer-to-Peer) ***Select the appropriate grant type. 15
Initiating an Application In order to initiate an application, select the type of grant you will be applying for (YA Young Adult), and make sure it is the correct grant year (YA 20XX) and click initiate. First Time Applicants will have no activity here. 16
Initiating an Application Select yes to initiate the application. First Time Applicants will have no activity here. 17
Application Program Components Under Program Type/Sub-Type, use the pull down tab and select YA. Under Name, put the Name of your Program (“i.e. Peer to Peer Educators”). Click SAVE. When the screen refreshes, the data will appear at the bottom. Go To Application Menu. Do Not Use a Person’s Name, Use Program Name, Data Cannot be Changed Past this Point. 18
Application Program Components When the screen refreshes, the data will appear at the bottom. Note: Do Not Use the Service Areas in this Section, we will complete that data in another section of the application. Go To Application Menu. 19
Application Menu • Start from the left side and work your way to the right side. • Go to the Agency Information and click on View Applicant Information link in the gray box. Note: • To Delete Duplicate Applications, after logging in and opening the application, click Delete Application. • Make sure to reduce confusion by deleting unnecessary duplicates. 20
View Agency Information Review the Agency Information. Make sure it is accurate and all information is completed. Click on either Edit button if changes need to be made. You can make changes to the Agency Data, as well as the Federal Employer ID Number, at this time. 21
View Agency Information You can make changes to the Agency (University’s) Data, as well as the Federal Employer ID Number (obtain this data from your Fiscal Contact). Save any changes made. If you didn’t make changes to the FEI Number, you will have an opportunity to correct it before you submit your application. Scroll down this page. 22
Agency Vendor Codes • This data identifies you Agency Location. Do Not Use this section. GOHS will be completing for you. • Continue to scroll down to the Agency Contacts Section. 23
Agency Contacts • Agency Administrator (Project Director) will already be filled in. • Click Add to put in the members that will be working in eGOHS application or Edit to make changes or to remove a contact. • Each application must have three (3) positions, add the AO and FO here: • Agency Authorized Official (AO) • Agency Staff (FO). • Note other options on next page. Add Or Edit 24
Administrative Details • Security Levels • Agency Authorized Official (AO) • Highest level in Agency/Jurisdiction (i.e. Mayor, Commissioner, Principal) • Able to Review and Submit the Application • Sign off on claim forms (optional with Electronic Signatures) • Project Director (PD) • Agency Administrator / Project Director - App • Grant Administrator – Grant • Able to Create/Initiate: Application, MAR, Claims, and Amendments • Able to Submit MAR, Claims and Amendments • Financial Officer (FO) • Agency Staff / Fiscal Officer - App • Financial Officer – Grant • Able to Create Claims and work on them • Alternate Signer (AO designee, optional) • Able to View Application / Grant only 25
Agency Contacts Click Add to put in the contact that will be working in eGOHS application (i.e. AO and the FO). In the System Security Level Section, use the dropdown button to select: the Agency Authorized Official (highest level at Agency), the Agency Staff (for the Fiscal/Financial Contact or Viewer), or Agency Administrator (for other Form/Grant Writers). Save data entered. Fiscal Officer 26
Agency Contacts The screen refreshes and will show the addition (Agency Staff) you have made to the Agency Contacts List. Continue to Add all contacts needed that will be working with your grant application (i.e. the Agency Authorized Official). Scroll up and Go Back to Previous Page or click on the Application Menu tab. 27
View Agency Information After you have completed adding staff, you are ready to proceed. Click on the Application Menu tab OR click on Back to Previous Page. 28
Application Menu Contacts Next, you must give your assigned members of the grant the proper access. Click on “Control Access to Application” link. 29
Give People Access To This Application The Project Director will already be populated in the “Application Contacts” Section. Go to the “Assign Additional Access to the Application” Section. Use the dropdown boxes to identify the contacts and to give them access to the application. The screen will refresh. 30
Give People Access To This Application • After the screen refreshes, notice in the Application Contacts Section, you now have both the Project Director and the Fiscal Officer. • The Agency Authorized Official automatically has access to the application. • You may add additional contacts OR click on “Back to Main Menu” or click on “Application Menu”. 31
Components You must now complete the “Components” section of the Application. Click on the “Service Areas” link. 32
Program Component Service Areas Benefiting Notice the Program Components reflect the information you entered when you first initiated the grant application, you cannot make changes to that section from this point on. Scroll down to proceed with the Areas Benefiting (Note: This section refers to your main office location, not Statewide locations). 33
Program Component Service Areas Benefiting • Service Area Type • Select Metro Statistical Area (which is the default) • OR • Rural • Scroll through the dropdown menu until you reach the County in which your Agency/School is located and then click “Add” (which Saves this section).. 34
Program Component Service Areas Benefiting When the screen refreshes it shows the County and Statistical Area in the lower section. Now click on the “Representative Districts tab”. 35
Program Component Service Areas Benefiting • Using the dropdown box Add the following districts: • Senate • House • Congressional Districts. Please note: The download for the Representative Districts is located on the GOHS Website under the Extras Section: Go to Georgia Legislative and Congressional Districts by Local Government/County Government. 36
Program Component Service Areas Benefiting • For consecutive districts hold down the Shift key, highlight the districts and then click Add. • 74.75.76.77.78 • Holding the Control Key and then clicking for multiples not in sequential order. • Return to Application Menu. 37
Application Forms The critical programmatic and budget portion of your application will need to be completed. Fill In Every Section starting with the “Application Project Information”through the “Certifications and Signatures” page. This will constitute a complete application. 38
Application Forms Click on the “Application Project Information” link. 39
Application Project Information • Complete your Project Title (not necessary to use the School/Universities Name). • Give a brief Project Summary (maximum 200 characters, which include spaces) and SAVE. • Please Note: After Saving your work, you will be able to continue through each section of your programmatic forms one of three ways: • Click Next, or • Return to previous page, or • Go to the Application Menu tab and then click on the form desired. • 2. Review your work. 40
Application Project Information You will then notice that your information has been saved. If you’ve created more than one page, click “Clear” to remove the page. You should only have one page in this section. Click the next button to proceed through the application. 41
Additional Information This page is for general information regarding your financials. Please answer all questions.Note… Your audit period generally coincides with your fiscal year and should include 2010-2011.Please check with your finance office if you are unsure about this page. Click Save . 42
Problem Identification • The “Problem Identification” page is used to describe the highway safety problems in your target area.Note…Your problem statement should be very detailed and clearly describe the “Who ,What, When, Where, and Why” of the problem. • Also include 3 years of consecutive problem data. • Click Save and then click next. For YA applications, the general problem identification text is already included in the PDF. Please add your local information below. 43
Documentation Attachment Attachments could be charts, graphs, narratives, etc. to describe your problem. Please avoid special characters when attaching documents in the eGOHS as the system does not recognize them. Click Save and then click next. 44
Program Assessment This page should include a detailed description of your school’s current and/or previous highway safety efforts. Be sure to indicate what has or has not worked in the past. Click Save and then click next. 45
Standard YA Project Objectives, Activities and Evaluations • This section is pre-populated in the application. • Click VIEW PDF to print and read the information (see next 3 pages). • Close screen and check the box if you agree to complete these required activities. • Click Save and Next. 46
Standard YA Milestone Chart • Fill in the milestone chart for the pre-populated standard activities according to your school’s calendar. Use “X” or a numeric value to indicate which month you plan to complete each activity. • Take into careful consideration seasonal campaigns including Spring Break, Alcohol Awareness Week, Click it or Ticket, and winter/summer break. • Click Save and Next 50