Download
1 / 47
470 likes | 470 Views
Learn how to effectively manage the information system as an administrative assistant. This tutorial covers topics such as editing the news box, sending emails to selected individuals, managing church planter information, changing usernames and passwords, setting up the funding process, and using the update tool.

E N D
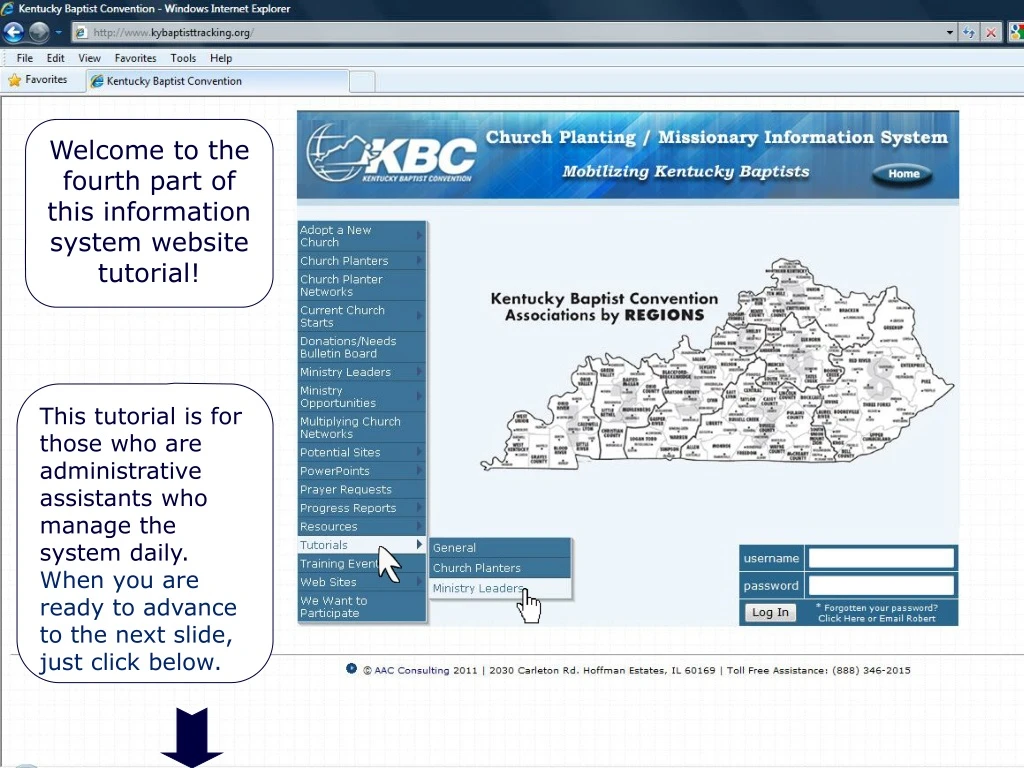
Welcome Welcome to the fourth part of this information system website tutorial! This tutorial is for those who are administrative assistants who manage the system daily. When you are ready to advance to the next slide, just click below.
Use your news box. Send emails to selected individuals. Edit vital planter and church info. Manage the funding process. Use the update tool and report administration page. Use training worksheets and administration lists. Effectively use the search page to generate custom reports. Use strategic mapping and its update tool. Use the document manager. Outline What we want to show you how to:
Go to News Box In order to change what you have posted on the news box on the home page, login, and under the top menu “Admin” select “News Box.”
Editing News Box In a similar manner to editing a blog post, you can define a title for your entry and then edit your document with a full array of word processing options. Click submit at the bottom when you are ready to post to the home page.
Editing/Deleting News Item To edit or change your post simply click on the “edit” link. Remember, the news box on your home page is a very small space. If you have an entire brochure’s worth of information you want to communicate you may want to put a simple description with a hyperlink to the brochure. You’ll need to upload the brochure to the “Resource” area, and you can get your hyperlink from there.
Deleting News Box Post Here you can again edit what you have posted to something more up-to-date, or you can delete your post altogether by clicking the “Delete” button at the bottom.
Transition to Emails to Selected Individuals For our next topic, if you need to send an email to a select number of church planters, start out by going to the planter directory.
Selecting the individuals to whom the email goes. To send an email to a select group of planters, check the box to the right of their record and then press the “Send Email to Selected Planters” button at the bottom of the page. Note – this button is to send emails to the whole list that is currently open
Editing Church Planter Status To change the status of a current planter, start from the planter directory page, find them on the list, and click on the “Edit” arrow in front of their record.
Editing Church Plant Status When you set the person up in the system you entered the planter first and then the church plant. To archive / delete them later you must reverse the process. This means first changing the information in the church section such as “church status” and “Church Planter Status for this Church.”
Editing Church Plant Status Then, if the planter is no longer working with the church you may wish to actually detach them from that ministry. Remember to update their funding status end date later on their profile! Also, hit “Submit” at the bottom after any changes.
Changing church planter status After you have changed the status of the church start, then you can return to the top of their profile and change their individual status as well. Don’t forget to resubmit this information at the very bottom of the form.
Transition to Usernames Next, we are going to look at how to change multiple usernames and passwords at the same time. Under the “Admin” menu item click “Usernames & Passwords.”
- Changing Usernames & PWs To change multiple usernames and passwords, simply type in the new username and password for the appropriate people, and then click on the “Update Planters/Ministry Leaders” button at the bottom of the page. Anyone you check to the right will receive an email notification.
- PIF and CPA Applications To view, upload, or edit a planter’s confidential paperwork click here. Security will ask you for an additional password.
- Funding Process Set Up To edit or alter the Funding Process Checklist used for everyone click here.
- Change Funding Checklist There is a row for each item in the checklist, that allows you great flexibility in setting up each check list item in a way that is exactly useful to you. You can even attach a file to each item on the checklist.
- Funding Process Setup 2 You can also add an entirely new checkpoint by clicking on this button at the bottom. Don’t forget to click the submit button after you have made changes.
Funding Process Checklist A Now to utilize the funding process checklist that you have no set up simply click here.
Funding Process Checklist B This table is populated with everyone currently working through the funding process. The columns are the very categories you set up on the previous form. You can remove someone from this list with the last column. Don’t forget to click on submit when you have made changes.
Update Tool A The update tool will allow you to easily alter a field across every planter in the system.
Using the updating tool For individual planters you can select any field from the Planter or Training Information sections. Then simply scroll down the page and make whatever changes need to be made in that field for particular planters.
Update Tool B The other sets of fields are actually related to the church starts and not to the planters. To update those fields you must first select churches from this dropdown box and then hit the top filter button off to the side.
Update Tool C Your primary list is now populated with congregation names. You also have three columns of possible fields to update, representing the three sections of information for churches. Don’t forget to hit the lower filter button to populate the column with current data after selecting a field.
Ministry Leader A To add new ministry leaders, or edit current ones, you use a process similar to adding and editing church planters. Click on the ‘Leaders’ menu and select “Add a New…”
Ministry Leader B Fill out all pertinent information for the new leader, including selecting all of their roles. Don’t forget to hit the submit button when you are done!
Ministry Leader C To edit or delete a ministry leader first click on the ‘Ministry Leader Directory’ menu item.
Ministry Leader D Next click on the arrow beside the name of the Ministry Leader who you wish to edit or delete.
Ministry Leader E You can now make any changes to their profile, please remember to scroll down and hit ‘Submit’ to register your changes. Also you can delete them using the ‘Delete’ button that is next to the ‘Submit’ button. Please be sure first to uncheck any leader roles that are currently checked.
Ministry Leader E You can now make any changes to their profile, please remember to scroll down and hit ‘Submit’ to register your changes. Also you can delete them using the ‘Delete’ button that is next to the ‘Submit’ button. Please be sure first to uncheck any leader roles that are currently checked.
Training Worksheets A As you know, you may also use the tracking system to keep records of those who need specific kinds of training, and of those who have completed training. Simply click on ‘Add a New Training’ to get started.
Training Worksheets B This form first gives you a list of current, upcoming training events. If your event is not listed you can create a new event by filling in the details on the form and clicking the ‘Add’ button.
Training Worksheets C You can also select a training worksheet for one of the different categories of training. Such as ‘Basic Training Journey’
Training Worksheets D This gives you a filterable and interactive form that lets you see who needs basic training, and if or when they are registered to attend.
Training Worksheets E You can also check ‘Attendance Reports’ for particular training events, see a ‘Registration List’ for particular training events, or click on ‘Register Me’ to assist someone in registering for an upcoming event.
Training Worksheets F You can then follow a step by step process to register someone for one of the training events that you have created.
Search Page Reports A Another incredible feature of this tracking system is the ability that you have to create customizable reports on your own using the ‘Search/Filter’
Search Page Reports B Simply enter as many of these parameters as you wish to use as a filter, and the database will give you back a report limited to those records when you hit the ‘Search’ button at the bottom.
Search Page Reports C If you scroll down to the bottom of the results you will see that there is a button that allows you to export these results to MS Excel.
Report Administration A It also is urgent to understand how to use your ‘Report Administration’ tool to control those who are receiving reports via email.
Report Administration B Here you can set the exact email of everyone (separated by commas) who needs to receive the reports listed here. To make sure someone no longer receives a report simply delete their email. Don’t forget to hit the submit button at the bottom!
Strategic Mapping A The ‘Mapping Update Tool’ allows you to help ensure that the most accurate information is displayed on your ‘Strategic Mapping’ report.
Strategic Mapping B Use the filters to find the appropriate group you wish to update on the map, and then use the form to make changes to multiple entries.
Strategic Mapping C To use your powerful ‘Strategic Mapping’ feature, that is priceless in understanding your field, simply click here.
Strategic Mapping D Follow the step by step sub-process to set the right parameters from your search, and enjoy a Google Map custom plotted and keyed with the locations of your congregations!
The End • That’s it! • If you have any questions, please feel free to call your information system administrator • Kay Sue Leppert at: 502.489.3418 • or • For customer support, call our team at • Office: (847) 348-1408or Jon’s Cell: (773) 213-4858 or • Email: jon@scatterus.org