Download
1 / 43
430 likes | 460 Views
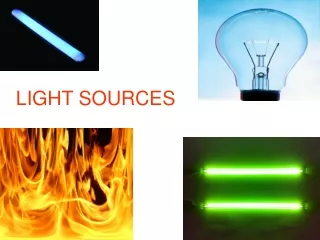
Two Major Categories of Light Sources. Natural Light Sunlight, Moonlight, Reflected Daylight Artificial Light Flash, Lamps, Studio Lights. Off Camera Lighting (flashgun). Off Camera Lighting (flashgun). Experiment

E N D
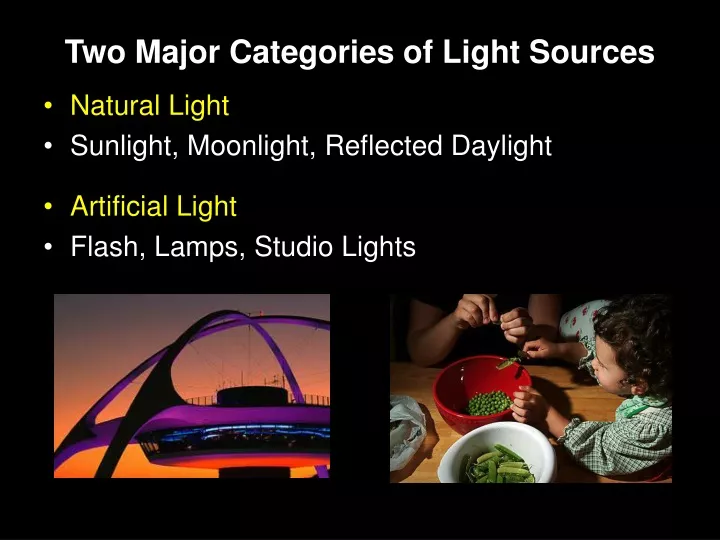
Two Major Categories of Light Sources • Natural Light • Sunlight, Moonlight, Reflected Daylight • Artificial Light • Flash, Lamps, Studio Lights
Off Camera Lighting (flashgun) • Experiment • A flash unit was underneath an opaque tupperware container shining up through the vinegar. • This created a 'lightbox' feel.
Off Camera Lighting (without a flash) • This was a simple setup on a table with a dark blanket as the background. • The lighting was a $10 construction clip lamp with a 14w compact fluorescent bulb (850 lumens). • The light is off-camera right and there was a large piece of foam core off-camera left as fill.
Direction of Light • Overhead • High contrast - harsh shadows. • This is a typical example of the harsh shadows that result when the sun is high in the sky. • When it is necessary to shoot at this time of day, flash "fill" or a reflector can help.
Direction of Light • Front Lighting • Flat, lacks depth, dimension • Front lighting with the light placed slightly to the right of the camera causes even and fairly flat illumination. • This produces a flat, brightly lit subject that reveals little texture and form. There will be few shadows to produce the illusion of depth.
Direction of Light • Back Lighting • May require additional fill or reflector. • Good for creating dynamic shapes • Striking graphic effect of silhouettes, or soft rim lighting are examples of effects when this type of light source is used.
Direction of Light • Side LightingGood for bringing out textures and defining shapes. • This tends to cast one side in total darkness, while putting the other in the spot light. This is a wonderful way to get a mysterious, dramatic portrait photo. Tulips: f/4L IS @ 105mm, f/4.0, 1/80 sec, ISO 400
Side Lighting • The Elephant was shot with strong side-lighting at 200mm, f/2.8 using a high shutter speed. • Note the detail in the hair atop the elephant’s head, in the folds of the skin, and esp. the detail retrieved in the shadows on the front leg, on the trunk, and to the right of the trunk.
Side Lighting • Side lighting casts illumination on half of the subject, modeling him in three-dimensional form. • For portraits, a reflector is used with side lighting to show detail in the shadows.
Comparison: Front and Side Lighting Front Side
Direction of Light • Overcast (clouds filtering the sun) • Lower contrast, good for details, fewer shadows • The diffused light from an overcast or partly cloudy sky allows you to see the details of the leaves and the variety of shades in his firn.
Quality of Light • Another characteristic of light is the quality, often defined as"hard"or"soft.“ • Hard light is very bright, resulting in sharp shadows. • Soft light is diffused, displaying better range of details.
Compare Light at different times of the day Boat AM- morning light, sun lower in the sky. Better details. Boat PM- midday light, sun higher in the sky. Details are washed out.
Studio Lighting With either hot lights or studio strobes you will be able to control the harshness of the light as well as being able to de-emphasize problem areas, such as a narrow face or a round face. The wrong lighting will emphasize these features and will not be flattering to your subject.
Diffused Lighting • Sometimes lighting from any direction is just too harsh. • This is when you want to soften the incoming light, to take away some of the contrast for a more pleasing photograph. • Bright sunlight at midday is the worst kind of light for photography. The light colors are washed out and the contrasting shadows are too dark.
Reflectors • Reflector card. A reflector card is used to bounce light that's shining down back up on a subject to add light to the shadowed areas, making for a more even overall appearance. • A reflector card can be made of any number of things. • White poster board, a white umbrella or aluminum foil (first crinkled and then stretched) • As a side note, aluminum foil can be especially fun if you can find it in gold color. It will cast a very nice, warm light onto your subject.
Using Reflectors White- Fills in shadow areas with detail Silver- Cools the subject with a white light Gold- Warms the subject with a yellow light
Softbox.A Softbox is a piece of studio lighting equipment that spreads and diffuses light out over your subject to avoid harsh shadows. • Overcast skies do the same thing. If you get skies like this, grab your subject and head outdoors to snap as many portraits as you can.
Flash Light (on camera flash) There is just about no light less flattering than a bright light aimed straight at your subject that causes harsh shadows. • There are studio strobe units that you set off to the side of your camera and flash as you press the shutter and those are a completely different thing. • It is not recommended to use camera's flash unless you are going to be in a dark situation where you absolutely have no choice.
Strobes • A studio flash (also called a strobe) is an extremely bright light that comes on momentarily when you hit your shutter. Due to the light intensity, these lights can be extremely hot and uncomfortable for a subject, which is why they are used as a brief strobe instead of left on all the time.
Portrait Lighting • Lighting Styles and techniques
Broad Lighting • Broad Lighting. Broad lighting is when the main light is positioned in such a way that it illuminates the side of the face that is turned toward the camera. • This technique is used mainly for corrective purposes. It will de-emphasize facial features and is used mostly to make thin, narrow faces appear wider.
Short Lighting • Short Lightingis when the main light illuminates the side of the face that is turned away from the camera. • This technique is used when the subject has an average oval face. Short lighting emphasizes facial contours more than broad lighting. • This narrow lighting is especially good for use in low-key portraiture. Because short lighting has a narrowing effect, it is great for use with subjects that have particularly round or plump faces.
Butterfly Lighting • Butterfly Lightingis achieved by positioning the main light directly in front of the subjects face and adjusting the height to create a shadow directly under, and in line with, the nose. • The term comes from a butterfly shaped shadow beneath the subject's nose. • This style is best suited for subjects with a normal oval face and is considered to be aglamour style of lighting.
45 Degree or Rembrandt Lighting • Rembrandt Lighting lighting is obtained by combining short lighting and butterfly lighting. • Direct your Main Light toward your subject's face at an angle of approximately 45 degrees. • The main light is positioned high and on the side of the face that is away from the camera. • This technique produces an illuminated triangle on the cheek closest to the camera. The triangle will illuminate just under the eye and not below the nose.
Portrait Lighting • Rembrandt, the master painter used a technique of setting his subjects near a large north-facing window (so no direct sunlight would hit the subject) and turning them in relation to the window to create flattering lighting effects that really emphasized the high spots and depths of his subject's face. Self-Portrait, Oil on canvas, 31 5/8 x 26 1/2 in.1660
Fill Light.You normally place the fill light on the opposite side of the camera from the main light. • The fill light also needs to be a much lower power unit than the main light. The purpose of the fill light is to add just enough light to soften the shadows created by the main light. • The fill light is used to control contrast.
Background Lights • Background lights can be used to illuminate the background, gaining more depth or separation in your image. • This light is usually placed low to the ground on a small stand. • A low power light is generally used. • You can dramatically change the look of the shot by adding a gel to background light. Just remember when using gels you have to use a stronger light to compensate for the illumination being lost through the gel.
Lighting Hair • Hair Light.The hair light is a lower power light that illuminates the subjects hair providing separation from the background. This is especially important when photographing a subject with dark hair against a dark background.
Lighting Hair • To properly place a hair light, you should bring the light forward enough to let the light spill onto the subjects face, then slowly move it back until the light disappears from the subjects skin.
Home Lighting tips Use a piece of tissue paper to diffuse the light from a desk lamp. Or use a piece of tin foil to reflect light. Try bouncing light off a mirror, onto a white sheet of paper and place an object in the middle.
Lighting and Depth of Field • Product Photography • Aperture Settings/ Depth of Field • Using Artificial Light
Lighting and Depth of Field Set the ISO to 80 Set the shutter speed to 1/30th of a second Set the aperture to f/11 to maintain a large depth of field
Lighting and Depth of Field To add more dimension to the shot, set up another small lighting kit and position it off to the left hand side.
Lighting and Depth of Field Before second lighting kit After second lighting kit (left side)
Lighting and Depth of Field Next, add another lighting kit to the right side to balance the reflections of the ring.
Lighting and Depth of Field After third lighting kit Before third lighting kit
Lighting and Depth of Field Set the aperture to f/4.5, adjusted the shutter speed, and ring is soft but recognizable. f/2.4(large aperture) makes the rear ring too soft (almost unrecognizable.)