Download
1 / 24
240 likes | 652 Views
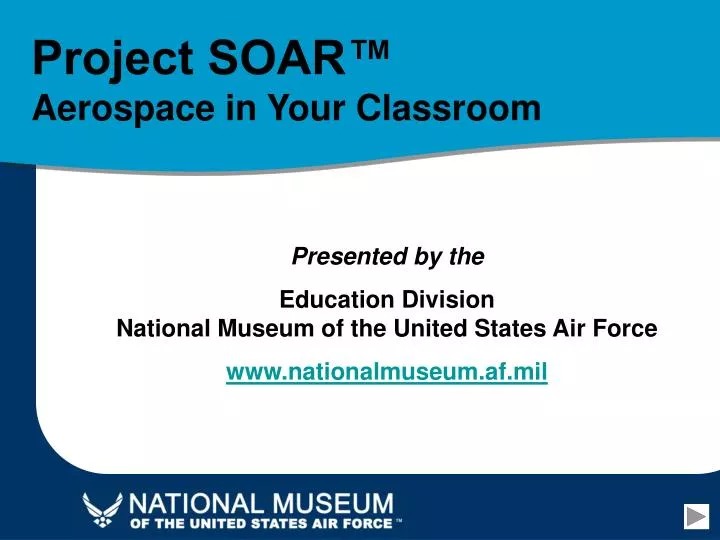
Project SOAR™ Aerospace in Your Classroom Presented by the Education Division National Museum of the United States Air Force www.nationalmuseum.af.mil Project SOAR™

E N D
Project SOAR™Aerospace in Your Classroom Presented by the Education DivisionNational Museum of the United States Air Force www.nationalmuseum.af.mil
Project SOAR™ The goal of Project SOAR is to inspire learning and capture the interest and enthusiasm of students and teachers through the implementation of aerospace activities that support the local curriculum, state models and national standards in science and mathematics. Each summer teachers participate in a week long summer institute and design and contribute aerospace lesson plans. These are located on the National Museum of the United States Air Force Web site, www.nationalmuseum.af.mil. The instructions for the plate glider are courtesy of the Academy of Model Aeronautics.
Parachute Activity • Material List: • For each parachute, you will need: • One paper dinner-sized napkin • String (160 cm long) • Ruler • Scissors • 5 small stickers or tape • 5 large paper clips • Chart paper • Markers
Parachute Activity • Directions: • Open the napkin completely and place on table. • Measure and cut string into for 40 cm lengths.
Parachute Activity • Directions (continued): • Lay one string at a diagonal on the each corner of the napkin and seal in place with a sticker or piece of tape. • Follow these same instructions for the other three corners of the napkin. • Gather up the ends of the strings carefully and lift the napkin into the air by the strings just above the table. • Make sure the strings are equal in length and attach to a paper clip with a piece of tape.
Parachute Activity Directions (continued): Students will drop the parachute gently and observe it as it floats to the ground. Why does it fall? What force is acting upon it? Why does is float rather than drop straight down? Discuss these questions with the class. Record class observations on chart paper. The students will add one paper clip at a time and observe what happens as the parachute floats to the ground. Time and record how long it takes the parachute to reach the ground.
Parachute Activity Directions (continued): Continue to add paper clips (one at a time) and record time of descent. Discuss what happens each time more mass (a paper clip) is added to the paper napkin parachute. To create a candy parachute similar to the ones in the book, Mercedes and the Chocolate Pilot by Margot Theis Raven, use miniature candy bars or hard candy instead of the paper clips.
Mercedes and the Chocolate Pilot By Margot Theis Raven This is the true story of a seven-year-old girl named Mercedes who lived in West Berlin during the Airlift and of the American who came to be known as the Chocolate Pilot, Col. Gail Halvorsen.
Airplane Activity • This classic paper airplane has control surfaces. Students may experiment to determine how the control surfaces change the flight. • Material List: • Paper (8½" x 11") • Paper clips • Tape • Scissors • Tape measure (metric or standard) • Notebook paper • Pencil • Graph paper • Paper dart pattern (download from the Project SOAR™ curriculum guide at www.nationalmuseum.af.mil)
Airplane Activity Directions: Using the paper dart airplane pattern, construct a paper airplane using the following instructions: • Fold the pattern in half lengthwise and open. • Fold down the top two corners of the paper so they meet together at the center line. Make folds as neatly as possible. Rub with the side of a pencil to make the fold nice and crisp.
Airplane Activity • Directions (continued): • Fold the entire right-hand top edge to the center line. Now fold the entire left-hand top edge to the center line. The two folds will meet in the middle. • Fold plane in half along the center line.
Airplane Activity • Directions (continued): • Now take one of the open edges and fold it back to the “folded” center line. • Turn the paper over and repeat. Gently pull up on the wings and tape them into place. • To make the ailerons, cut on the solid lines and fold on the dotted lines, as indicated on the master pattern.
Airplane Activity • Directions (continued): • Go to a large indoor area (gymnasium) and practice flying the paper dart airplanes. • Using masking tape, mark a line for the students to stand behind when flying their darts. • Students will fly their darts a total of four times, each time with a different aileron configuration. • 1st flight - no ailerons • 2nd flight - both ailerons up • 3rd flight - both ailerons down • 4th flight - one aileron up and one aileron down
Airplane Activity • Directions (continued): • Measure the distance flown during each flight. Note: You may want to mark the gym floor (with masking tape) at 1 meter intervals to make it easier for students to measure. • Record distance flown during each flight. • Students will determine which aileron configuration provided their paper dart the longest flight distance.
Airplane Activity On a delta wing airplane, the elevator and the ailerons are combined to create an elevon. When both are in the same position, the control surfaces work as an elevator, controlling motion along the lateral axis. This axis is an imaginary line running from wingtip to wingtip. This motion is called pitch. When the elevons are in opposite positions, they work as an aileron, controlling motion along the longitudinal axis. This axis is an imaginary line that runs from the nose to the tail. This motion is called roll.
Plate Glider Activity FPG-9 Styrofoam® Plate Glider By Jack Reynolds, VolunteerNational Model Aviation Museum, www.buildandfly.com Objective: This simple design requires only a foam plate, a little ambition, and even less time. The FPG-9 plane is a basic illustration of how flight works.
Plate Glider Activity • Description: • The FPG-9 is constructed from a 9” foam plate. Just two pieces are traced from a pattern, cut out and assembled. • Material List: • FPG-9 pattern • 9” foam plate • Scissors • Clear tape • Ink pen • Penny
Paper Glider Activity Directions: Note: Since a paper pattern is hard for students to trace around, the instructor may want to cut out a foam plate master template for the students to use to trace around. • Cut out the paper FPG-9 pattern. Do not cut along the dotted line on the paper pattern. Only cut along the bolded lines. • Place the paper pattern in the center of the foam plate ensuring that the tail of the pattern stays inside of the curved portion of the plate bottom. (The tail must remain on the plate’s flat bottom.) It’s fine if the tab on the front of the pattern is on the curved portion. The ends of the wings should spill over the curved edge of the plate.
Plate Glider Activity • Directions (continued): • Trace around the pattern with an ink pen. Don’t forget to mark the scissor slits A and B. • Cut the foam template out by following the pen lines you just drew.
Paper Glider Activity • Directions (continued): • Once the instructor has completed the master foam template, the students may use the template to create their FPG-9 planes. • Have the students place the foam template in the center of the plate and trace around the template making sure to mark all of the lines. • When tracing slits A and B the students only need to make one line. These lines will create the elevons and rudder. • Have the students cut out the FPG-9 they just traced by following the pen lines.
Paper Glider Activity Directions (continued): Important Note: At this time cut along the dotted line to separate the tail from the wing of the FPG-9. It works better if you make all of your cuts from the outside of the plate towards the center of the plate. Do not try to turn your scissors to cut sharp corners. When cutting out the slots, make them only as wide as the thickness of the foam plate. If the slots are cut too wide the pieces of the plane will not fit together snuggly.
Paper Glider Activity • Directions (continued): • The wing and the tail each have slits drawn on them. Have the students make a cut along each of these lines as drawn. • To attach the tail to the wing, slide Slot 1 into Slot 2. Use two small (2”) pieces of tape to secure the bottom of the tail to the bottom of the wing. Ensure the tail is perpendicular to the wing before adding the tape. • In order to make the plane fly successfully, the students must attach a penny on top of the wing right behind the square tab. Fold the tab back over the penny and tape it down to secure the coin.
Plate Glider Activity • Directions (continued): • Bend the elevons on the wing upward. This will provide for a flatter glide. If the students want the plane to turn they can adjust the rudder on the vertical fin. • Your FPG-9 is complete and ready to fly. Gently toss the plane directly in front of you. Once it flies reasonably straight ahead and glides well, try throwing it hard with the nose of the glider pointed 30° above the horizon. The FPG-9 should perform a big loop and have enough speed for a glide of 20-25 feet after the loop.
More Resources Additional Teacher Resourcesare available online athttp://www.nationalmuseum.af.mil/education/educators/index.asp