Download
1 / 12
120 likes | 307 Views
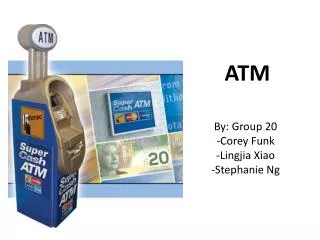
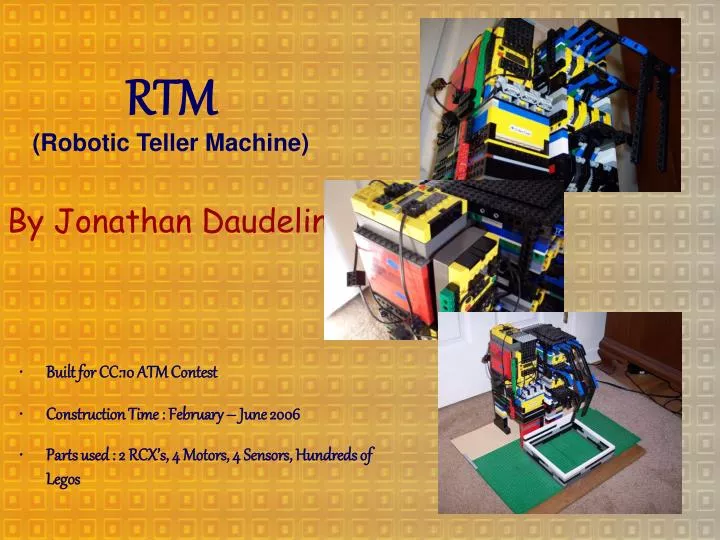
RTM (Robotic Teller Machine). By Jonathan Daudelin. Built for CC:10 ATM Contest. Construction Time : February – June 2006. Parts used : 2 RCX’s, 4 Motors, 4 Sensors, Hundreds of Legos. RCX’s:. Microcomputers that make up the brain and power of RTM. 2 are used.

E N D
RTM(Robotic Teller Machine) By Jonathan Daudelin • Built for CC:10 ATM Contest • Construction Time : February – June 2006 • Parts used : 2 RCX’s, 4 Motors, 4 Sensors, Hundreds of Legos
RCX’s: • Microcomputers that make up the brain and power of RTM • 2 are used • Communicate with each other via IR • One handles keypad and money dispensing • One handles card reading
Reading the Card: • When card is inserted, RTM moves it over a light sensor, which scans the color code • If correct, RTM matches the card with it’s account and gives access to entering the PIN • If wrong, RTM ejects the card and gives no access
Money Dispensers I • To separate bills, the bill has to travel through a complex route in order to get out – this friction only lets the top bill come out. • A motorized wheel spits out the bills into a container below • Wheel is on a beam that can move up or down and still power the wheel. This enables the wheel to continually press on the bills (via rubber band)
Money Dispensers II • Three money dispensers that dispense three types of bills : Ones, fives, and tens • Stacked vertically above a container, so that bills land in the same spot in the container • The bill dispensers were the first thing worked on, as they were the main design challenge
Key Pad • Key pad is made up of three buttons : “Switch”, “Select”, and “Enter” • Display shows “0” at the start • When “Switch” is pressed, the display moves up 1 (so if display shows 4, it would change to 5) • “Select” selects the current digit • “Enter” (only available when withdrawing money) enters the number shown
Entering PIN • PIN is entered via key pad, and can only be entered if a correct card has been inserted • PIN consists of five digits, which are selected via the “Switch”, and “Select” keys • Once five digits are selected, RTM determines if the PIN matches the inserted card’s account • If PIN is correct, access is given to money withdrawal, otherwise RTM beeps and no access is given
Withdrawing Money • User selects a desired amount of money using “Switch” and “Select” keys, and then enters that amount with the “Enter” key • When an amount is entered, RTM determines whether or not it’s greater than the amount in the user’s account • If it’s greater, RTM clears the screen and you enter a new amount . If less, RTM dispenses the exact amount in tens, fives, and ones (in least number of bills)
Depositing Money • In back of RTM, a door can be opened, revealing slots • Bills can be slid through slots into money dispensing boxes. • Slots only allow bills to be slid in, but not be taken out • A “tool” on the door helps push bills in all the way
Short History I • RTM was made in modules: Money dispensers, Card reader, Key pad, and RCX’s. Then they were put together to form the complete RTM • Money Dispensers were worked on first, as they were the biggest challenge. • Two prototype dispensers were made before final version. • Card reader and Key pad were made next • First card reader worked well, and was used in final version. First key pad didn’t work, so another version was made for the final RTM
Short History II • First working dispenser module – late February • Card reader and first key pad – mid March • Above models programmed – late March • First complete RTM prototype – early April • Second complete RTM – mid April • RTM Securified and completed – late April • RTM programmed except for firmware bug – early May • RTM finalized and bugs fixed – Late May • RTM shown and publicized – Early June
Interesting Facts • PIN’s and Money Amounts: • #1 – 35182 - $100.00 • #2 – 27435 - $110.00 • #3 – 57293 - $30.00 • Programming language used: NQC • Cards were designed on computer • Lines of code: • Program #1 – 232 • Program #2 - 106