Download
1 / 75
750 likes | 928 Views
Security and Forensics in the Classroom. Professor James L. Antonakos Computer Science Department. Topics. My Teaching Goals The Networking Lab We Use Scenario #1: Switched LANs Scenario #2: MyiSpaces.com Scenario #3: Making Malware Harmless Scenario #4: Mystery Traffic

E N D
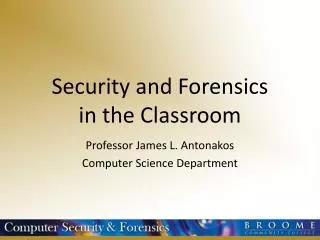
Security and Forensicsin the Classroom Professor James L. Antonakos Computer Science Department
Topics • My Teaching Goals • The Networking Lab We Use • Scenario #1: Switched LANs • Scenario #2: MyiSpaces.com • Scenario #3: Making Malware Harmless • Scenario #4: Mystery Traffic • Scenario #5: DDoS the Network Camera • Scenario #6: Buffer Overflows • Scenario #7: Exploring Steganography • Scenario #8: Hard Disk Forensics
My Teaching Goals • Get students interested, excited, and curious about security and forensics. • Show students how to use different hardware and software tools. • Reinforce knowledge from other courses. • Show students how to learn. • Increase my own knowledge by learning from students.
Networking Lab Details • Lab is fed from a Cisco ASA firewall in network closet. • Managed Asante switch is fed from Linksys router. • Thirteen desktop PCs running Windows XP (with Linux and Windows Server partitions also). • Networked Axis video camera. • Linksys wireless access point. • Local file server. • HP network printer. • Additional Linksys router feeds small test network.
Network Lab Details, Part 2 • Internet connection for lab is through Time Warner RoadRunner. • This allows us to do things that are not possible on the campus network: • Capture traffic • Add devices • Use Administrator privileges on the lab computers • Install / remove / test software
Scenario #1: Switched LANs • What has the SwitchSniffer application found? • IP and MAC addresses • Machine names • Operating systems • Network vendors • Questions to students: • How did SwitchSniffer do all this? • Are we safe on a switched LAN?
Scenario #1: Switched LANs • Wireshark ran on the machine whose IP address was 192.168.1.104. • SwitchSniffer was run on the same machine so that Wireshark could capture all traffic associated with the program. • Questions to students: • Why is SwitchSniffer using ARP? • Where is the ARP for 192.168.1.1?
Scenario #1: Switched LANs • An ARP reply shows that an IP address is active and also returns the MAC address of the device. • Question to students: • Does the time difference between the ARP request and ARP reply tell us something about the device (fast response means dedicated hardware, slow means operating system)?
Scenario #1: Switched LANs • SwitchSniffer has used SMBs with some discovered devices to learn more about them. • The “Follow TCP Stream” feature of Wireshark shows what SwitchSniffer learns via the SMB session. • Question to students: • Why does SwitchSniffer use SMBs with some devices but not all?
Scenario #1: Switched LANs • We examined the SwitchSniffer program using the Strings utility. • We found a large list of NIC Vendor names and their associated 24-bit MAC address ID. • SwitchSniffer used the MAC address from the ARP reply to search its internal database. Flagged vendor IDs caused a SMB session to follow. • Files for this scenario are located here: • http://web.sunybroome.edu/~antonakos_j/cybersec/scenario1/
Scenario #1: Switched LANs • What did the students learn? • Not really safe even on a switched LAN. • How to use Wireshark. • The power of the ARP protocol. • How to use the Strings utility. • Overall, one way to investigate the operation of a network-based program.
Scenario #2: MyiSpaces.com • I received a call from a former student in charge of security at Time Warner asking if I wanted to capture a live attack before he blacklisted the website. • I started Wireshark and entered the website URL. The website was a mock-up of the MySpace login page. I entered a bogus account name and password and then spent some time investigating the captured traffic. • I have a special laptop I use for capturing and investigating malicious code.
Scenario #2: MyiSpaces.com • Using Wireshark’s “Follow TCP Stream” feature starting at packet 325 gives the cryptic code that we want to investigate. • Question to students: • Does anyone recognize those % codes?
Scenario #2: MyiSpaces.com • I wrote a program to print the ASCII symbols associated with the % codes.
Scenario #2: MyiSpaces.com • Here is the code with some formatting added for readability. • Question to students: • What does this code do?
Scenario #2: MyiSpaces.com • I wrote another program that implements the decryption code and ran it with this input:
Scenario #2: MyiSpaces.com • Here we see that an obfuscated java script was used to decrypt and execute a VB script. • VB script wants to download iepeers32.exe, among other things. • What did the Students learn? • Good to know ASCII. • How to analyze code to discover its purpose. • Malware writers do not want us to see what they are doing. • Files for this scenario are located here: • http://web.sunybroome.edu/~antonakos_j/cybersec/scenario2/
Scenario #3: Making Malware Harmless • Several years ago I used to provide a working copy of malware to my students in a password protected ZIP file. • This was a mistake as one student actually ran it (curiosity killed the cat). • Question to students: • Who is at fault here? The student for running the code or the instructor for providing it? • A virus scan of the WebCT server revealed my file and the administrator deleted it. • Problem for me: How do I continue to provide a malware sample but make it undetectable from the WebCT administrator (and safe for the students)?
Scenario #3: Making Malware Harmless • I used URSoft’s W32Dasm disassembler to look at the machine language of the malware and locate the first instruction. • I then used a hex editor to search through the machine code for the initial instruction bytes and changed the initial instruction to a RET. • This rendered the malware harmless as it simply loads into memory and immediately returns.
Scenario #3: Making Malware Harmless • Two problems for me: • The malware, even though it is now crippled, can still be recognized by some virus scanners (Panda ActiveScan). This means I can not put even the crippled malware back onto the WebCT server. • The crippled malware is not recognized by other virus scanners (Bit Defender) meaning I have changed its signature. This is not good for me but good for the students as they are now challenged to use more than one scanner to identify the code. • Solution: Turn the malware into a text file.
Scenario #3: Making Malware Harmless • I wrote a program to read every byte from the malware file and convert it into a two-character cipher text pair written to a file called TEXT.HID. • Example: 3C becomes DN. The upper nybble is added to ‘A’ and the lower nybble is subtracted from ‘Z.’ • TEST.HID can be stored on the WebCT server as it is a harmless text file. • I also wrote a decoder program that converts TEST.HID back into the original code saved in a file called TEST.EXE which is the crippled malware the students can examine. The decoder program also goes on the WebCT server and is not recognized as malicious by the scanner either.
Scenario #3: Making Malware Harmless • TEST.HID and the decoder program are saved in a new password-protected ZIP file on the WebCT server (summerfun.zip, password is 123). • Skills students are exposed to: • Using a disassembler. • Using a hex editor. • Cryptography. • Finding a password cracker for ZIP files. • Files for this scenario are located here: • http://web.sunybroome.edu/~antonakos_j/cybersec/scenario3/
Scenario #4: Mystery Traffic • I was inspired by a previous year’s Cyber Security presentation that had an example of analyzing suspicious traffic, so I wrote my own network program to generate some of my own mystery traffic. • Question to students: • What is going on?
Scenario #4: Mystery Traffic • Things the students picked up on: • The source port number keeps increasing by 1. • The destination port number bounces around seemingly at random, but all in the 7000 range. • The data area of the UDP datagrams contain an increasing integer sequence ([100], [101], [102], etc). • Why all the ICMP messages?
Scenario #4: Mystery Traffic • Taking a closer look at the destination port numbers, we have:
Scenario #4: Mystery Traffic • First we remove the 7000 bias on the port numbers. • The Value numbers are actually decimal values for ASCII codes. • The network traffic represents the command cd /usr/bin
Scenario #4: Mystery Traffic • I explain to the students that this is one way to hide commands sent from one computer to another. • Question to students: • What is required on the destination computer in order to be able to receive commands in this way? • Files for this scenario are located here: • http://web.sunybroome.edu/~antonakos_j/cybersec/scenario4/
Scenario #5: DDoS the Network Camera • Use the PING command to send large amounts of traffic from one machine to the network camera. • Run PING on all lab computers, in multiple command windows, to increase the amount of traffic that must be processed by the camera. • Eventually the camera freezes and does not come back until powered off and on again.
Scenario #5: DDoS the Network Camera • In one second the PING command generates approximately 40-50 PING requests from the command ping 192.168.1.98 –l 65000 –t • This easily becomes hundreds of requests when multiple command windows are used. • This then becomes many thousands of requests when multiple computers are used. • It is fun to watch the lights flashing on the network switch during the DDoS attack.
Scenario #6: Buffer Overflows • The goal in teaching the students about this material was to duplicate the activities described in the paper “Smashing the Stack for Fun and Profit.” • In order to do the work, the students were given refreshers in Intel 80x86 assembly language and the operation of the run-time stack created by the C compiler. • Some of the information presented in the paper had to be changed due to the different compiler version available with our version of Linux.
Scenario #6: Buffer Overflows • Sample C program and its associated run-time stack:
Scenario #6: Buffer Overflows • The idea behind a buffer overflow is to write more information into a reserved memory buffer than it can hold, causing other memory locations to be overwritten. • These memory locations exist on the run-time stack. By overwriting the locations with the proper information (malicious instructions and data), control of the program can be passed to the malicious code.
Scenario #6: Buffer Overflows • The students learned how to use the gdb debugger to single-step through the function code and display the register contents.
Scenario #6: Buffer Overflows • The problem: We could not duplicate the results presented in the paper (the ability to spawn a new command shell). • The reason: In the years since the paper was released, the Linux operating system has been hardened against certain types of buffer overflow exploits (through the ExecShield technology), resulting in ‘Segmentation Fault’ errors no matter what we tried. • The solution: Use an older version of Linux.
Scenario #6: Buffer Overflows • A Red Hat Linux 6.1 environment was created in VMWare:
Scenario #6: Buffer Overflows • All students are given a DVD containing VMWare Player (free) and the files needed for the Linux 6.1 environment. • The students are able to duplicate the results of other buffer overflow examples from the paper.