Download
1 / 40
440 likes | 1.26k Views
Intravenous Access. The ability to obtain intravenous (IV) access is an essential skill in medicine and is performed in a variety of settings by paramedics, nurses and physicians.

E N D
Intravenous Access The ability to obtain intravenous (IV) access is an essential skill in medicine and is performed in a variety of settings by paramedics, nurses and physicians. Although the procedure can appear deceptively simple when performed by an expert, it is in fact a difficult skill which requires considerable practice to perfect.
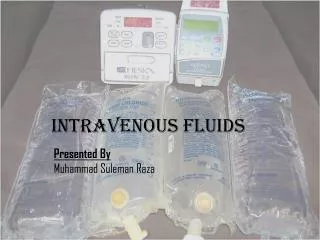
Intravenous Access Used for access to body's circulation Indications: Administer fluids Administer drugs Obtain laboratory specimens Route of choice for fluid replacement is peripheral vein in an extremity
Intravenous Access No general or regional anaesthetic procedure should start without intravenous access. A large bore cannula (14 or 16 gauge) or occasionally a small cannula (21 or 23 gauge)may be used, depending on the type of surgery. For any surgical procedure in which rapid blood loss may occur, nothing smaller than a 16 gauge cannula should be used.
Intravenous Access For major surgery at least one 14 gauge cannula is essential. The major determinant of the flow rate achieved through a cannula is the fourth power of the internal radius. All large-bore intravenous cannulae that are inserted before induction of anaesthesia should be placed after the intradermal infiltration of lignocaine using a 25 gauge needle. The ‘sting’ of the local anaesthetic is trivial compared with the pain of a large intravenous cannula pushed through the skin.
Intravenous AccessTypes of IV Catheters Hollow needles Butterfly type Indwelling plastic catheter over hollow needle Indwelling plastic catheter inserted through a hollow needle Intracath
Intravenous AccessIndications By starting a peripheral IV, you gain access to the peripheral circulation of a patient, which will enable you to sample blood as well as infuse fluids and IV medications. IV access is essential to manage problems in all critically ill patients. High volume fluid resuscitation may be required for the trauma patient, in which case at least two large bore (14-16 G) IV catheters are usually inserted. All critically ill patients require IV access in anticipation of future potential problems, when fluid and/or medication resuscitation may be necessary.
Intravenous AccessContraindications Some patients have anatomy that poses a risk for fluid extravasation or inadequate flow and peripheral IVs should be avoided in these situations. Examples include extremities that have massive edema, burns or injury; in these cases other IV sites need to be accessed. For the patient with severe abdominal trauma, it is preferable to start the IV in an upper extremity because of the potential for injury to vessels between the lower extremities and the heart. For the patient with cellulitis of an extremity, the area of infection should be avoided when starting an IV because of the risk of inoculating the circulation with bacteria.
Intravenous AccessContraindications Avoid sites that have injury or disease: Trauma Dialysis fistula History of mastectomy (concerns about adequate vascular flow)
Intravenous AccessComplications The main complications of an IV catheter are infection at the site and development of superficial thrombophlebitis in the vein that is catheterized. It is also common for the IV sites to leak interstitially.
Intravenous AccessComplications Cellulitis Inflammation of loose connective tissue around insertion site. - Caused by poor insertion technique - Red swollen area spreads from insertion site outwardly in a diffuse circular pattern - Treated w/antibiotics
Intravenous AccessComplications Phlebitis/Thrombophlebitis Chemical - Infusate chemically erodes internal layers. Warm compresses may help while the infusate is stopped/changed. Anti-inflammatory and analgesic medications are often used no matter what the cause Mechanical - Caused by irritation to internal lumen of vein during insertion of vascular access device and usually appears shortly after insertion. The device may need to be removed and warm compresses applied • Bacterial - Caused by introduction of bacteria into the vein. Remove the device immediately and treat w/antibiotics. The arm will be painful, red and warm; edema may accompany
Intravenous AccessComplications Infiltration/Extravasation The most common cause is damage to the wall during insertion or angle of placement. STOP INFUSION and treat as indicated by Pharmacy, Medication package insert or drug reference book.
Intravenous AccessComplications Septicemia/Pulmonary Edema/Embolism Septicemia - Severe infection that occurs to a system or entire body - Most often caused by poor insertion technique or poor site care - Discontinue device immediately, culture and treat appropriately Pulmonary edema- caused by rapid infusion Pulmonary embolism - Caused by any free floating substances that require thrombolytic therapy for several months. Increased risk w/lower ext. Air embolism- caused by air injected into IV system. Keep insertion site below level of heart
Intravenous AccessUniversal precautions The potential for contact with a patient's blood while starting an IV is high and increases with the inexperience of the operator. Gloves must be worn while starting an IV and if the risk of blood splatter is high, such as an agitated patient, the operator should consider face and eye protection as well as a gown. Trauma protocol calls for all team members to wear gloves, face and eye protection and gowns. As well, once removed from the protective sheath, IV catheters should either go into the patient or into an appropriate sharps container.
Intravenous AccessUniversal precautions Important: Recapping needles, putting catheters back into their sheath or dropping sharps to the floor (an unfortunately common practice in trauma) should be strictly avoided. Recapping of needles is one of the commonest causes of preventable needle stick injuries in health care workers.
Intravenous AccessPeripheral IV sites Generally IV's are started at the most peripheral site that is available and appropriate for the situation. This allows cannulation of a more proximal site if your initial attempt fails. If you puncture a proximal vein first, and then try to start an IV distal to that site, the fluid may leak from the injured proximal vessel. The preferred site in the emergency department is the veins of the forearm, followed by the median cubital vein that crosses the antecubitalfossa. In trauma patients, it is common to go directly to the median cubital vein as the first choice because it will accommodate a large bore IV and it is generally easy to catheterize.
Intravenous AccessPeripheral IV sites In circumstances where the veins of the upper extremities are inaccessible, the veins of the dorsum of the foot or the saphenous vein of the lower leg can be used. In circumstances in which no peripheral IV access is possible a central IV can be started.
Intravenous AccessAlternate sites External jugular veins Central vein
Intravenous Access Equipment All necessary equipment should be prepared, assembled and available at the bedside prior to starting the IV. Basic equipment includes: gloves and protective equipment appropirate size catheter 14-25 G IV catheter non-latex tourniquet alcohol swab/other cleaning instrument non-sterile 2x2 gauze sterile 2x2 gauze (this is not practiced in nursing) 6x7cm Tegaderm™ Transparent Dressing 3 pieces of 2.5 cm tape approximately 10 cm in length IV bag with solution set (tubing) (flushed and ready) or saline lock sharps container
Intravenous AccessEstablishing a peripheral intravenous line Explain procedure Inspect fluid for contamination, appearance, and expiration date Prepare infusion set Attach infusion set to bag of solution Assemble your equipment. Put a pair of appropriately sized non-latex examination gloves. Apply tourniquet to the IV arm above the site. Visualize and palpate the vein. Cleanse the site with a chlorhexidine swab using an expanding circular motion.
Intravenous AccessEstablishing a peripheral intravenous line Prepare and inspect the catheter:Remove the catheter from the package. Push down on the flashback chamber to ensure it is tight. Remove the protective cover. Inspect the catheter and needle for any damage or contaminants. Spin the hub of the catheter to ensure that it moves freely on the needleDo not move the catheter tip over the bevel of the stylet.
Intravenous AccessEstablishing a peripheral intravenous line Stabilize the vein and apply countertension to the skin. Insert the stylet through the skin and then reduce the angle as you advance through the vein. Observe for "flash back" as blood slowly fills the flash back chamber. Advance the needle approximately 1 cm further into the vein. Holding the end of the catheter with your thumb and index finger, pull the needle (only) back 1 cm with your middle finger. Slowly advance the catheter into the vein while keeping tension on the vein and skin.
Intravenous AccessEstablishing a peripheral intravenous line Remove the tourniquet. Secure the catheter by placing the Tegaderm™ over the lower half of the catheter hub taking care not to cover the IV tubing connection Occlude the distal end of the catheter with the 3rd, 4th and 5th fingers of your non-dominant hand. Cover puncture site dressing
Intravenous AccessEstablishing a peripheral intravenous line Antibiotic ointment if indicated by protocol Anchor tubing Secure catheter Document procedure Monitor flow
Intravenous AccessEstablishing a peripheral intravenous line http://www.youtube.com/watch?v=R7CJkgjSkvk
Intravenous AccessEstablishing a peripheral intravenous line http://www.youtube.com/watch?v=R7CJkgjSkvk
Intravenous AccessRemoval of the IV Shut off the IV by closing the roller camp. Remove the tape and Tegaderm™ from the tubing and catheter. Place a non-sterile 2x2 gauze over the IV site and remove the catheter from the arm and secure it in place with a piece of tape.
Intravenous AccessCentral line Internal Jugular Anatomy
Intravenous AccessCentral line Femoral Vein Anatomy
Intravenous AccessCentral line IJ Ultrasound Guidance for Central Venous Access, Part 1 (8 min) http://www.youtube.com/watch?v=vRIIaMZL9XI&feature=player_detailpage IJ Ultrasound Guidance for Central Venous Access - Part 2 - SonoSite, Inc. (9min) http://www.youtube.com/watch?v=zV3hw_QbgK4&feature=player_detailpage#t=13s PLACEMENT OF A FEMORAL VENOUS CATHETER (13min) http://www.youtube.com/watch?v=GHfGdpVJuMA&feature=player_detailpage US GUIDED SUBCLAVIAN CENTRAL LINE (12min) http://www.youtube.com/watch?v=jzv99DBa2jE&feature=player_detailpage Percutaneous Sheath insertion http://www.youtube.com/watch?v=0EPTfXx0Np8
Intravenous AccessCentral line Advantages Available when peripheral vessels collapse Access to central pressure measurements In-hospital procedure Safer vasopressor administration
Intravenous AccessCentral line Disadvantages Excessive time for placement Sterile technique Special equipment Skill deterioration High complication rate Pneumothorax, arterial injury, abnormal placement Chest x-ray should be obtained immediately
Intravenous AccessCentral line Air Embolism Uncommon but can be fatal Air enters bloodstream through catheter tubing Risk greatest with catheter in central circulation Negative pressure may pull air in
Intravenous AccessCentral line Air Embolism Signs and symptoms Hypotension Cyanosis Weak and rapid pulse Loss of consciousness
Intravenous AccessCentral line Air Embolism Management Close the tubing Turn patient on left side with head down Check tubing for leaks Administer high-concentration oxygen Aspirate
Intravenous AccessCentral line Complications Air/Thrombus embolism Arrythmias Hematoma Pneumothorax Hemothorax Chylothorax Cardiac perforation Cardiac tamponade Trauma to nearby nerves and arteries Thrombosis
Intravenous AccessCentral line Complications Line infection Blood stream infection