Download
1 / 134
1.34k likes | 1.35k Views
Discover the complete guide to the W600 controller in our comprehensive manual. Uncover the advanced features, setup instructions, and detailed insights for optimal control and monitoring. Download the PDF now for a deep dive into W600 functionality.

E N D
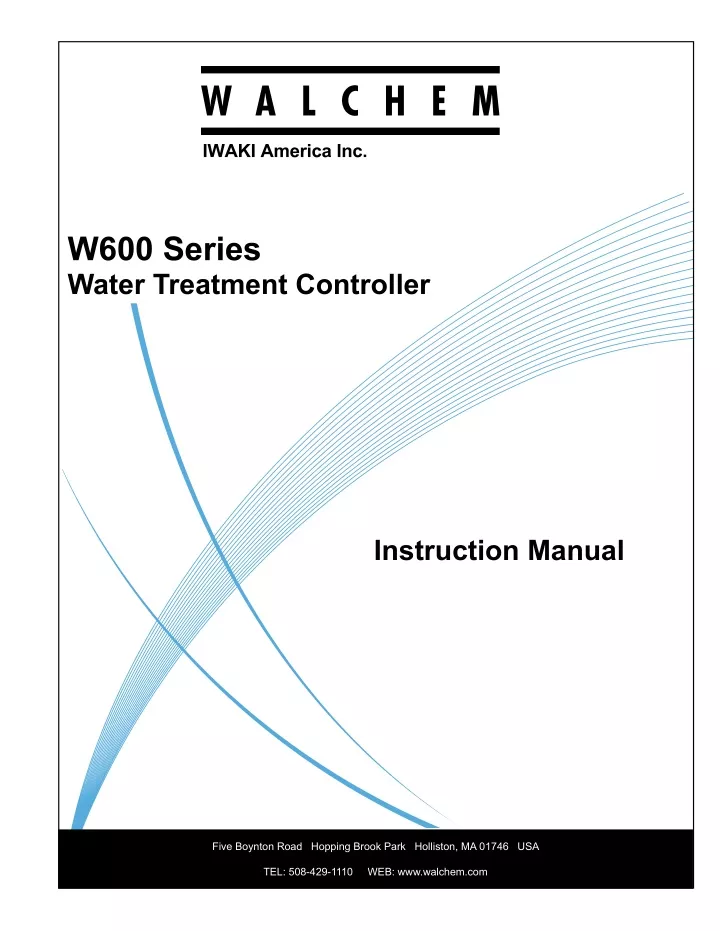
W600 Series Water Treatment Controller Instruction Manual Five Boynton Road Hopping Brook Park Holliston, MA 01746 USA TEL: 508-429-1110 WEB: www.walchem.com
Notice © 2023 WALCHEM, Iwaki America Incorporated (hereinafter “Walchem”) 5 Boynton Road, Holliston, MA 01746 USA (508) 429-1110 All Rights Reserved Printed in USA Proprietary Material The information and descriptions contained herein are the property of WALCHEM. Such information and descriptions may not be copied or reproduced by any means, or disseminated or distributed without the express prior written per- mission of WALCHEM, 5 Boynton Road, Holliston, MA 01746. This document is for information purposes only and is subject to change without notice. Statement of Limited Warranty WALCHEM warrants equipment of its manufacture, and bearing its identification to be free from defects in workmanship and material for a period of 24 months for electronics and 12 months for mechanical parts and electrodes from date of delivery from the factory or authorized distributor under normal use and service and otherwise when such equipment is used in accordance with instructions furnished by WALCHEM and for the purposes disclosed in writing at the time of purchase, if any. WALCHEM’s liability under this warranty shall be limited to replacement or repair, F.O.B. Holliston, MA U.S.A. of any defective equipment or part which, having been returned to WALCHEM, transportation charges prepaid, has been inspected and determined by WALCHEM to be defective. Replaceable elastomeric parts and glass components are expendable and are not covered by any warranty. THIS WARRANTY IS IN LIEU OF ANY OTHER WARRANTY, EITHER EXPRESS OR IMPLIED, AS TO DESCRIPTION, QUALITY, MERCHANTABILITY, FITNESS FOR ANY PARTICULAR PURPOSE OR USE, OR ANY OTHER MATTER. 180600 Rev. Q April 2023
Contents 1.0 INTRODUCTION ................................................................................... 1 2.0 SPECIFICATIONS ................................................................................. 3 2.1 Measurement Performance .....................................................................................3 2.2 Electrical: Input/Output ............................................................................................4 2.3 Mechanical ...............................................................................................................6 2.4 Variables and their Limits .........................................................................................7 3.0 UNPACKING & INSTALLATION ......................................................... 10 3.1 Unpacking the unit .................................................................................................10 3.2 Mounting the electronic enclosure .........................................................................10 3.3 Sensor Installation .................................................................................................10 3.4 Icon Definitions ......................................................................................................14 3.5 Electrical installation ..............................................................................................14 4.0 FUNCTION OVERVIEW ...................................................................... 33 4.1 Front Panel ............................................................................................................33 4.2 Touchscreen ..........................................................................................................33 4.3 Icons .....................................................................................................................33 4.4 Startup ...................................................................................................................35 4.5 Shut Down .............................................................................................................44 5.0 OPERATION using the touchscreen ................................................ 44 5.1 Alarms Menu ........................................................................................................44 5.2 Inputs Menu ..........................................................................................................44 5.2.1 Contacting Conductivity ................................................................................47 5.2.2 Electrodeless Conductivity .................................................................................48 5.2.3 Temperature .......................................................................................................49 5.2.4 pH .......................................................................................................................49 5.2.5 ORP ....................................................................................................................50 5.2.6 Disinfection .........................................................................................................50 5.2.7 Generic Sensor ..................................................................................................51 5.2.8 Transmitter Input and AI Monitor Input ...............................................................52 5.2.9 Fluorometer Input ...............................................................................................52 5.2.10 DI State ...............................................................................................................53 5.2.11 Flow Meter, Contactor Type ................................................................................53 5.2.12 Flow Meter, Paddlewheel Type ...........................................................................54 5.2.13 Feed Monitor ......................................................................................................54 5.2.14 DI Counter Input .................................................................................................56 5.2.15 Virtual Input – Calculation ...................................................................................57 5.2.16 Virtual Input – Raw Value ...................................................................................58 5.3 Outputs Menu ............................................................................................................58 5.3.1 Relay, Any Control Mode ....................................................................................58 5.3.2 Relay, On/Off Control Mode ...............................................................................59 5.3.3 Relay, Flow Timer Control Mode ........................................................................60 5.3.4 Relay, Bleed and Feed Control Mode .................................................................60 5.3.5 Relay, Bleed then Feed Control Mode ................................................................60 5.3.6 Relay, Percent Timer Control Mode ....................................................................60
5.3.7 Relay, Biocide Timer Control Mode ........................................................................61 5.3.8 Relay, Alarm Output Mode ......................................................................................62 5.3.9 Relay, Time Proportional Control Mode ..................................................................62 5.3.10 Relay, Intermittent Sampling Control Mode ............................................................63 5.3.11 Relay, Manual Mode ...............................................................................................64 5.3.12 Relay, Pulse Proportional Control Mode .................................................................64 5.3.13 Relay, PID Control Mode ........................................................................................64 5.3.14 Relay, Dual Set Point Mode ....................................................................................67 5.3.15 Relay, Timer Control Mode .....................................................................................68 5.3.16 Relay, Probe Wash Control Mode ..........................................................................69 5.3.17 Relay, Spike Control Mode .....................................................................................70 5.3.18 Relay Output, Flow Meter Ratio Control Mode .................................................71 5.3.19 Relay Output, Flow Proportional Mode .............................................................72 5.3.20 Relay, Counter Timer Control Mode .......................................................................72 5.3.21 Relay, Dual Switch Control Mode ...........................................................................73 5.3.22 Relay or Analog Output, Lag Control Mode ......................................................73 5.3.23 Analog Output, Retransmit Mode ...........................................................................79 5.3.24 Analog Output, Proportional Control Mode.............................................................80 5.3.25 Analog or Relay Output, PID Control Mode............................................................80 5.3.26 Analog Output, Manual Mode .................................................................................83 5.3.27 Analog or Relay Output, Flow Proportional Mode ................................................. 83 5.4 Configuration Menu ......................................................................................................84 5.4.1 Global Settings .......................................................................................................84 5.4.2 Security Settings .....................................................................................................84 5.4.3 Ethernet Settings ....................................................................................................84 5.4.4 Ethernet Details ......................................................................................................85 5.4.5 Remote Communcations (Modbus and BACnet) ...................................................85 5.4.6 Email Report Settings .............................................................................................86 5.4.7 Display Settings ......................................................................................................87 5.4.8 File Utilities .............................................................................................................88 5.4.9 Controller Details ....................................................................................................88 5.5 HOA Menu ...............................................................................................................89 5.6 Graph Menu .............................................................................................................89 6.0 OPERATION using Ethernet .................................................................90 6.1 Connecting to a LAN ..................................................................................................90 6.1.1 Using DHCP ...........................................................................................................90 6.1.2 Using a fixed IP Address ........................................................................................90 6.2 Connecting Directly to a Computer ............................................................................90 6.3 Navigating the web pages .........................................................................................91 6.4 Graphs Webpage .....................................................................................................91 6.5 Software Upgrade ......................................................................................................92 6.6 Notepad Menu ...........................................................................................................92 7.0 MAINTENANCE ......................................................................................93 7.1 Electrode Cleaning ....................................................................................................93 7.2 Replacing the Fuse Protecting Powered Relays .......................................................93 8.0 TROUBLESHOOTING ............................................................................94 8.1 Calibration Failure ...........................................................................................................94 8.1.1 Contacting Conductivity Sensors ...........................................................................94
8.1.2 Electrodeless Conductivity Sensors ........................................................................94 8.1.3 pH Sensors ..............................................................................................................94 8.1.4 ORP Sensors ..........................................................................................................95 8.1.5 Disinfection Sensors ................................................................................................95 8.1.6 Analog Inputs ..........................................................................................................95 8.1.7 Temperature Sensors ..............................................................................................95 8.2 Alarm Messages .........................................................................................................96 8.3 Procedure for Evaluation of Conductivity Electrode .................................................100 8.4 Procedure for evaluation of the pH/ORP electrode .................................................100 8.5 Diagnostic Lights ....................................................................................................100 9.0 Spare Parts Identification ....................................................................102 10.0 Service Policy ......................................................................................129 e
1.0 INTRODUCTION The Walchem W600 Series controllers offer a high level of flexibility in controlling water treatment applications. One or two sensor inputs are available that are compatible with a variety of sensors: Contacting conductivity Electrodeless conductivity pH ORP Any Walchem disinfection sensor Generic sensor (Ion Selective Electrodes or any type of sensor with a linear voltage output between -2 VDC and 2 VDC) An analog (4-20 mA) sensor input card with two input circuits is also available for use with 2,3 or 4-wire transmitters. Or a sensor card that combines one sensor (contacting conductivity, pH, ORP, disinfection or generic) plus one analog (4-20 mA) input is available. Six relay outputs may be set to a variety of control modes: On/Off set point control Time Proportional control Pulse Proportional control (when purchased with Pulse solid state opto outputs) PID control (when purchased with Pulse solid state opto outputs) Lead/Lag control of up to 6 relays Dual set point Timer Bleed or Feed based on a Water Contactor or Paddlewheel flow meter input Feed and Bleed Feed and Bleed with Lockout Feed as a percent of Bleed Feed as a percent of elapsed time Daily, Weekly, 2-week or 4-week Biocide timers with pre-bleed and post-add lockout of bleed Intermittent sampling for boilers with proportional blowdown, controlling on a trapped sample Always on unless interlocked Probe Wash timer Spike to alternate set point on timed basis Flow Meter Ratio Counter Timer Dual Switch Diagnostic Alarm triggered by: High or Low sensor reading No Flow Relay output timeout Sensor error An option card with two isolated analog outputs may be installed to retransmit sensor input signals to a chart recorder, datalogger, PLC or other device. They may also be connected to valves, actuators or metering pumps for linear propor- tional control or PID control. 1
An Ethernet option provides remote access to the controller’s programming via a PC connected directly, via a local area network, or via Walchem’s Fluent account management server. It also allows emailing of datalog files (in CSV format, compatible with spreadsheets like Excel) and alarms, to up to eight email addresses. Our USB features provide the ability to upgrade the software in the controller to the latest version. The Config file feature allows you to save all the set points from a controller onto a USB flash disk, and then import them into another controller, making the programming of multiple controllers fast and easy. The data logging feature allows you to save the sensor readings and relay activation events to a USB flash disk. 2
2.0 SPECIFICATIONS 2.1 0.01 Cell Contacting Conductivity Range Resolution Accuracy Measurement Performance 0-300 µS/cm 0.01 µS/cm, 0.0001 mS/cm, 0.001 mS/m, 0.0001 S/m, 0.01 ppm ± 1% of reading or 0.01 µS/cm, whichever is greater 0.1 Cell Contacting Conductivity Range Resolution Accuracy 0-3,000 µS/cm 0.1 µS/cm, 0.0001 mS/cm, 0.01 mS/m, 0.0001 S/m, 0.1 ppm ± 1% of Reading or 0.1 µS/cm, whichever is greater 1.0 Cell Contacting Conductivity Range Resolution Accuracy 0-30,000 µS/cm 1 µS/cm, 0.001 mS/cm, 0.1 mS/m, 0.0001 S/m, 1 ppm ± 1% of Reading or 1 µS/cm, whichever is greater 10.0 Cell Contacting Conductivity Range Resolution Accuracy 0-300,000 µS/cm 10 µS/cm, 0.01 mS/cm, 1 mS/m, 0.001 S/m, 10 ppm ± 1% of Reading or 10 µS/cm, whichever is greater pH Range Resolution Accuracy ORP/ISE Range Resolution Accuracy -2 to 16 pH units 0.01 pH units ± 0.01% of reading -1500 to 1500 mV 0.1 mV ± 1 mV Disinfection Sensors Range (mV) Resolution (mV) 0.1 mV Accuracy (mV) ± 1 mV -2000 to 1500 mV Range (ppm) Resolution (ppm) Varies with range and slope Accuracy (ppm) Varies with range and slope 0-2 ppm to 0-20,000 ppm 100Ω RTD Temperature Range Resolution Accuracy 23 to 500°F (-5 to 260°C) 0.1°F (0.1°C) ± 1% of Reading or ± 1°C, whichever is greater 1000Ω RTD Temperature Range Resolution Accuracy 23 to 500°F (-5 to 260°C) 0.1°F (0.1°C) ± 1% of Reading or ± 0.3°C , whichever is greater 10k or 100k Thermistor Temperature Range 23 to 194°F (-5 to 90°C) 3
Resolution Accuracy 0.1°F (0.1°C) ± 1% of Reading or ± 0.3°C, whichever is greater Analog (4-20 mA) Range Resolution Accuracy ± 0.5% of reading 0 to 22 mA 0.01 mA Electrodeless Conductivity Range 500-12,000 µS/cm 3,000-40,000 µS/cm 10,000-150,000 µS/cm 50,000-500,000 µS/cm 200,000-2,000,000 µS/cm Resolution Accuracy 1 µS/cm, 0.01 mS/cm, 0.1 mS/m, 0.001 S/m, 1 ppm 1 µS/cm, 0.01 mS/cm, 0.1 mS/m, 0.001 S/m, 1 ppm 10 µS/cm, 0.1 mS/cm, 1 mS/m, 0.01 S/m, 10 ppm 10 µS/cm, 0.1 mS/cm, 1 mS/m, 0.01 S/m, 10 ppm 100 µS/cm, 0.1 mS/cm, 1 mS/m, 0.1 S/m, 100 ppm 1% of reading 1% of reading 1% of reading 1% of reading 1% of reading Temperature °C 0 10 15 20 25 30 35 40 50 60 70 Range Multiplier 181.3 139.9 124.2 111.1 100.0 90.6 82.5 75.5 64.3 55.6 48.9 Temperature °C 80 90 100 110 120 130 140 150 160 170 180 Range Multiplier 43.5 39.2 35.7 32.8 30.4 28.5 26.9 25.5 24.4 23.6 22.9 Note: Conductivity ranges on page 2 apply at 25°C. At higher temperatures, the range is reduced per the range multiplier chart. 2.2 Electrical: Input/Output Input Power 100 to 240 VAC, 50 or 60 Hz, 7 A maximum Fuse: 6.3 A Inputs Sensor Input Signals (0, 1 or 2 depending on model code): Contacting Conductivity Electrodeless Conductivity Disinfection Amplified pH, ORP or ISE 0.01, 0.1, 1.0, or 10.0 cell constant OR (not available on the combination sensor/analog input card) OR OR Requires a preamplified signal. Walchem WEL or WDS series recommended. ±5VDC power available for external preamps. Each sensor input card contains a temperature input Temperature 100 or 1000 ohm RTD, 10K or 100K Thermistor 4
Analog (4-20 mA) Sensor Input (0, 1, 2 or 4 depending on model code): 2-wire loop powered or self-powered transmitters supported 3 or 4 –wire transmitters supported Each dual sensor input board has two channels Channel 1, 130 ohm input resistance Channel 2, 280 ohm input resistance The combination input board has one channel, 280 ohm input resistance Available Power: One independent isolated 24 VDC ± 15% supply per channel 1.5 W maximum for each channel 2W (83 mA at 24 VDC) total power consumption for all channels (four total channels possible if two dual boards are installed; 2W is equivalent to 2 Little Dipper sensors) Digital Input Signals (6): State-Type Digital Inputs Electrical: Optically isolated and providing an electrically isolated 9V power with a nominal 2.3mA current when the digital input switch is closed Typical response time: < 2 seconds Devices supported: Any isolated dry contact (i.e. relay, reed switch) Types: Interlock Electrical: Optically isolated and providing an electrically isolated 9VDC power with a nominal 2.3mA current when the digital input switch is closed 0-20 Hz, 25 msec minimum width Devices supported: Any device with isolated open drain, open collector, transistor or reed switch Types: Contacting Flowmeter, Flow Verify Electrical: Optically isolated and providing an electrically isolated 9VDC power with a nominal 2.3mA current when the digital input switch is closed, 0-500 Hz, 1.00 msec minimum width, Minimum pulse rate to see paddlewheel rate = 0.17 Hz Devices supported: Any device with isolated open drain, open collector, transistor or reed switch Types: Paddlewheel Flowmeter, DI Counter Low Speed Counter-Type Digital Inputs High Speed Counter-Type Digital Inputs Note: Total available power on the Digital Input 9 VDC is 111 mA Outputs Powered mechanical relays (0 or 6 depending on model code): Pre-powered on circuit board switching line voltage 6 A (resistive), 1/8 HP (93 W) All six relays are fused together as one group, total current for this group must not exceed 6A 6 A (resistive), 1/8 HP (93 W) Dry contact relays are not fuse protected Dry contact mechanical relays (0, 2 or4 depending on model code): Pulse Outputs (0, 2 or4 depending on model code): Opto-isolated, Solid State Relay 200mA, 40 VDC Max. VLOWMAX = 0.05V @ 18 mA Accuracy (0-10 Hz): ± 0.5% of Pulse Rate, (10-20 Hz): ± 1.0%, (20-40 Hz): ± 2.0% Internally powered Fully isolated 600 Ohm max resistive load Resolution 0.0015% of span 4 - 20 mA (0 or 2) 5
Ethernet 10/100 802.3-2005 Auto MDIX support Auto Negotiation Agency Approvals: Safety UL 61010-1:2012 3rd Ed + Rev:2016 CSA C22.2 No. 61010-1:2012 3rd Ed. + U1; U2 IEC 61010-1:2010 3rd Ed. EN 61010-1:2010 3rd Ed. BS EN 61010-1:2010 + A1:2019 IEC 61326-1:2012 EN 61326-1:2013 BS EN 61326-1:2013 EMC Note: For EN61000-4-6, EN61000-4-3 the controller met performance criteria B. *Class A equipment: Equipment suitable for use in establishments other than domestic, and those directly connected to a low voltage (100-240 VAC) power supply network which supplies buildings used for domestic purposes. 2.3 Mechanical Enclosure Material Enclosure Rating Dimensions Display Operating Ambient Temp Storage Temperature Humidity Mechanical (Sensors) (*see graph) Sensor Polycarbonate NEMA 4X (IP65) 9.5” x 8” x 4” (241 mm x 203 mm x 102 mm) 320 x 240 pixel monochrome backlit display with touchscreen -4 to 131 °F (-20 to 55 °C) -4 – 176°F (-20 – 80°C) 10 to 90% non-condensing Pressure Temperature Materials Process Connections CPVC, FKM in-line o-ring PEEK, 316 SS in-line adapter CPVC: 32-158°F (0 to 70°C)* PEEK: 32-190°F (0 to 88°C) 1” NPTM submersion 2” NPTM in-line adapter Electrodeless conductivity 0-150 psi (0-10 bar)* pH 0-100 psi (0-7 bar)* 50-158°F (10-70°C)* CPVC, Glass, FKM o-rings, HDPE, Titanium rod, glass-filled PP tee 1” NPTM submersion 3/4” NPTF in-line tee ORP 0-100 psi (0-7bar)* 32-158°F (0-70°C)* Contacting conductivity (Condensate) 0-200 psi (0-14 bar) 32-248°F (0-120°C) 316SS, PEEK 3/4” NPTM Contacting conductivity Graphite (Cooling Tower) Grpahite, Glass-filled PP, FKM o-ring 0-150 psi (0-10 bar)* 32-158°F (0-70°C)* 3/4” NPTM Contacting conductivity SS (Cooling Tower) 316SS, Glass-filled PP, FKM o-ring 0-150 psi (0-10 bar)* 32-158°F (0-70°C)* 3/4” NPTM Contacting conductivity (Boiler) 0-250 psi (0-17 bar) 32-401°F (0-205°C) 316SS, PEEK 3/4” NPTM Contacting conductivity (High Pressure Tower) 0-300 psi (0-21 bar)* 32-158°F (0-70°C)* 316SS, PEEK 3/4” NPTM Glass, Polymer, PTFE, 316SS, FKM pH (High Pressure) 0-300 psi (0-21 bar)* 32-275°F (0-135°C)* 1/2” NPTM gland Platinum, Polymer, PTFE, 316SS, FKM ORP (High Pressure) 0-300 psi (0-21 bar)* 32-275°F (0-135°C)* 1/2” NPTM gland Free Chlorine/Bromine 0-14.7 psi (0-1 bar) 32-113°F (0-45°C) Extended pH Range Free Chlorine/Bromine 0-14.7 psi (0-1 bar) 32-113°F (0-45°C) PVC, Polycarbonate, silicone rubber, SS, PEEK, FKM, Isoplast Total Chlorine 0-14.7 psi (0-1 bar) 32-113°F (0-45°C) 1/4” NPTF Inlet 3/4” NPTF Outlet Chlorine Dioxide 0-14.7 psi (0-1 bar) 32-131°F (0-55°C) Ozone 0-14.7 psi (0-1 bar) 32-131°F (0-55°C) Peracetic Acid 0-14.7 psi (0-1 bar) 32-131°F (0-55°C) Hydrogen Peroxide 0-14.7 psi (0-1 bar) 32-113°F (0-45°C) 6
Flow switch manifold 0-150 psi (0-10 bar) up to 100°F (38°C)* 0-50 psi (0-3 bar) at 140°F (60°C) 32-140°F (0-60°C) GFRPP, PVC, FKM, Isoplast 3/4” NPTF Flow switch manifold (High Pressure) Carbon steel, Brass, 316SS, FKM 0-300 psi (0-21 bar)* 32-158°F (0-70°C)* 3/4” NPTF Pressure vs. Temperature PSI Bar 350 24.1 300 20.7 250 17.2 pH/ORP 200 13.8 LD2 10.3 150 Cond 6.9 100 HP Cond/Steel 3.4 50 HP pH/ORP/Steel 0 °F 100 110 120 130 140 150 160 170 180 30 40 50 60 70 80 90 10.0 15.5 21.1 26.6 32.2 37.7 43.3 48.8 54.4 60.0 65.5 71.1 76.6 82.2 -1.1 °C 4.4 2.4 Variables and their Limits Sensor Input Settings Alarm limits Input alarm dead band Cell constant (conductivity only) Smoothing Factor Temp Comp Factor (conductivity linear ATC only) Installation Factor (Electrodeless conductivity only) Cable length PPM conversion factor (only if units = PPM) Default temperature Deadband Calibration Required Alarm Sensor Slope (Generic sensor only) Sensor Offset (Generic sensor only) Low Range (Generic sensor only) High Range (Generic sensor only) 4 mA value (Transmitter, AI Monitor analog input only) 20 mA value (Transmitter, AI Monitor analog input only) Max Sensor Range (Fluorometer analog input only) Dye/Product Ratio (Fluorometer analog input only) Flow meter input settings Totalizer alarm Volume/contact for units of Gallons or Liters Volume/contact for units of m3 Low Limit Low end of sensor range Low end of sensor range 0.01 0% 0% 0.5 0.1 0.001 -20 Low end of sensor range 0 days -1,000,000 -1,000,000 -1,000,000 -1,000,000 0 0 0 ppb 0 ppb/ppm Low Limit 0 1 0.001 High Limit High end of sensor range High end of sensor range 10 90% 20.000% 1.5 3,000 10.000 500 High end of sensor range 365 days 1,000,000 1,000,000 1,000,000 1,000,000 100 100 100,000 ppb 100 ppb/ppm High Limit 100,000,000 100,000 1,000 7
K Factor for units of Gallons or Liters K Factor for units of m3 Paddlewheel rate alarm limits Paddlewheel rate alarm deadband Smoothing Factor Set Flow Total Feed Monitor Input Settings Totalizer Alarm Set Flow Total Flow Alarm Delay Flow Alarm Clear Dead Band Reprime Time Volume/Contact Smoothing Factor Counter Input Settings DI Counter Rate Alarms DI Counter Rate Deadband Totalizer Alarm Set Total Units per Pulse Smoothing Factor Relay output settings Output Limit Time Hand Time Limit Min Relay Cycle Set Point Spike Set Point (Spike mode) Onset Time (Spike mode) Duty Cycle Period (On/Off, Spike, Dual Setpoint modes) Duty Cycle (On/Off, Spike, Dual Setpoint modes) On Delay Time (Manual, On/Off, Dual Setpoint modes, Dual Switch, Alarm modes) Off Delay Time (Manual, On/Off, Dual Setpoint modes, Dual Switch, Alarm modes) Dead Band Feed duration (Flow Timer, Counter Timer mode) Accumulator Setpoint (Counter Timer mode) Feed duration (Flow Timer mode) Accumulator Volume (Flow Timer, Target PPM, PPM Volume, Volumetric Blend, Flow Meter Ratio modes) Feed Percentage (Bleed then Feed mode) Feed Lockout Time Limit (Bleed & Feed, Bleed then Feed modes) Prebleed To Conductivity (Biocide mode) Prebleed Time (Biocide mode) Bleed Lockout (Biocide mode) Event duration (Biocide, Timer modes) 0.01 1 0 0 0% 0 Low Limit 0 vol. units 0 vol. units 00:10 Minutes 1 Contact 0% 00:00 Minutes 0.001 ml 0% Low Limit 0 0 0 0 0.001 0% Low Limit 1 second 1 second 0 seconds Low end of sensor range Low end of sensor range 0 seconds 0:00 minutes 0% 0 seconds 100,000 1,000,000 High end of sensor range High end of sensor range 90% 1,000,000,000 High Limit 1,000,000 vol. units 1,000,000,000 vol. units 59:59 Minutes 100,000 Contacts 90% 59:59 Minutes 1,000.000 ml 90% High Limit 30,000 30,000 2,000,000,000 2,000,000,000 1,000 90% High Limit 86,400 seconds (0 = unlimited) 86,400 seconds (0 = unlimited) 300 seconds High end of sensor range High end of sensor range 23:59:59 HH:MM:SS 59:59 minutes 100% 23:59:59 HH:MM:SS 0 seconds 23:59:59 HH:MM:SS Low end of sensor range 0 seconds 1 0 seconds 1 High end of sensor range 86,400 seconds 1,000,000 86,400 seconds 1,000,000 0% 0 seconds 1 (0 = no prebleed) 0 seconds 0 seconds 0 1000% 86,400 seconds High end of sensor range 86,400 seconds 86,400 seconds 30,000 8
Proportional band (Time/Pulse Proportional mode, Intermittent Sampling) Sample period (Time Proportional mode) Sample Time (Intermittent Sampling mode) Hold Time (Probe Wash, Intermittent Sampling modes) Maximum Blowdown (Intermittent Sampling mode) Wait Time (Intermittent Sampling mode) Max Rate (Pulse Proportional, Pulse PID modes, Flow Prop modes) 10 pulses/minute Minimum Output (Pulse Proportional, Pulse PID modes) Maximum Output (Pulse Proportional, Pulse PID modes) Gain (Pulse PID Standard mode) Integral Time (Pulse PID Standard mode) Derivative Time (Pulse PID Standard mode)us Proportional Gain (Pulse PID Parallel mode) Integral Gain (Pulse PID Parallel mode) Derivative Gain (Pulse PID Parallel mode) Input Minimum (Pulse PID modes) Input Maximum (Pulse PID modes) Wear Cycle Time (Lag mode) Delay Time (Lag mode) Bleed Volume (Flow Meter Ratio mode) Pump Capacity (Flow Prop mode) Pump Setting (Flow Prop mode) Specific Gravity (Flow Prop mode) Target (Flow Prop mode) Analog (4-20 mA) Output Settings 4 mA Value (Retransmit mode) 20 mA Value (Retransmit mode) Hand Output Set Point (Proportional, PID modes) Proportional Band (Proportional mode) Minimum Output (Proportional, PID modes) Maximum Output (Proportional, PID modes) Off Mode Output (Proportional, PID modes, Flow Prop modes) Error Output (not in Manual mode) Hand Time Limit (not in Retransmit mode) Output Time Limit (Proportional, PID modes) Gain (PID, Standard mode) Integral Time (PID Standard mode) Derivative Time (PID Standard mode) Proportional Gain (PID Parallel mode) Integral Gain (PID Parallel mode) Derivative Gain (PID Parallel mode) Input Maximum (PID modes) Pump Capacity (Flow Prop mode) Pump Setting (Flow Prop mode) Specific Gravity (Flow Prop mode) Low end of sensor range High end of sensor range 0 seconds 0 seconds 0 seconds 0 seconds 0 seconds 3600 seconds 3600 seconds 3600 seconds 3600 seconds 86,400 seconds 2400 pulses/minute 100% 100% 1000.000 1000.000 seconds 1000.000 seconds 1000.000 1000.000 /second 1000.000 seconds High end of sensor range High end of sensor range 23:59:59 HH:MM:SS 23:59:59 HH:MM:SS 1,000,000 10,000 gal/hour or l/hour 100% 9.999 g/ml 1,000,000 ppm High Limit High end of sensor range High end of sensor range 100% High end of sensor range High end of sensor range 100% 100% 21 mA 21 mA 86,400 seconds (0 = unlimited) 86,400 seconds (0 = unlimited) 1000.000 1000.000 seconds 1000.000 seconds 1000.000 1000.000 /second 1000.000 seconds High end of sensor range 10,000 gal/hour or l/hour 100% 9.999 g/ml 0% 0% 0.001 0.001 seconds 0 seconds 0.001 0.001 /second 0 seconds Low end of sensor range Low end of sensor range 10 seconds 0 seconds 1 0 gal/hour or l/hour 0% 0 g/ml 0 ppm Low Limit Low end of sensor range Low end of sensor range 0% Low end of sensor range Low end of sensor range 0% 0% 0 mA 0 mA 1 second 1 second 0.001 0.001 seconds 0 seconds 0.001 0.001 /second 0 seconds Low end of sensor range 0 gal/hour or l/hour 0% 0 g/ml 9
Target (Flow Prop mode) Configuration settings Local Password Fluent update period Fluent reply timeout Alarm Delay SMTP Port TCP Timeout Auto Dim Time Graph settings Low axis limit High axis limit 0 ppm Low Limit 0000 1 minute 10 seconds 0:00 minutes 0 1 second 0 seconds Low Limit Low end of sensor range Low end of sensor range 1,000,000 ppm High Limit 9999 1440 minutes 60 seconds 59:59 minutes 65535 240 seconds 23:59:59 HH:MM:SS High Limit High end of sensor range High end of sensor range 3.0 UNPACKING & INSTALLATION 3.1 Inspect the contents of the carton. Please notify the carrier immediately if there are any signs of damage to the controller or its parts. Contact your distributor if any of the parts are missing. The carton should contain a W600 series controller and an instruction manual. Any options or accessories will be incorporated as ordered. Unpacking the unit 3.2 The controller is supplied with mounting holes on the enclosure. It should be wall mounted with the display at eye level, on a vibration-free surface, utilizing all four mounting holes for maximum stability. Do not install the enclosure in a lo- cation where it will be exposed to direct sunlight. Use M6 (1/4” diameter) fasteners that are appropriate for the substrate material of the wall. The enclosure is NEMA 4X (IP65) rated. The maximum operating ambient temperature is 131°F (55°C); this should be considered if installation is in a high temperature location. The enclosure requires the follow- ing clearances: Top: 2” (50 mm) Left: 8” (203 mm) (not applicable for prewired models) Right: 4” (102 mm) Bottom: 7” (178 mm) 3.3 Sensor Installation Refer to the specific instructions supplied with the sensor being used, for detailed installation instructions. Mounting the electronic enclosure General Guidelines Locate the sensors where an active sample of water is available and where the sensors can easily be removed for cleaning. Position the sensor such that air bubbles will not be trapped within the sensing area. Position the sensor where sediment or oil will not accumulate within the sensing area. In-Line Sensor Mounting In-line mounted sensors must be situated so that the tee is always full and the sensors are never subjected to a drop in water level resulting in dryness. Refer to Figure 2 for typical installation. Tap off the discharge side of the recirculation pump to provide a minimum flow of 1 gallon per minute through the flow switch manifold. The sample must flow into the bottom of the manifold in order to close the flow switch, and return to a point of lower pressure in order to ensure flow. Install an isolation valve on both sides of the manifold to stop flow for sensor maintenance. IMPORTANT: To avoid cracking the female pipe threads on the supplied plumbing parts, use no more than 3 wraps of Teflon tape and thread in the pipe FINGER tight plus 1/2 turn! Do not use pipe dope to seal the threads of the flow switch because the clear plastic will crack! 10
Submersion Sensor Mounting If the sensors are to be submersed in the process, mount them firmly to the tank, and protect the cable with plastic pipe, sealed at the top with a cable gland, to prevent premature failure. Place the sensors in an area of good solution movement. Sensors should be located such that they respond rapidly to a well-mixed sample of the process water and the treatment chemicals. If they are too close to the chemical injection point, they will see spikes in concentration and cycle on and off too frequently. If they are too far away from the chemical injection point, they will respond too slowly to the concentration changes, and you will overshoot the set point. The contacting conductivity sensor should be placed as close to the controller as possible, to a maximum distance of 250 ft. (76 m). Less than 25 ft. (8 m) is recommended. The cable must be shielded from background electrical noise. Always route low voltage (sensor) signals with at least a 6” (15 cm) separation from AC voltage wiring. The electrodeless conductivity sensor should be placed as close to the controller as possible, to a maximum distance of 120 ft. (37 m). Less than 20 ft. (6 m) is recommended. The cable must be shielded from background electrical noise. Always route low voltage (sensor) signals with at least a 6” (15 cm) separation from AC voltage wiring. These sensors are affected by the geometry and conductivity of their surroundings, so either maintain 6 inches (15 cm) of sample around the sensor or ensure that any nearby conductive or non-conductive items are consistently positioned. Do not install the sensor in the path of any electrical current that may be flowing in the solution, as this will shift the conductivity reading. The amplified pH/ORP/ISE electrode should be placed as close to the controller as possible, to a maximum dis- tance of 1000 feet (305 m) from the controller. A junction box and shielded cable are available to extend the stan- dard 20 foot (6 m) length. pH and ORP electrodes must be installed such that the measuring surfaces will always remain wet. A U-trap provided in the manifold design should achieve this, even if the sample flow stops. These electrodes also must be installed with the measuring surfaces pointing down; that is 5 degrees above the horizontal, at a minimum. The flow velocity past the sensor must be less than 10 ft./sec. (3 m/sec.) The disinfection sensor should be placed as close to the controller as possible, to a maximum distance of 100 feet (30 m) from the controller. A junction box and shielded cable are available to extend the standard 20 foot (6 m) length. The sensor should be mounted such that the measuring surfaces will always stay wet. If the membrane dries out, it will respond slowly to changing disinfectant values for 24 hours, and if dried out repeatedly, will fail prematurely. The flow cell should be placed on the discharge side of a circulation pump or downhill from a grav- ity feed. Flow into the cell must come from the bottom side that has the ¾” x ¼” NPT reducing bushing installed. The reducing bushing provides the flow velocity required for accurate readings and must not be removed! A “U” trap should be installed so that if the flow stops, the sensor is still immersed in the water. The outlet of the flow cell must be plumbed to open atmosphere unless the system pressure is at or below 1 atmosphere. If the flow through the line cannot be stopped to allow for cleaning and calibration of the sensor, then it should be placed in a by-pass line with isolation valves to allow for sensor removal. Install the sensor vertically, with the measuring surface pointing down, at least 5 degrees above horizontal. Flow rate regulation must be done upstream from the sensor, because any flow restriction downstream can increase the pressure above atmospheric and damage the membrane cap! Important Boiler Sensor Installation Notes: (refer to typical installation drawing) 1. Make sure the minimum water level in the boiler is at least 4-6 inches above the skimmer blowdown line. If the skimmer line is closer to the surface, it is likely that steam will be drawn into the line instead of boiler water. The skimmer line must also be installed above the highest tube. 2. Maintain a 3/4 inch minimum pipe ID with no flow restrictions from the tap for the boiler skimmer blow- down line to the electrode. If the ID is reduced below 3/4 inch, then flashing will occur beyond that point and the conductivity reading will be low and erratic. Minimize the usage of tees, valves, elbows or unions between the boiler and the electrode. 3. A manual shut off valve should be installed so that the electrode can be removed and cleaned. This valve must be a full port valve in order to avoid a flow restriction. 4. Keep the distance between the tap for the boiler skimmer line to the electrode as short as possible, to a maxi- mum of 10 feet. 11
5. Mount the electrode in the side branch of a cross in a horizontal run of pipe. This will minimize entrapment of steam around the electrode and will allow any solids to pass through. 6. There MUST be a flow restriction after the electrode and/or control valve in order to provide back pressure. This flow restriction will be either a flow control valve or an orifice union. The amount of the flow restric- tion will affect the blowdown rate as well, and should be sized accordingly. 7. Install the motorized ball valve or solenoid valve per the manufacturer’s instructions. For best results, align the hole in the conductivity electrode such that the direction of water flow is through the hole. Guide to Sizing Blowdown Valves and Orifice Plates 1. Determine the Rate of Steam Production in Pounds per Hour: Either read off the boiler name plate (water-tube boilers) or Calculate from horsepower rating (fire-tube boilers): HP x 34.5 = lbs/hr. Example: 100 HP = 3450 lbs/hr. 2. Determine the Concentration Ratio (BASED ON FEEDWATER) A water treatment chemical specialist should determine the desired number of cycles of concentration. This is the ratio of TDS in the boiler water to TDS in the feedwater. Note that feedwater means the water that is fed to the boiler from the deaerator and includes makeup water plus condensate return. Example: 10 cycles of concentration has been recommended 3. Determine the Required Blowdown Rate in Pounds Per Hour Blowdown Rate = Steam Production / (Concentration Ratio –1) Example: 3450/(10-1) = 383.33 lbs./hr 4. Determine if Continuous or Intermittent Sampling is Required Use intermittent sampling when the boiler operation or loading is intermittent, or on boilers where the required blowdown rate is less than 25% of the smallest available flow control valve or less than the flow through the smallest orifice. See the graphs on the next page. Use continuous sampling when the boiler is operating 24 hours per day and the required blowdown rate is more than 25% of the smallest applicable flow control valve or orifice. See the graphs on the next page. Use of a flow control valve will give you the best control of the process, since the flow rate can be easily adjusted. The dial on the valve also gives you a visual indication if the flow rate has been changed. If the valve clogs, it can be opened to clear the obstruction, and closed to the previous position. If an orifice plate is used, you must install a valve downstream from the orifice in order to fine tune the flow rate and provide additional back pressure in many applications. Example: An 80 psi boiler has a Required Blowdown Rate of 383.33 lbs./hr. The maximum flow rate of the smallest flow control valve is 3250 lbs./hr. 3250 x 0.25 = 812.5 which is too high for continuous sampling. Using an orifice, the flow rate through the smallest diameter plate is 1275 lbs./hr. This is too high for continu- ous sampling. 12
5. Determine the Orifice or Flow Control Valve Size for this Blowdown Rate Use the following graphs to select a flow control device: Flow Rate in Lbs/hr for Various Orifices 18000 16000 14000 12000 1/8 inch dia 10000 lbs/hr 3/16 inch dia 1/4 inch dia 5/16 inch dia 8000 6000 4000 2000 0 10 20 30 40 50 60 70 80 90 100 200 300 Pressure PSI Flow Control Valve Maximum Flow Rates in Lbs/hr 25000 20000 15000 1/2" 150 PSI lbs/hr 1/2" 300 PSI 3/4" 150 PSI 3/4" 300 PSI 10000 5000 0 20 30 40 50 60 70 80 90 100 150 200 300 Pressure PSI 13
3.4 Icon Definitions Symbol Publication Description IEC 417, No.5019 Protective Conductor Terminal | IEC 417, No. 5007 On (Supply) O IEC 417, No. 5008 Off (Supply) ISO 3864, No. B.3.6 Caution, risk of electric shock ISO 3864, No. B.3.1 Caution 3.5 The various standard wiring options are shown in figure 1, below. Your controller will arrive from the factory pre- wired or ready for hardwiring. Depending on your configuration of controller options, you may be required to hard- wire some or all of the input/output devices. Refer to figures 6 through 17 for circuit board layout and wiring. Electrical installation Note: when wiring the optional flow meter contactor input, the 4-20 mA outputs or a remote flow switch, it is advis- able to use stranded, twisted, shielded pair wire between 22-26 AWG. Shield should be terminated at the controller at the most convenient shield terminal. CAUTION 1. There are live circuits inside the controller even when the power switch on the front panel is in the OFF posi- tion! The front panel must never be opened before power to the controller is REMOVED! If your controller is prewired, it is supplied with an 8 foot, 18 AWG power cord with USA style plug. A tool (#1 Phillips driver) is required to open the front panel. When mounting the controller, make sure there is clear access to the disconnecting device! The electrical installation of the controller must be done by trained personnel only and conform to all applica- ble National, State and Local codes! Proper grounding of this product is required. Any attempt to bypass the grounding will compromise the safety of persons and property. Operating this product in a manner not specified by Walchem may impair the protection provided by the equip- ment. 2. 3. 4. 5. 14
4-20 mA Outputs Power In Ethernet Sensor 1 Power Switch Digital Inputs Relays Relays Sensor 2 Figure 1 Conduit Wiring 15
COOLING TOWER METERING PUMPS HEAT EXCHANGER 19.5" ¾“ NPTF FLOW SWITCH FLOW WEL pH/ORP ELECTRODE ¾“ NPTF FLOW 11.75" CONDUCTIVITY ELECTRODE SAMPLE VALVE 1/4" POLYPRO PANEL 19.5" x 11.75" Figure 2 Typical Installation – Cooling Tower 16
123456 AC POWER FLOW IN FLOW OUT SUBMERSION ELECTRODE BASE ACID pH PROBE Figure 3 Typical Installation – Cooling Tower Submersion 17
RECOMMENDED INSTALLATION INTERMITTENT SAMPLING Skimmer Blowdown Line 3/4" Min. up to Electrode 10 ft. max. with minimal valves, elbows & unions CONDUCTIVITY ELECTRODE Flow Control Valve or Orifice Union Motorized Ball or Solenoid Valve Full Port Block Valve ¾" TEE 2 ft. 1 to 3 ft. maximum minimum Manual Blowdown (Normally Closed) To Drain TO DRAIN Install accessories either vertically or horizontally, per manufacturer's instructions. Flow Control Valve or Orifice Union Motorized Ball or Solenoid Valve Skimmer Blowdown Line 3/4" Min. up to Electrode CONDUCTIVITY ELECTRODE Flow Control Valve or Orifice Union Full Port Block Valve ¾" TEE To Drain Manual Blowdown (Normally Closed) To Drain To Drain RECOMMENDED INSTALLATION CONTINUOUS SAMPLING Figure 4 Typical Installation – Boiler 18
123456 SAMPLE RETURN 1 ATMOSPHERE MAXIMUM ROTAMETER 30-100 LPH SENSOR FLOW CELL ISOLATION VALVE (NORMALLY OPEN) FLOW SWITCH FLOW CONTROL VALVE SAMPLE VALVE RECIRCULATION PUMP PROCESS WATER Figure 5 Typical Installation – Disinfection Sensor 19
TERMINAL BLOCK RELAY OUTPUT TERMINAL NEUTRAL BLOCK AC POWER TERMINAL BLOCK FUSE TERMINAL BLOCK EARTH GROUND SENSOR, DIGITAL INPUT AND ANALOG OUTPUT TERMINAL BLOCKS POWER SUPPLY RIBBON CABLE POWER BOARD RELAY OPTION BOARD MAIN CONTROLLER BOARD I/O SLOT 2 I/O SLOT 1 BOARD USB PORT ETHERNET OPTION OUTPUT DUAL ANALOG OPTION Figure 6 Parts Identification 20
POWER SWITCH FUSE R1 R2 Sensor 1 R3 N N N N N N N N N N N N 1 2 3 4 5 6 7 8 9 10 11 12 13 14 15 16 17 18 1 2 3 4 5 6 7 8 9 10 11 12 13 14 15 16 17 18 1 2 3 4 5 6 7 8 9 R4 R5 10 11 12 13 14 15 16 17 18 TB5 R6 Sensor 2 N L TB7 TB4 TB6 TB1 TB2 TB3 SENSOR INPUT CARD LABEL ECOND CCONDpH/ORP DIS TEMP– WHT TEMP– TEMP– TEMP– 1 2 3 4 5 6 7 8 9 10 11 12 1 2 3 4 5 6 7 8 9 TEMP+ TEMP+ TEMP+ R-SHLD TEMP+ GRN IN– RCV IN+ RCV BLACK RCV– RCV+ X-SHLD SHIELD SHIELD Conductivity Electrode SHIELD +5V –5V GRN WHT RED BLK High Pressure XMT RED XMT+ XMT– XMT 10 11 12 18 TB1 (for Sensor 1) or TB2 (for optional Sensor 2) General Purpose (wiring is typical of all three sensor options) 2 Wire 2 Wire3 Wire 4 Wire CCONDpH/ORP DIS Loop Pwrd TEMP– TEMP– TEMP– WHT 1 2 3 4 5 6 7 8 9 10 11 12 1 2 3 4 5 6 7 8 9 TEMP+ TEMP+ SHIELD TEMP+ GRN IN– SHIELD RCV IN+ –5V RCV BLACK XMT RED XMT +5V COM(–) 24V(-) +24V +24V +24V XMTR– XMTR+XMTR+ XMTR+ XMTR– 10 11 12 XMTR– SHIELD or use DI SHIELD (TB3 7-12) COMBINATION SENSOR/ANALOG CARD LABEL Conductivity Electrode TB1 (for Sensor 1) or TB2 (for optional Sensor 2) Figure 7 Contacting Conductivity Sensor Input Wiring 21
POWER SWITCH FUSE R1 Sensor 1 R2 R3 N N N N N N N N N N N N 1 2 3 4 5 6 7 8 9 10 11 12 13 14 15 16 17 18 1 2 3 4 5 6 7 8 9 10 11 12 13 14 15 16 17 18 1 2 3 4 5 6 7 8 9 R4 R5 10 11 12 13 14 15 16 17 18 TB5 Sensor 2 R6 N L TB7 TB4 TB6 TB3 TB1 TB2 ECOND CCONDpH/ORP DIS TEMP – BLK 1 2 3 4 5 6 7 8 9 10 11 12 TEMP– TEMP– TEMP– 1 2 3 4 5 6 7 8 9 TEMP+ TEMP+ TEMP+ R-SHLD TEMP + GRN IN– R-SHLD (SHIELD) RCV IN+ RCV – BLK RCV– RCV+ X-SHLD SHIELD SHIELD RCV + RED X-SHLD (SHIELD) +5V –5V XMT+ XMT– XMT XMT + WHT 10 11 12 13 14 15 16 17 18 XMT – BLK SENSOR LABEL TB1 (for Sensor 1) or TB2 (for optional Sensor 2) ELECTRODELESS CONDUCTIVITY SENSOR Figure 8 Electrodeless Conductivity Sensor Input Wiring 22
POWER SWITCH FUSE R1 R2 Sensor 1 R3 N N N N N N N N N N N N 1 2 3 4 5 6 7 8 9 10 11 12 13 14 15 16 17 18 1 1 2 3 4 5 6 7 8 9 2 3 4 5 6 7 8 9 10 11 12 13 14 15 16 17 18 R4 R5 10 11 12 13 14 15 16 17 18 TB5 R6 Sensor 2 N L TB7 TB4 TB6 TB1 TB2 TB3 SENSOR LABEL TB1 (for Sensor 1) or TB2 (for optional Sensor 2) pH/ORP DIS TEMP– 2 Wire 2 Wire3 Wire 4 Wire CCOND Loop Pwrd 1 TEMP– 1 BLK COM(–) 8 9 8 9 10 11 12 24V(-) LITTLE DIPPER 4 WIRE RED +24V +24V +24V BRN XMTR– XMTR+ XMTR+ XMTR+ XMTR– 10 11 12 ORN XMTR– SHIELD or use DI SHIELD (TB3 7-12) pH/ORP DIS TEMP– 2 Wire 2 Wire3 Wire 4 Wire CCOND Loop Pwrd 1 TEMP– 1 POWERED 2 WIRE 4-20mA SOURCE COM(–) 8 9 8 9 10 11 12 24V(-) •SIMULATOR +24V +24V +24V – + XMTR– XMTR+ XMTR+ XMTR+ XMTR– 10 11 12 •POWERED 4-20mA OUTPUT XMTR– SHIELD (e.g. W100) SHIELD or use DI SHIELD (TB3 7-12) pH/ORP DIS TEMP– 2 Wire 2 Wire3 Wire CCOND 4 Wire Loop Pwrd 1 TEMP– 1 UNPOWERED COM(–) 8 9 8 9 10 11 12 24V(-) + 2 WIRE +24V +24V +24V LOOP POWERED TRANSMITTER XMTR– XMTR+ XMTR+ XMTR+ XMTR– 10 11 12 – XMTR– SHIELD SHIELD or use DI SHIELD (TB3 7-12) pH/ORP DIS TEMP– 2 Wire 2 Wire3 Wire 4 Wire CCOND Loop Pwrd 1 TEMP– 1 UNPOWERED – GROUND COM(–) 8 9 8 9 10 11 12 24V(-) 24V POWER 3 WIRE +24V +24V +24V TRANSMITTER XMTR– XMTR+ XMTR+ XMTR+ XMTR– 10 11 12 + SIGNAL XMTR– SHIELD SHIELD or use DI SHIELD (TB3 7-12) NOTE: To program the combination card analog input, you must go to Inputs menu, then enter the analog input (S13 or S23), scroll down to Transmitter, and select the type of transmitter from the list. Figure 11a Combination Card 4-20mA Dual Sensor Input Wiring 23
POWER SWITCH FUSE R1 R2 Sensor 1 R3 N N N N N N N N N N N N 1 2 3 4 5 6 7 8 9 10 11 12 13 14 15 16 17 18 1 1 2 3 4 5 6 7 8 9 2 3 4 5 6 7 8 9 10 11 12 13 14 15 16 17 18 R4 R5 10 11 12 13 14 15 16 17 18 TB5 R6 Sensor 2 N L TB7 TB4 TB6 TB1 TB2 TB3 SENSOR INPUT CARD LABEL ECOND CCONDpH/ORP Optional Temperature Compensation DIS TEMP– TEMP– TEMP– 1 2 3 4 5 6 7 8 9 10 11 12 1 2 3 4 5 6 7 8 9 10 11 12 18 TEMP– WHT/GRN TEMP+ TEMP+ TEMP+ R-SHLD TEMP+ GRN/WHT IN– IN– WHT/ORN IN+ ORN/WHT RCV IN+ RCV– RCV+ X-SHLD SHIELD SHIELD SHIELD pH/ORP/ISE electrode +5V BLU/WHT +5V –5V -5V WHT/BLU XMT+ XMT– XMT TB1 (for Sensor 1) or TB2 (for optional Sensor 2) Optional Temperature Compensation pH/ORP DIS 2 Wire 2 Wire3 Wire 4 Wire CCOND Loop Pwrd TEMP– TEMP– 1 2 3 4 5 6 7 8 9 10 11 12 1 2 3 4 5 6 7 8 9 TEMP– WHT/GRN TEMP+ TEMP+ SHIELD TEMP+ GRN/WHT IN– IN– WHT/ORN RCV IN+ –5V IN+ ORN/WHT -5V WHT/BLU XMT +5V +5V BLU/WHT COM(–) 24V(-) +24V +24V +24V XMTR– XMTR+XMTR+ XMTR+ XMTR– 10 11 12 XMTR– pH/ORP/ISE electrode SHIELD SHIELD or use DI SHIELD (TB3 7-12) COMBINATION SENSOR/ANALOG CARD LABEL TB1 (for Sensor 1) or TB2 (for optional Sensor 2) Figure 9 pH/ORP/ISE Sensor Input Wiring 24
POWER SWITCH FUSE R1 R2 Sensor 1 R3 N N N N N N N N N N N N 1 2 3 4 5 6 7 8 9 10 11 12 13 14 15 16 17 18 1 1 2 3 4 5 6 7 8 9 2 3 4 5 6 7 8 9 10 11 12 13 14 15 16 17 18 R4 R5 10 11 12 13 14 15 16 17 18 TB5 R6 Sensor 2 N L TB7 TB4 TB6 TB1 TB2 TB3 SENSOR INPUT CARD LABEL ECOND CCONDpH/ORP DIS TEMP– TEMP– TEMP– 1 2 3 4 5 6 7 8 9 10 11 12 1 2 3 4 5 6 7 8 9 TEMP+ TEMP+ TEMP+ R-SHLD IN– IN– WHT RCV IN+ IN+ GRN RCV– RCV+ X-SHLD SHIELD SHIELD SHIELD Disinfection Sensor +5V –5V +5V RED -5V BLK XMT+ XMT– XMT 10 11 12 18 TB1 (for Sensor 1) or TB2 (for optional Sensor 2) pH/ORP DIS 2 Wire 2 Wire3 Wire CCOND 4 Wire Loop Pwrd TEMP– TEMP– 1 2 3 4 5 6 7 8 9 10 11 12 1 2 3 4 5 6 7 8 9 TEMP+ TEMP+ SHIELD IN– IN– WHT RCV IN+ –5V IN+ GRN -5V BLK XMT +5V +5V RED COM(–) 24V(-) +24V +24V +24V XMTR– XMTR+XMTR+ XMTR+ XMTR– 10 11 12 XMTR– Disinfection Sensor SHIELD or use DI SHIELD (TB3 7-12) COMBINATION SENSOR/ANALOG CARD LABEL SHIELD TB1 (for Sensor 1) or TB2 (for optional Sensor 2) Figure 10 Disinfection Sensor Input Wiring 25
POWER SWITCH FUSE R1 R2 R3 N N N N N N N N N N N N 1 2 3 4 5 6 7 8 9 10 11 12 13 14 15 16 17 18 1 2 3 4 5 6 7 8 9 10 11 12 13 14 15 16 17 18 1 2 3 4 5 6 7 8 9 R4 R5 10 11 12 13 14 15 16 17 18 TB5 R6 N L TB7 TB4 TB6 TB3 TB1 TB2 Type of Transmitter TB Pin# 2 Wire Powered3 Wire 2 Wire Loop +24V AI# 4 Wire +24V 24V(–) Power RED Ground BLK – BRN + ORN +24V 1 2 3 4 5 6 7 8 9 1 2 3 4 5 6 7 8 9 1 XMTR– XMTR+ XMTR– XMTR+ Little Dipper XMTR+ XMTR– COM(-) SHIELD +24V SHIELD SHIELD +24V SHIELD +24V 24V(–) POWERED 4-20mA SOURCE – XMTR– XMTR+ XMTR– XMTR+ 2 •SIMULATOR + XMTR– XMTR+ COM(-) 10 11 12 10 11 12 •POWERED 4-20mA OUTPUT Shield SHIELD SHIELD SHIELD SHIELD (i.e. W100) TB1 (for Sensor 1) or TB2 (for optional Sensor 2) Type of Transmitter TB Pin# 2 Wire Powered3 Wire 2 Wire Loop +24V AI# 4 Wire +24V 24V(–) UNPOWERED + +24V 1 2 3 4 5 6 7 8 9 1 2 3 4 5 6 7 8 9 2 WIRE Jumper wire TRANSMITTER 1 XMTR– XMTR+ XMTR– XMTR+ – XMTR+ XMTR– COM(-) SHIELD +24V Shield SHIELD +24V 24V(–) SHIELD +24V SHIELD 24V Power UNPOWERED Jumper wire XMTR– XMTR+ XMTR– XMTR+ 2 3 WIRE + Signal XMTR– XMTR+ COM(-) 10 11 12 10 11 12 TRANSMITTER – Ground Shield SHIELD SHIELD SHIELD SHIELD TB1 (for Sensor 1) or TB2 (for optional Sensor 2) Figure 11 Dual 4-20mA Sensor Input Wiring 26
POWER SWITCH FUSE R1 R2 R3 N N N N N N N N N N N N 1 2 3 4 5 6 7 8 9 10 11 12 13 14 15 16 17 18 1 2 3 4 5 6 7 8 9 10 11 12 13 14 15 16 17 18 1 2 3 4 5 6 7 8 9 R4 R5 10 11 12 13 14 15 16 17 18 TB5 R6 N L TB7 TB4 TB6 TB3 TB1 TB2 1 DIG IN 3+ DIG IN 3– 1 2 3 4 5 6 7 8 9 1 1 2 2 3 2 3 +9 VDC 3 SIGNAL DIG IN 4+ DIG IN 4– 4 4 4 IN – 5 5 5 SEE SEE POWER +9V 6 6 +9 VDC 6 SENSOR 1 LABEL SENSOR 2 LABEL 7 7 7 8 8 8 FLOW SWITCH Contact Closure: Polarity not critical DI 9 9 9 SHIELD Hall Effect FLOW METER 10 11 12 13 14 15 16 4-20 OUT1+ 17 4-20 OUT1– 18 SHIELD TB1 10 11 12 13 14 15 16 17 18 10 11 12 13 14 15 16 4-20 OUT2+ 17 4-20 OUT2– 18 SHIELD TB2 10 11 12 13 14 15 16 17 18 DIG IN 1+ DIG IN 1– DIG IN 5+ DIG IN 5– DIG IN 2+ DIG IN 2– +9 VDC +9 VDC +9 VDC DIG IN 6+ DIG IN 6– +9 VDC TB3 Reed Switch FLOW METER Polarity not Critical TB1, 2 OR 3 (TB 3 SHOWN) SAFETY COVER LABEL Figure 12 Digital Input Wiring 27
POWER SWITCH FUSE R1 R2 R3 N N N N N N N N N N N N 1 2 3 4 5 6 7 8 9 10 11 12 13 14 15 16 17 18 1 2 3 4 5 6 7 8 9 10 11 12 13 14 15 16 17 18 1 2 3 4 5 6 7 8 9 R4 R5 10 11 12 13 14 15 16 17 18 TB5 R6 N L TB7 TB4 TB6 TB3 TB1 TB2 TO TB4 GRN 120V GRN/YEL 240V IF MOTORIZED BALL VALVE NC R1 N N N N N N BLK 120V BRN 240V NO WHT 120V BLU 240V SOLENOID/ MOTORIZED BALL VALVE NC R2 WHT 120V BLU 240V BLK 120V BRN 240V NO NC WHT 120V BLU 240V R3 BLK 120V BRN 240V NO GRN 120V GRN/YEL 240V TO TB4 NC R4 WHT 120V BLU 240V BLK 120V BRN 240V NO NC R5 BLK 120V BRN 240V NO TB5 PUMP NC R6 NO TO TB4 TB6 TO TB4 GRN 120V GRN/YEL 240V N L WHT 120V BLU 240V GRN/YEL 240V WHT 120V BLU 240V GRN 120V BLK 120V BRN 240V TB7 PUMP TO TB4 GRN 120V GRN/YEL 240V ALARM Power Supply (115 VAC or 230 VAC) Figure 13 W600 AC Power & Relay Output Wiring 28
POWER SWITCH FUSE NC R1 NO NC R2 NO N N N 1 2 3 4 5 6 7 8 9 10 11 12 13 14 15 16 17 18 1 2 3 4 5 6 7 8 9 10 11 12 13 14 15 16 17 18 R3 N N N N N N 1 2 3 4 5 6 7 8 9 R4 R5 10 11 12 13 14 15 16 17 18 TB5 N L R6 TB7 TB4 TB3 TB1 TB2 TB6 If motorized ball valve GRN 120V GRN/YEL 240V NC R1 WHT 120V BLU 240V NO BLK 120V BRN 240V N N N NC R2 WHT 120V BLU 240V BLK 120V BRN 240V NO TB5 GRN 120V GRN/YEL 240V R3 PLC GRN 120V GRN/YEL 240V WHT 120V BLU 240V Fused External Power Source BLK 120V BRN 240V R4 BLK 120V BRN 240V GRN 120V GRN/YEL 240V WHT 120V BLU 240V Fused External Power Source R5 BLK 120V BRN 240V ALARM TB4 R6 N L WHT 120V BLU 240V GRN/YEL 240V GRN 120V BLK 120V BRN 240V TB6 TB7 Power Supply (115 VAC or 230 VAC) Figure 14 W610 AC Power & Relay Output Wiring 29
POWER SWITCH FUSE + – + – R1 R2 1 2 3 4 5 6 7 8 9 10 11 12 13 14 15 16 17 18 1 2 3 4 5 6 7 8 9 10 11 12 13 14 15 16 17 18 R3 N N N N N N 1 2 3 4 5 6 7 8 9 R4 R5 10 11 12 13 14 15 16 17 18 TB5 N L R6 TB7 TB4 TB3 TB1 TB2 TB6 External AC Power + R1 – + External AC Power R2 – R3 PLC GRN 120V GRN/YEL 240V WHT 120V BLU 240V Fused External Power Source BLK 120V BRN 240V R4 BLK 120V BRN 240V GRN 120V GRN/YEL 240V WHT 120V BLU 240V Fused External Power Source R5 BLK 120V BRN 240V ALARM TB4 R6 N L WHT 120V BLU 240V GRN/YEL 240V GRN 120V BLK 120V BRN 240V TB6 TB7 Power Supply (115 VAC or 230 VAC) Figure 15 W620 AC Power & Relay Output Wiring 30
POWER SWITCH FUSE + – + – + – + – R1 R2 1 2 3 4 5 6 7 8 9 10 11 12 13 14 15 16 17 18 1 2 3 4 5 6 7 8 9 10 11 12 13 14 15 16 17 18 R3 N N N N N N 1 2 3 4 5 6 7 8 9 R4 R5 10 11 12 13 14 15 16 17 18 TB5 N L R6 TB7 TB4 TB3 TB1 TB2 TB6 External AC Power + R1 – + External AC Power R2 – + External AC Power R3 – + External AC Power – R4 R5 PLC TB4 GRN 120V GRN/YEL 240V WHT 120V BLU 240V Fused External Power Source N L R6 WHT 120V BLU 240V GRN/YEL 240V ALARM BLK 120V BRN 240V GRN 120V BLK 120V BRN 240V TB6 TB7 Power Supply (115 VAC or 230 VAC) Figure 16 W640 AC Power & Relay Output Wiring 31
POWER SWITCH FUSE R1 R2 R3 N N N N N N N N N N N N 1 2 3 4 5 6 7 8 9 10 11 12 13 14 15 16 17 18 1 2 3 4 5 6 7 8 9 10 11 12 13 14 15 16 17 18 1 2 3 4 5 6 7 8 9 R4 R5 10 11 12 13 14 15 16 17 18 TB5 R6 N L TB7 TB4 TB6 TB3 TB1 TB2 1 2 3 4 5 6 7 8 9 1 2 3 4 5 6 7 8 9 10 11 12 13 14 15 16 17 18 1 DIG IN 3+ DIG IN 3– +9 VDC DIG IN 4+ DIG IN 4– +9 VDC 1 1 2 2 3 2 3 3 4 4 4 5 5 5 SEE SEE 6 6 6 SENSOR 1 LABEL SENSOR 2 LABEL 7 7 7 8 8 8 DI 9 9 9 SHIELD 10 11 12 13 14 15 16 17 18 10 11 12 13 14 15 16 4-20 OUT1+ 17 4-20 OUT1– 18 SHIELD TB1 10 11 12 13 14 15 16 17 18 10 11 12 13 14 15 16 4-20 OUT2+ 17 4-20 OUT2– 18 SHIELD TB2 DIG IN 1+ DIG IN 1– +9 VDC DIG IN 5+ DIG IN 5– +9 VDC DIG IN 6+ DIG IN 6– +9 VDC TB3 DIG IN 2+ DIG IN 2– +9 VDC + – + – SHIELD SHIELD Chart Recorder Chart Recorder TB1 TB2 SAFETY LABEL Figure 17 Analog Output Wiring 32
4.0 FUNCTION OVERVIEW 4.1 Front Panel Figure 18 Front Panel 4.2 A Home screen is displayed while the controller is on. This display shows a user-defined list of input readings or status of outputs. Touching any of the items on the Home Screen will bring up the item’s Details Screen, where you can access calibration and setting menus. If more than four items have been selected to be displayed on the Home screen, the display will toggle between the first group of up to four and the next group. A “pause button” icon, when touched, stops the automatic toggling. Touching the down arrow icon allows for manual toggling. Touching the “play button” icon enables automatic toggling again. Touching the Menu icon brings up the Main Menu screen. Touchscreen 4.3 Icons The following icons appear on the Home screen. The Main Menu icon brings you to the list of menu options listed below. The following icons appear on the Main Menu screen. Touch the icon to get to the menu selections. Alarm Menu Inputs Menu Outputs Menu 33
Configuration Menu HOA Menu Graph Menu Home Page Other icons may appear in the menu screens. Calibration icon appears in sensor input menus and brings up the calibration menu X Cancel icon aborts a calibration or setting change The Page Down icon scrolls down to a new page in a list of options. The Page Up icon scrolls up to a new page in a list of options. The Back/Return icon returns the display to the previous screen The Make Character Higher icon is used when making an alphanumeric entry The Make Character Lower icon is used when making an alphanumeric entry The Move Cursor icon is used to scroll left to right within an alphanumeric entry The Confirm icon accepts a choice, finishes entering data, or advances to the next calibra- tion step Settings Menu X The Character Delete icon deletes part of an alphanumeric entry The Shift icon switches between upper and lower case alpha entry screens The Next Screen icon moves to the next step in a calibration sequence. In a Graph it shifts the graph forward in time. The Previous Screen icon moves back a step in a calibration sequence. In a Graph it shifts the graph backwards in time. Overview of the use of icons Changing Numeric Values To change a number, use the Character Delete icon to the digit to be changed. If the new number will be neg- 34
ative, start with touching the minus sign, then use the numeric touchpad and decimal point to type the number (some entries must be integers and the decimal will be ignored and the setting rounded to the nearest integer). Once the value of the number is correct touch the Confirm icon to store the new value into memory, or touch the Cancel icon to leave the number at its previous value and go back. Changing Names To change the name used to identify an input or output, use the Move Cursor icon to the character to be changed and change it using either the Make Character Higher or Lower icons. Upper case and lower case letter, numbers, a blank space, period, plus and minus symbols are available. Move the cursor to the right and modify each charac- ter. Once the word is correct, use the Enter icon to store the new value into memory, or use the Cancel icon to leave the word at its previous value and go back. Choosing from a List Selecting the type of sensor, the units of measure of an input, or the control mode used for an output, the selec- tion is picked from a list of available options. Touch the Page Up or Down icons if necessary to find the desired option, and then touch the option to highlight it. Touch the Confirm icon to store the new option into memory, or touch the Cancel icon to leave the selection at its previous value and go back. Hand-Off-Auto Relay Mode Touch the desired relay mode. In Hand mode the relay is forced on for a specified amount of time and when that time is up the relay returns to its previous mode, in Off mode the relay is always off until taken out of Off mode, and in Auto mode the relay is responding to control set points. Touch the Return icon to go back to the relay settings. Interlock and Activate with Channels Menus To select which digital inputs or relays will interlock this relay (Interlock Channels), or which digital inputs or relays will force this relay on (Activate with Channels), touch the input or relay number(s). The background of the selected item will turn dark. When finished selecting as many as needed, touch the Confirm icon to accept the changes or the Cancel icon to leave the selections at the previous settings and go back. 4.4 Initial Startup After having mounted the enclosure and wired the unit, the controller is ready to be started. Plug in the controller and turn on the power switch to supply power to the unit. The display will briefly show the model number and then revert to the normal summary (Home) display. Refer to section 5 below for more details on each of the settings. Startup and then touch the Home icon. To return to the summary display, touch the Main Menu icon Settings Menu (see section 5.4) Choose language Touch the Configuration Settings icon. Touch Global Settings. Touch the Scroll Down icon until the English word “Language” is displayed and then touch it. Touch the Scroll Down icon until your language is displayed and touch it. Touch the Confirm icon to change all menus to your language. Set date (if necessary) Touch the Scroll Up or Down icon until Date is displayed, and then touch it. Touch the Move Cursor icon to highlight the Day, and then use the numeric touchpad to change the date. Touch the Confirm icon to accept the change. Set time (if necessary) Touch the Scroll Up or Down icon until Time is displayed and then touch it. Touch the Move Cursor icon to highlight the digit to change, then use the numeric touchpad to change the time. Touch the Confirm icon to accept the change. Set global units of measure Touch the Scroll Up or Down icon until Global Units is displayed and then touch it. Touch the desired units. Touch the Confirm icon to accept the change. Set temperature units of measure 35
Touch the Scroll Up or Down icon until Temp Units is displayed and then touch it. Touch the desired units. Touch the Confirm icon to accept the change. Touch the Main Menu icon. Touch the Inputs icon. Inputs (see section 5.2) Program the settings for each input The S11 sensor input will be displayed. Touch it to get to the Details screen. Touch the Settings icon. If the name of the sensor does not describe the type of sensor connected, touch the Scroll Down icon until Type is displayed. Touch the Type field. Touch the Scroll Down icon until the correct type of sensor is displayed, then touch it to highlight it. Touch the Confirm icon to accept the change. This will bring you back to the Settings screen. Finish the rest of the S1 settings. For disinfections sensors, choose the exact sensor in the Sensor menu. For contacting conductivity sensors, enter the cell constant. Select the units of measure. Enter the alarm set points and alarm deadband. Set the default temperature that will be used for automatic temperature compensation if the temperature signal becomes invalid. When finished with S11, touch the Return icon until the list of inputs is displayed. Touch the Scroll Down icon and repeat the process for each input. The S12 temperature input Element should be set correctly once the S11 sensor type has been set. If not, select the correct temperature element and set the alarm set points and alarm deadband. Generic, ORP and disinfection sensors do not have temperature signals and are preset to Unassigned. To calibrate the temperature, return to the S12 Details screen, touch the Calibrate icon, and touch the Enter icon to perform a calibration. If either input card is a Dual Analog Input card (4-20mA signal), then select the type of sensor that will be connected. Select Fluorometer if a Little Dipper 2 will be connected. Select AI Monitor if the device can be calibrated on its own and the W600 calibration will only be in units of mA. Select Transmitter if the device connected cannot be calibrated on its own and the W600 will need to be used to calibrate in engineering units of measure. If a flow switch or liquid level switch is connected, D1 through D6 (whichever one has the device connected to it) should be set to DI State type (if no switch is connected, select No Sensor). Set the state that will possibly interlock control outputs (refer to the Outputs settings to program which outputs, if any, will be interlocked by the switch). Set the state, if any, that will result in an alarm. If a contacting head or paddlewheel flow meter is connected, D1 through D6 (whichever one has the device con- nected to it) should be set to that type (if no flow meter is connected, select No Sensor). Set the units of measure, volume/contact or K factor, etc. Calibrate the sensor To calibrate the sensor, return to the list of inputs, touch the sensor to calibrate, touch the Calibrate icon, and select one of the calibration routines. For disinfection and Generic sensors, start with the Zero Calibration. For elec- trodeless conductivity, start with the Air Calibration. Refer to section 5.2. Touch the Main Menu icon. Touch the Outputs icon. 36
MAIN MENU/HOME SCREEN OVERVIEW Inputs Sensor (S11) 3038 µS/cm Temp (S12) 77.1°F Generic AI (S21) 30.5% Generic AI (S22) 37.9% HOME SCREEN (example) Flowswitch (D1) No Flow SENSOR (S1) CCond (S11) 3041 µS/cm Config > List of possible Inputs: Contacting Conductivity Electrodeless Conductivity Temperature pH ORP Disinfection Generic Transmitter/AI Monitor Fluorometer DI State Flow Meter, Contactor type Flow Meter, Paddlewheel type Feed Monitor DI Counter Virtual Input – Calculation Virtual Input – Raw Value Global Settings Security Settings Ethernet Settings Ethernet Details Temp (S12) 77.0°F Flowswitch (D1) No Flow > Additional Confg Settings: Remote Communications (Modbus and BACnet) Email Report Settings Display Settings File Utilities Controller Details MAIN MENU Main Menu 09:19:01 14-Mar-2017 Inputs Config Outputs HOA Outputs > HOA On/Off (R1) Off Flow Timer (R2) Off Flow Timer (R3) Off Manual (R4) Off Graph Alarm R1 R2 R3 R4 R5 R6 > Hand Off Auto To HOME SCREEN List of possible Outputs: On/Of control mode Flow Timer control mode Percent Timer control mode Alarm Output mode Time Proportional control mode Manual control mode Pulse Proportional control mode Flow Proportional control mode PID control mode Dual Setpoint mode Timer control mode Probe Wash control mode Spike control mode Lag Output control mode Flow Meter Ratio Dual Switch mode Counter Timer Analog Output, Retransmit mode Analog Output, Proportional control mode Analog Output, PID control mode Analog Output, Manual mode Analog Output, Flow Proportional mode Analog Output, Lag Output CCond (S11) On/Off (R2) µS/cm 3036 3035 3034 3033 3032 3031 14-Nov 10.35 10.40 10.45 10 Minutes Graph Settings Time Range SENSOR (S1) 10 Minutes 30 Minutes 1 Hour 2½ Hours X SENSOR (S1) Sensor DI Relay Low Axis Limit High Axis Limit Alarms P > > List of all Active Alarms Additional Graph Settings: Time Range More possible settings: 8 Hours 12 Hours 1 Day ½ Week 1 Week 2 Weeks 4 Weeks 37
Inputs Sensor (S11) 3038 µS/cm Temp (S12) 77.1°F Generic AI (S21) 30.5% Generic AI (S22) 37.9% Main Menu 09:19:01 14-Mar-2017 Config Inputs HOA Outputs Alarms Graph > > Calibration SENSOR (S1) One Point Process Calibration One Point Buffer Calibration Two Point Buffer Calibration Three Point Buffer Calibration One Point Analog Calibration Two Point Analog Calibration Open Air Calibration (Cond) Zero Calibration (Disinfection) Inputs>Sensor (S11) Details Screen Content varies with sensor type > INPUTS Transmitter S11 (S12,13,21,22,23) AI Monitor S11 (S12,13,21,22,23) Additional Settings for Contacting Conductivity: Alarm & Data Log Suppression Smoothing Factor Default Temp Temp Compensation Temp Comp Factor Cell Constant Contacting Cond S11 (22) Alarms Deadband Reset Calibration Values Cal Required Alarm Additional Settings for Transmitter and AI Monitor: Alarm & Data Log Suppression Smoothing Factor 4 mA Value 20 mA Value Cable Length Gauge Units Name Type Alarms Deadband Reset Calibration Values Cal Required Alarm Units Name Type > > > > Only if HVAC mode is enabled Additional Settings for Electrodeless Conductivity: Alarm & Data Log Suppression Smoothing Factor Default Temp Installation Factor Range Temp Compensation Electrodeless Cond S11 (S21) Alarms Deadband Reset Calibration Values Cal Required Alarm Additional Settings for Fluorometer: Alarm & Data Log Suppression Smoothing Factor Max Sensor Range Fluorometer S11 (12,13, 21,22, 23) Temp Comp Factor Cell Constant Cable Length Gauge Units Name Type Dye / Product Ratio Name Type Alarms Deadband Reset Calibration Values Cal Required Alarm > > > > Temperature S12 (S22) SENSOR (S1) Alarms Deadband Reset Calibration Values Cal Required Alarm Additional Settings for Temperature Sensor: Alarm & Data Log Suppression Smoothing Factor Name Element > > pH S11 (S21) SENSOR (S1) Alarms Deadband Reset Calibration Values Cal Required Alarm Additional Settings for pH Sensor: Alarm & Data Log Suppression Smoothing Factor Buffers (pH only) Default Temp Cable Length Gauge Electrode Name Type > > ORP S11 (S21) SENSOR (S1) Alarms Deadband Reset Calibration Values Cal Required Alarm Additional Settings for ORP Sensor: Alarm & Data Log Suppression Smoothing Factor Cable Length Gauge Name Type > > Additional Settings for Disinfection Sensor: Alarm & Data Log Suppression Smoothing Factor Cable Length Gauge Name Sensor Type Disinfection S11 (S21) SENSOR (S1) Alarms Deadband Reset Calibration Values Cal Required Alarm > > Additional Settings for Generic Sensor: Alarm & Data Log Suppression Smoothing Factor Sensor Slope Sensor Offset Low / High Range Cable Length Generic S11 (S21) SENSOR (S1) Alarms Deadband Reset Calibration Values Cal Required Alarm Gauge Units Electrode (Linear or Ion Selective) Name Type > > 38
INPUTS Additional Settings for Virtual Input Calculation (V1-V2) Alarms Deadband Input Input 2 VIRTUAL INPUTS Calculation Mode Alarm & Datalog Suppression Low Range High Range Smoothing Factor Name Type > > Raw Value (V1-V2) Alarms Deadband Alarm & Datalog Suppression Input Additional Settings for Raw Value: Smoothing factor Name Type > > DI State (D1-D6) SENSOR (S1) Open Message Closed Message Interlock Alarm Additional Settings for DI State: Alarm & Datalog Suppression Total Time Reset Time Total Name Type > > DIGITAL INPUTS Contactor Type Additional Settings for Contactor, Flowmeter: Alarm & Datalog Suppression Volume/Contact Flow Units Name Type Flowmeter (D1-D6) SENSOR (S1) Totalizer Alarm Reset Flow Total Set Flow Total Scheduled Reset > > Paddlewheel Type Additional Settings for Paddlewheel, Flowmeter: Flowmeter (D1-D6) Alarms Deadband Alarm & Datalog Suppression Totalizer Alarm Reset Flow Total Set Flow Total Scheduled Reset K Factor Flow Units Rate Units Smoothing Factor Name Type > > Additional Settings for Feed Monitor: Feed Monitor (D1-D6) SENSOR (S1) Totalizer Alarm Reset Flow Total Set Flow Total Scheduled Reset Total Alarm Mode Flow Alarm Mode Flow Alarm Delay Flow Alarm Clear Deadband Reprime Time Volume/Contact Flow Units Rate Units Smoothing Factor Output Name Type > > Only if HVAC mode is disabled DI Counter (D1-D6) Additional Settings for DI Counter Reset Total Set Total Scheduled Reset Units Rate Units Units per Pulse Smoothing Factor Name Type SENSOR (S1) Alarms Deadband Alarm & Datalog Suppression Totalizer Alarm > > > 39
Outputs On/Off (R1) Off Inhibitor (R2) Off Flow Timer (R3) Off Manual (R4) Off OUTPUTS (RELAYS R1-R6) Page 1 Main Menu 09:19:01 14-Mar-2017 Config Inputs HOA Outputs Only if HVAC mode is enabled Additional Settings for Intermittent Sampling Mode: Sample Time Hold Time Maximum Blowdown Wait Time Output Time Limit Reset Output Timeout Interlock Channels Activate with Channels Alarms Graph Int. Sampling (R1-R6) HOA Setting Set Point Proportional Band Deadband Min Relay Cycle Hand Time Limit Reset Time Total Cond Input Trap Sample Name Mode > Outputs>On/Off (R1) Details Screen Content varies with output type > > > Additional Settings for Manual Mode: Reset Output Timeout Interlock Channels Minimum Relay Cycle Hand Time Limit Reset Time Total Manual (R1-R6) HOA Setting On Delay Time Off Delay Time Output Time Limit Name Mode Additional Settings for On/OFF Mode: Duty Cycle On Delay Time Of Delay Time Output Time Limit Reset Output Timeout Interlock Channels Activate with Channels On/Off (R1-R6) HOA Setting Set Point Deadband Duty Cycle Period Minimum Relay Cycle Hand Time Limit Reset Time Total Input Direction Name Mode > > Only if Relay Type is Pulse Additional Settings for Pulse Prop Mode: Maximum Rate Interlock Channels Activate with Channels Minimum Relay Cycle Hand Time Limit Reset Time Total Pulse Prop (R1-R6) SENSOR (S1) HOA Setting Set Point Proportional Band Minimum/Maximum Output > > Input Direction Name Mode Additional Settings for Flow Timer Mode: Reset Output Timeout Interlock Channels Activate with Channels Minimum Relay Cycle Hand Time Limit Reset Time Total Flow Timer (R1-R6) HOA Setting Feed Duration Accumulated Volume Output Time Limit Flow Input Flow Input 2 Name Mode > > Only if HVAC mode is disabled Only if Relay Type is Pulse Additional Settings for PID Control Mode: Integral Time Integral Gain Derivative Time Derivative Gain Reset PID Integral Minimum Output Maximum Output Maximum Rate Input > > Hand Time Limit Reset Time Total Name Mode Direction Input Minimum Input Maximum Gain Form Output Time Limit Reset Output Timeout Interlock Channels Activate with Channels Minimum Relay Cycle PID Control (R1-R6) SENSOR (S1) HOA Setting Set Point Gain Proportional Gain Only if HVAC mode is enabled Bleed & Feed (R1-R6) SENSOR (S1) HOA Setting Feed Time Limit Output Time Limit Reset Output Timeout Additional Settings for Bleed & Feed Mode: Interlock Channels Activate with Channels Minimum Relay Cycle Hand Time Limit Reset Time Total Bleed Name Mode > > > > Additional Settings for Dual Setpoint Mode: Dual Setpoint (R1-R6) HOA Setting Set Point Set Point 2 Deadband Minimum Relay Cycle Hand Time Limit Reset Time Total Input Direction Name Mode Duty Cycle Period Duty Cycle On Delay Time Of Delay Time Output Time Limit Reset Output Timeout Interlock Channels Activate with Channels Only if HVAC mode is enabled Bleed then Feed (R1-R6) SENSOR (S1) HOA Setting Feed Percentage Feed Time Limit Reset Timer Additional Settings for Bleed then Feed Mode: Output Time Limit Reset Output Timeout Interlock Channels Activate with Channels Minimum Relay Cycle Hand Time Limit Reset Time Total Bleed Name Mode > > > > Only if HVAC mode is disabled Additional Settings for Timer Control Mode: Timer Control (R1-R6) SENSOR (S1) HOA Setting Event 1 (through 10) Repetition Hourly Week Day Events Per Day Start Time Duration Additional Settings for Percent Timer Mode: Reset Output Timeout Interlock Channels Activate with Channels Minimum Relay Percent Timer (R1-R6) SENSOR (S1) HOA Setting Sample Period Feed Percentage Output Time Limit Reset Time Total Name Mode Add Last Missed Output Time Limit Reset Output Timeout Interlock Channels Activate with Channels Minimum Relay Cycle Hand Time Limit Cycle Hand Time Limit Reset Time Total Name Mode > > Only if HVAC mode is enabled Additional Settings for Biocide Timer Mode: Bleed Prebleed Time Prebleed To Cond Input Bleed Lockout Add Last Missed Interlock Channels Biocide Timer (R1-R6) SENSOR (S1) HOA Setting Event 1 (through 10) Repetition Week Day Start Time Duration Activate with Channels Minimum Relay Cycle Hand Time Limit Reset Time Total Name Mode > > Additional Settings for Flow Meter Ratio: Output Time Limit Reset Output Timeout Interlock Channels Activate with Channels Minimum Relay Cycle Hand Time Limit Reset Time Total Makeup Meter Flow Meter Ratio (R1-R6) HOA Setting Accumulator Volume Bleed Volume Reset Timer Makeup Meter 2 Bleed Meter Bleed Meter 2 Name Mode > > Additional Settings for Alarm Mode: Select Alarms Output Interlock Channels Activate with Channels Minimum Relay Cycle > Alarm (R1-R6) SENSOR (S1) HOA Setting Alarm Mode On Delay Time Off Delay Time > Hand Time Limit Reset Time Total Name Mode > > Additional Settings for Time Prop Mode: Output Time Limit Reset Output Timeout Interlock Channels Activate with Channels Minimum Relay Cycle Hand Time Limit Reset Time Total Time Prop (R1-R6) HOA Setting Set Point Proportional Band Sample Period Input Direction Name Mode > > 40
OUTPUTS (RELAYS R1-R6) Page2 Additional Settings for Probe Wash Mode: Probe Wash (R1-R6) HOA Setting Event 1 (through 10) Repetition Hourly Week Day Events Per Day Start Time Duration Hand Time Limit Reset Time Total Name Mode Input Input 2 Sensor Mode Hold Time Interlock Channels Activate with Channels Minimum Relay Cycle > > Additional Settings for Spike Control Mode: Spike Control (R1-R6) Direction Interlock Channels Activate with Channels Minimum Relay Cycle Hand Time Limit Reset Time Total Name Mode Duty Cycle Period Duty Cycle Event 1 (through 8) Repetition Week Day Start Time Duration Input HOA Setting Set point Spike Set point Deadband > > Additional Settings for Lag Control Mode: Lag Control (R1-R6) Activate with Channels Min Relay Cycle Hand Time Limit Reset Time Total Name Mode Activation Mode* Set Point Set Point 2 Deadband Delay Time* Output Time Limit Reset Output Timeout Interlock Channels * See section 5.3.22 HOA Setting Lead Wear Leveling* Wear Cycle Time* > > Only if Relay Type is Pulse Additional Settings for Flow Prop Control Mode: Specifc Gravity Max Rate Output Time Limit Reset Output Timeout Interlock Channels Activate with Channels Flow Prop (R1-R6) HOA Setting Target Pump Capacity Pump Setting Hand Output Hand Time Limit Reset Time Total Flow Input Name Mode > > Additional Settings for Dual Switch Mode: Of Switch Activate Of Of Delay Time Hand Time Limit Output Time Limit Reset Output Timeout Interlock Channels Dual Switch(R1-R6) HOA Setting On Switch Activate On On Delay Time Activate with Channels Min Relay Cycle Reset Time Total Name Mode > > Only if HVAC mode is disabled Additional Settings for Counter Timer Mode: Output Time Limit Reset Output Timeout Interlock Channels Activate with Channels Minimum Relay Cycle Hand Time Limit Counter Timer (R1-R6) HOA Setting Feed Duration Accumulator Setpoint Reset Time Reset Time Total Input Name Mode > > 41
OUTPUTS (ANALOG A1-A2) Outputs On/Off (R1) Off Inhibitor (R2) Off Flow Timer (R3) Off Manual (R4) Off Main Menu 09:19:01 14-Mar-2017 Inputs Config Outputs HOA Alarms Graph > Outputs>On/Off (R1) Details Screen Content varies with output type > Additional settings for Retransmit Mode: Error Output Reset Time Total Input Name Mode Retransmit (A1-A2) HOA Setting 4 mA Value 20 mA Value Hand Output > > Additional Settings for Proportional Control Mode: Max Output Output Time Limit Reset Output Timeout Interlock Channels Activate with Channels Hand Output Hand Time Limit Reset Time Total Proportional Control (A1-A2) HOA Setting Set Point Proportional Band Min Output Off Mode Output Error Output Input Direction Name Mode > > Additional Settings for PID Control Mode: Integral Time Integral Gain Derivative Time Derivative Gain Reset PID Integral Min Output Max Output Max Rate Output Time Limit Reset Output Timeout Interlock Channels Activate with Channels PID Control (A1) Hand Output Hand Time Limit Off Mode Output Error Output Reset Time Total Input Direction Input Minimum Input Maximum Gain Form Name Mode HOA Setting Set Point Gain Proportional Gain > > Only if HVAC mode is disabled Manual Control (A1-A2) HOA Setting Interlock Channels Activate with Channels Minimum Relay Cycle Additional Settings for Manual Control Mode: Hand Time Limit Reset Time Total Name Mode > > Additional Settings for Flow Prop Control Mode: Specific Gravity Output Time Limit Reset Output Timeout Interlock Channels Activate with Channels Hand Output Hand Time Limit Off Mode Output Flow Prop (A1-A2) HOA Setting Target Pump Capacity Pump Setting Error Output Reset Time Total Flow Input Name Mode > > Additional settings for Lag Output Mode: Reset Output Timeout Wear Leveling Wear Cycle Time Name Mode Lag Output (A1-A2) HOA Setting Lead Reset Time Total Output Time Limit > > 42
CONFIG MENU HOME SCREEN (example) Config Global Settings Security Settings Ethernet Settings Ethernet Details Flowswitch (D1) No Flow Main Menu 09:19:01 14-Mar-2017 CCond (S11) 3041 µS/cm SENSOR (S1) Inputs Config Temp (S12) 77.0°F Outputs HOA Flowswitch (D1) No Flow Alarms Graph > Additional Config Settings: Remote Communications (Modbus and BACnet) Email Report Settings Display Settings File Utilities Controller Details Additional Global Settings: Global Units Temperature Units Alarm Delay HVAC Modes Language Global Settings Date Time Name Location Additional Display Settings: Display Settings Home 1 Home 2 Home 3 Home 4 Home 5 Home 6 Home 7 Home 8 Adjust Display Key Beep Auto Dim Time > > > > Security Settings Controller Log Out Security Local Password Additional File Utilities: Export Event Log Export System Log Export User Config File Import User Config File Restore Default Config Software Upgrade File Utilities SENSOR (S1) File Transfer Status Data Log Range Log Frequency Export Data Log File > > > > Additional Ethernet Settings: DNS Server Web Server Web Page Color Scheme Fluent Alarm Delay TCP Timeout Fluent Status LiveConnect Status Update Period Reply Timeout Ethernet Settings SENSOR (S1) DHCP Setting Controller IP Address Network Netmask Network Gateway Additional Controller Details: Software Version Power Board Sensor Board #1 Software Version Sensor Board #2 Software Version Network Board Software Version AO Board Last Data Log Battery Power Internal Temp 1 Internal Temp 2 Internal Temp 3 Internal Temp 4 +5 Volt Supply +3.3 Volt Supply LCD Bias Voltage LCD Supply Controller Details SENSOR (S1) Controller Product Name Serial Number Controller Board > > > Ethernet Details SENSOR (S1) Alarms DHCP Status Controller IP Address Network Netmask Additional Ethernet Details: Network Gateway DNS Server Web Server MAC Address Last Fluent Data Last Fluent Config > > > Remote Communications SENSOR (S1) Comm Status Data Format Data Port Verbose Logging > > Email Report Settings SENSOR (S1) Report #1 through #4 Email Adresses Email Server SMTP Server Report #1-4 Settings: Report Type Email Recipients Repetition (Datalog/Summary/Graph Reports) Reports Per Day (Datalog/Summary/Graph Reports) Day (Datalog/Summary/Graph Reports) Day of Month (Datalog/Summary/Graph Reports) Report Time (Datalog/Summary/Graph Reports) Log Frequency (Datalog Report) Alarm Mode (Alarms Report) Select Alarms (Alarms Report) Alarm Delay (Alarms Report) Attach Summary (Alarms Report) > > Additional Email Report Settings: SMTP Port From Address ASMTP Username ASMTP Password Test Report Recipients Send Email Test Report 43
Outputs (see section 5.3) Program the settings for each output The R1 relay output will be displayed. Touch the relay field to get to the Details screen. Touch the Settings icon. If the name of the relay does not describe the control mode desired, touch the Scroll Down icon until Mode field is displayed. Touch the Mode field. Touch the Scroll Down icon until the correct control mode is displayed, then touch the Confirm icon to accept the change. This will bring you back to the Settings screen. Finish the rest of the R1 settings. If you want the output to be interlocked by a flow switch or by another output being active, enter the Interlock Channels menu and select the input or output channel that will interlock this output. The default is for the output to be in Off mode, where the output does not react to the settings. Once all settings for that output are complete, enter the HOA Setting menu and change it to Auto. Repeat for each output. Normal Startup Startup is a simple process once your set points are in memory. Simply check your supply of chemicals, turn on the controller, calibrate it if necessary and it will start controlling. 4.5 To shut the controller down, simply turn off the power. Programming remains in memory. It is important that the pH/ ORP electrode remains wet. If the shutdown is expected for any longer than a day, and it is possible for the electrode to dry out, remove the electrode from the tee and store it in pH 4 buffer or cooling tower water. Take care to avoid freezing temperatures when storing the pH/ORP electrodes to avoid breakage of the glass. Shut Down 5.0 OPERATION using the touchscreen These units control continuously while power is applied. Programming is accomplished either via the touchscreen or the optional Ethernet connection. See section 6.0 for Ethernet instructions. To view the readings of each sensor, or whatever user-defined list of parameters that has been set, touch the Home icon if not already there. The menus for each of these parameters may be accessed directly by touching the parameter. Keep in mind that even while browsing through menus, the unit is still controlling. Touch the Main Menu icon inputs and outputs. Under the Configuration menu will be general settings such as the clock, the language, etc. that do not have an input or output associated with it. Each input has its own menu for calibration and unit selection as needed. Each output has its own setup menu including set points, timer values and operating modes as needed. from the home page to access all settings. The menu structure is grouped by alarms, 5.1 Touch the Alarms icon to view a list of active alarms. If there are more than six active alarms, the Page Down icon will be shown; touch this icon to bring up the next page of alarms. Alarms Menu Touch the Main Menu icon to go back to the previous screen. 5.2 Touch the Inputs icon to view a list of all sensor and digital inputs. The Page Down icon pages down the list of inputs, the Page Up icon pages up the list of inputs, the Main Menu icon brings back the previous screen. Inputs Menu Touch the input to access that input’s details, calibration (if applicable) and settings. 44
Sensor Input Details The details for any type of sensor input include the current value read, alarms, the raw (uncalibrated) signal, the sensor type, and the calibration gain and offset. If the sensor has automatic temperature compensation, then the sensor’s temperature value and alarms, the temperature resistance value read, and the type of temperature element required are also displayed under a separate sensor input menu. Calibration Touch the Calibration icon to calibrate the sensor. Select the calibration to perform: One Point Process, One Point Buffer or Two Point Buffer Calibration. Not all calibration options are available for all types of sensor. One Point Process Calibration New Value Enter the actual value of the process as determined by another meter or laboratory analysis and touch Confirm. Cal Successful or Failed If successful, touch Confirm to put the new calibration in memory. If failed, you may retry the calibration or cancel. Refer to Section 8 to troubleshoot a calibration failure. One Point Buffer Calibration, Disinfection/Generic Sensor Zero Cal, Conductivity Air Cal Cal Disables Control Touch Confirm to continue or Cancel to abort Buffer Temperature (only appears if no temperature sensor is detected for sensor types that use automatic tem- perature compensation) Enter the temperature of the buffer and touch Confirm. Buffer Value (only appears for One Point Calibration except when automatic buffer recognition is used) Enter the value of the buffer being used Rinse Sensor Remove the sensor from the process, rinse it off, and place it in the buffer solution (or oxidizer-free water for Zero Cal, or air for the conductivity open air cal). Touch Confirm when ready. Stabilization When the temperature (if applicable) and signal from the sensor is stable, the controller will automatically move to the next step. If they don’t stabilize you may manually go to the next step by pressing Confirm. Cal Successful or Failed If successful, touch Confirm to put the new calibration in memory. If failed, you may retry the calibration or cancel. Refer to Section 8 to troubleshoot a calibration failure. Resume Control Replace the sensor in the process and touch Confirm when ready to resume control. Two Point Buffer Calibration Cal Disables Control Touch Confirm to continue or Cancel to abort Buffer Temperature (only appears if no temperature sensor is detected for sensor types that use automatic temperature compensation) Enter the temperature of the buffer and touch Confirm. First Buffer Value (does not appear if automatic buffer recognition is used) Enter the value of the buffer being used Rinse Sensor Remove the sensor from the process, rinse it off, and place it in the buffer solution. Touch Confirm when ready. Stabilization When the temperature (if applicable) and signal from the sensor is stable, the controller will automatically move 45