Download
1 / 32
320 likes | 744 Views
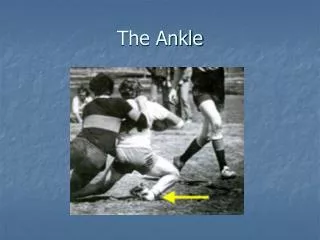
Ankle. Views. Ap Lateral Internal and external Obliques. Things to know. Page 224 in book Cassette: 10 x 12 crosswise divided in half Measures 8 Shield Marker Hold still. Part Position for AP. Place patient supine on table Do not flex foot allow it to be in a natural position

E N D
Views • Ap • Lateral • Internal and external Obliques
Things to know • Page 224 in book • Cassette: 10 x 12 crosswise divided in half • Measures 8 • Shield • Marker • Hold still
Part Position for AP • Place patient supine on table • Do not flex foot allow it to be in a natural position • Point toes up to ensure a true AP of lower leg and ankle.
Central Ray • 40 SID • Perpendicular to a point mid-way between malleoli • Collimate to lateral skin borders and included distal tib/fib and proximal half of metatarsals.
Seen on Radiograph • The Distal tib/fib • The lateral and medial malleoli • The talus • Proximal half of metatarsals
Lateral • The other half of the 10x 12 cassette • Shield • Marker
Part Position • Rotate patient on side of affect foot • Place unaffected leg behind affected leg • Dorsiflex foot for a true 90 degree angle
Central ray • 40 Sid • Perpendicular to the medial malleolus
Seen on Radiograph • Distal third of tib/fib superimposed • The talus • The calcaneus • The navicular and cuboid • Tibotalar joint open
Obliques 10 x12 cassette divided in half Shield Marker
Part Position for oblique • Start like on an AP • Patient supine and heel against cassette toes up • Center ankle to center of Cassette • Rotate leg medially (internal) 45 degrees • Rotate leg laterally (external) 45 degrees
Central ray • 40 SID • Perpendicular to mid-way between malleoli
Seen on internal oblique • Distal third of tib/fib • the malleoli • the talus and proximal half of metatarsals • tibiofibular joint open • the lateral malleoli and talus joint open • the medial malleoli and talus partially imposed.
Seen on external oblique • The Calcaneal sulcus • The superior portion of the calcaneus • The distal tib/fib superimposed anterior
the Views • AP • Lateral
Things to know • Cassette size: 14 X 17 turned diagonally • one cassette per view • Shield • Marker • Measures 10
Part position for AP • Patient Supine on table • Place shield over lap • leg fully extended • place leg in true AP position for knee and ankle • Femoral condyles parallel to IR • foot flexed to 90 degree (TOES up) • include both joints (knee & ankle) IR.
Central Ray • 40 SID • perpendicular to mid-leg • Collimate to skin borders on lateral and medial sides. • Leave collimation open from top to bottom • ** can go up to 44 or 48 SID to include more of part**
Seen on Radiograph • The entire tibia and fibula • both ankle and knee joint • the condyles of tibia and femur in profile • the intercondylar eminence centered in the intercondylar fossa • some imposition of distal and proximal tib/fib
Lateral Tib/Fib • 14 X 17 diagonally • shield • Marker
Part position for lateral • Patient on side with injured side down • flex knee about 45 degree to ensure true lateral • plane of patella should be perpendicular to IR • opposite leg behind injured one • both joints included on IR
Central Ray • perpendicular to mid-leg • collimation to skin borders on sides • open fully top to bottom • ** can go up to 44 or 48**
Seen on Radiograph • Entire tib/fib • both joints • tibial tuberosity in profile • fibula head imposed by tibia • distal fibula imposed on posterior portion of tibia • femoral condyles superimposed.
!!!Important Note!!!! • If you can not fit entire leg on on film... • You must include the joint nearest the injury on the film and take a separate picture of the other joint.