Download
1 / 82
850 likes | 1.35k Views
Microsoft Publisher 2000. Foundation . What is Publisher 2000?. Publisher 2000 is a Desk-Top Publishing application. You can: Create letterheads, cards, invitations and more for your personal use Create newsletters, business cards, envelopes and brochures for business use and much more.

E N D
Microsoft Publisher 2000 Foundation
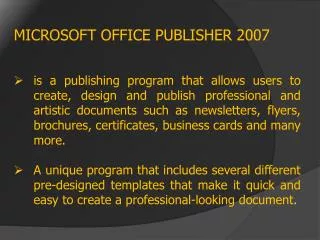
What is Publisher 2000? • Publisher 2000 is a Desk-Top Publishing application • You can: • Create letterheads, cards, invitations and more for your personal use • Create newsletters, business cards, envelopes and brochures for business use and much more
Getting Familiar With the Environment Click on the Start button, select Programs, and then select Microsoft Publisher
Menus and Toolbars Investigate the function of each of these icons Get used to the drop down menus!
Rulers & Measurements • Press Ctrl when dragging the ruler to reset to Zero on the page • Click Tools menu and Options to switch between inches and centimetres
Using the “Publisher Tutorials” • Get detailed help on common tasks!
Learning About Wizards • Click Next to advance through a Wizard’s questions
Using Zoom • Remember F9 to Zoom in and out to Actual size • Use the View Menu to select other Zoom factors • Or use the Zoom factor buttons
Hiding and Showing the Wizard • The Hide Wizard/Show Wizard button is found at the bottom left of the screen • Use it to turn the Wizard on and off at will
Changing the Design • Use the Wizard to change elements of your design • Choose ResetDesign if you like the change that is previewed on screen
Save and Save As • Choose your destination • Be careful with filenames • Choose other options if you want
Publications by Design • Design sets ensure consistency of design throughout a complete set of business documentation
Blank Publication • If you choose a publication with multiple pages Publisher will handle this for you
Opening a Publication From Disk • Pick the network drive from the drop-down box Note Previews will only be shown if Preview is chosen when the publication is saved
Personal Information • Publisher 2000 can store your personal and business information • When it is stored you can use the Personal Information design element to quickly add your details
Creating Publisher Objects • Publisher uses graphic objects • Click and drag is a necessary technique to learn • Objects have square handles for • identification • resizing
Using Undo and Redo • Use the Edit Menu • Use the buttons • Press Ctrl + Z on the keyboard to undo • Press Ctrl + Y on the keyboard to redo
Text Frame Text Entry • Wavy Red underline for spelling errors • Object Formatting toolbar becomes available when objects are created
Table Frame Tool • The table frame tool creates a table similar to those found in Word 97 • Choose the number of rows and columns • Choose the Table Format and let Publisher do the rest
Deleting a Page • Click Edit Menu and choose Delete Page • If your document has left and right hand pages you will be asked to choose between them
The WordArt Frame Tool • Click the WordArt Frame tool • Enter your text into the WordArt Text Entry box
WordArt Formatting Toolbar Same height letters Character spacing Line tool Bold Stretch Shading Italic Alignment Shadow Flip letters Rotation Style Selector Font Type Font Size
The Picture Frame Tool • Click the Picture Frame tool • Drag to create the frame size • Double click inside the frame to select the picture file
The ClipArt Gallery Tool • Click the ClipArtGallery tool button to create the frame • Select the ClipArt from any of the categories listed and click Insert
Drawing Objects • Click these buttons to create lines, rectangles, squares and ellipses • Press Shift to create perfect lines, squares and circles • Custom Shapes button
Changing the View • Click the View Menu • Choose Two Page Spread
Zoom • Use the Zoom In and Zoom Out buttons to select an area within an object • Use F9 to zoom up and down from Actual size on a complete object • Use the Zoom Factor buttons at the bottom for a generalised zoom or to get back to Full Page • Or use the View Menu, Zoom
Page Navigation Note: The scroll bars only allow you to move up and down on the one page
Background • Backgrounds appear on every page of your publication • Ctrl + M switches between background and foreground • Or click the View Menu and choose Go to Background/Go to Foreground • Insert any ClipArt, Picture File or Image from Scanner as a background
Picture Display • Complicated or large pictures slow down the on-screen display • Choose to: • Hide the picture • Fast resize and zoom
Show Hide Characters • As in Word you can show non-printing characters • Click the button to show characters • This symbol is a paragraph mark • These are tab marks • This shows the end of a story
Boundaries and Guides • Use Layout Guides to help you arrange your page • Click the Arrange Menu and choose Layout Guides
Cut, Copy and Paste Objects • Cut and Paste is a way of moving objects from one location to another • Copy and Paste is a way to duplicate an object • There are 3 ways to Cut, Copy and Paste • Use the Edit Menu • Click the Right hand mouse button and use the Short-cut menu • Click and Drag the object (use Ctrl at the same time to copy)
Changing Picture Frames You can change the frame around a picture so that text wraps around it like this • Right click the mouse on an object and choose Change Frame, Change Frame Properties
Changing ClipArt • If you’ve inserted the wrong picture don’t worry - Change It! • Right click on the picture to see the Short-cut menu • Go back to the ClipArt Gallery and select another
Re-sizing Objects • Move the mouse over a handle • Wait for the different Re-size mouse cursors • Click and drag • ClipArt and Pictures will resize in proportion • Objects can distort - hold Shift to resize in ratio
Moving Objects • Moving objects is the same as Cut and Paste • You can either use the Edit Menu to Cut and Paste • Or, you can Click and Drag the object
Re-coloring Objects • Right click on an object to choose either Change Object (whatever the name of the object is ) • You can change 3 elements • Line Style Thickness, color & style • Fill Colour Colors, effects, gradients, and patterns • Shadow
The Crop Picture Tool • Remove unwanted parts of a • picture by cropping • the parts you don’t want • Right click a Picture or Object to see the Short-cut menu • Choose Crop.. (either Picture or Object) • Click and drag the crop cursor over the area you want to crop