Download
1 / 19
230 likes | 588 Views
Blood pressure measurement using mercury sphygmomanometers . EHES Training Material. Exclusion criteria. Blood pressure is not measured If a participant has open wounds/sores on both arms severe rash on both arms both arms amputated cast on both arms

E N D
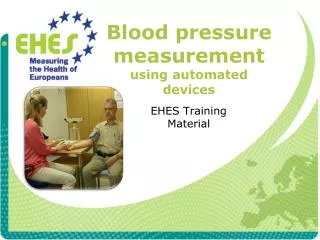
Blood pressure measurement using mercury sphygmomanometers EHES Training Material
Exclusion criteria Blood pressure is not measured • If a participant has • open wounds/sores on both arms • severe rash on both arms • both arms amputated • cast on both arms • malformation on both arms preventing to place the cuff • lymph node malfunction in both arms • If the participant refuses
Instruction to the participants Before blood pressure measurement, ask • if the participant has abstained from recently • eating • drinking (except water) • smoking • heavy exercise • alcohol use • If the participant needs to empty bladder
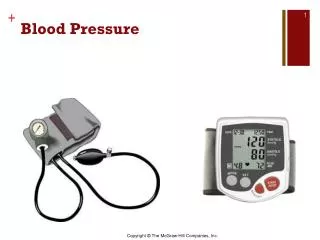
Equipment Sphygmomanometer Stop watch Something to elevate the device Watch and thermometer Cuffs Stethoscope Measurement tape
Setting up the measurement site • The room should be • quiet • comfortable temperature • no disturbance • Place the device so that • you can see the mercury bar clearly • the participant cannot see the mercury bar • the mercury bar is at your eye level
Position of the subject • Participant is sitting • back supported • feet resting firmly on the floor • feet not crossed • Check that the position of the participant does not change during the measurement Back supported Feet resting on the floor, not crossed
Position of the arm Right arm, resting on the desk • Take the measurement from the right arm • Arm resting on the desk or arm rest • antecubital fossa at the level of the heart • if needed, adjust the chair or use a pillow to elevate the arm • Palm facing up Palm facing up In line with the heart
Clothing Roll sleeves up, if not constrictive Undress constrictive sleeves
Measurement process • Ask the participant • to sit still for 5 minutes • not to talk or move during the measurement • Explain that you will tell the measurement results after all 3 measurements are taken • Measure arm circumference and select cuff
Selection of the cuff • Measure the greatest circumference of the upper arm • The bladder of the cuff should be • width: At least 40% of the arm circumference • length: At least 80% of the arm circumference
Placement of the cuff Cuff 2-3 cm above antecubitalfossa • Place the cuff on right arm about 2-3 cm above the antecubitalfossa • Check that the top edge of the cuff is not restricted by clothing • Check that the cuff is not too tide • one finger fits between the cuff and the arm
Measurement of pulse rate • Palpate the radial pulse and count the pulse rate for 60 seconds • Record 60 sec pulse count and whether or not the pulse was regular
Use of the stethoscope Not touching the cuff, rubber or clothing • Use the bell of the stethoscope • Check that the bell is not touching the cuff, rubber or clothing • Place inside the bicep muscle tendon Inside the bicep muscle tendon
Determination of the peak inflation level • Palpate the radial pulse • Inflate the cuff to the level when the radial pulse disappears plus 30 mmHg
Measurement of blood pressure (1/3) • Wait at least 30 seconds after the determination of the peak inflation level • Locate the brachial pulse • Place the stethoscope immediately below the cuff at the point of maximal pulsation
Measurement of blood pressure (2/3) • Rapidly inflate the cuff to the peak inflation level • Deflate at the rate of 2 mmHg per second • Determine blood pressure • Systolic bp: • Korotkoff Phase I • The first appearance of a clear repetitive tapping sound • Diastolic bp: • Korotkoff Phase V • The disappearance of the repetitive sounds
Measurement of blood pressure (3/3) • Deflate the cuff rapidly by fully opening the valve of the inflation bulb • Wait 1 minute • Make the 2nd measurement • Wait 1 minute • Make the 3rd measurement
Recording of the results • Record • room temperature • time of the blood pressure measurement • pulse for 60 seconds • results of the 3 blood pressure measurements • all exceptions • Record the results in the participant’s feedback form and explain the results to the participant
Acknowledgements • Slides • Hanna Tolonen, Päivikki Koponen • Photographs • Hanna Tolonen • Measurement demonstrations • Liisa Saarikoski, Marika Strand, Anne Söderqvist, Kari Kuulasmaa, Ari Haukijärvi, Shadia Rask, Katri Kilpeläinen, Vesa Tanskanen, Ulla Leskinen, Marja Lampola