Download
1 / 12
120 likes | 303 Views
Ei has been designed to be the world’s simplest saltwater chlorine generator. Simple to install, operate and maintain, the Ei will provide you many years of trouble free operation and keep your pool safe and sparkling for the whole family to enjoy.<br>

E N D
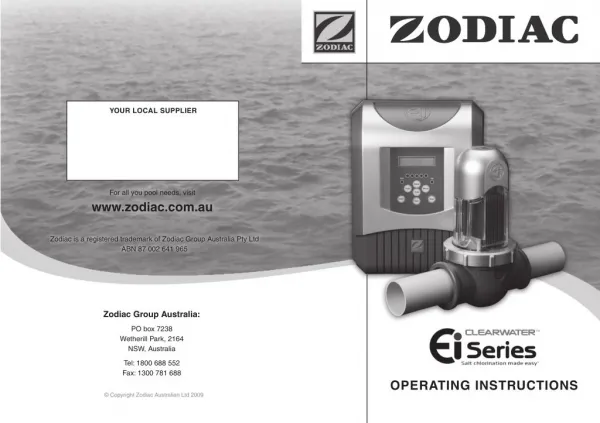
YOUR LOCAL SUPPLIER For all you pool needs, visit www.zodiac.com.au Zodiac is a registered trademark of Zodiac Group Australia Pty Ltd ABN 87 002 641 965 Zodiac Group Australia: PO box 7238 Wetherill Park, 2164 NSW, Australia Tel: 1800 688 552 Fax: 1300 781 688 OPERATING INSTRUCTIONS © Copyright Zodiac Australian Ltd 2009 Ei Brochure A4 Spread 090701.indd 1 1/07/2009 2:27:16 PM
CONTENTS OF THE CARTON Practices Act 1974 ) is limited, at Zodiac’s option, to the repair or replacement of the Product or the payment of the cost of having the Product repaired or replaced. Any such implied term, condition or warranty will be limited to the duration of the Warranty Period. Ei has been designed to be the world’s simplest saltwater chlorine generator. Simple to install, operate and maintain, the Ei will provide you many years of trouble free operation and keep your pool safe and sparkling for the whole family to enjoy. 10) (whether material or personal) arising out of or in connection with any defect of the Product or any negligence by Zodiac, including, but not limited to, injuries to persons, damages to property or loss of use. Additional contents C - 11) Zodiac’s aggregate liability in respect of all claims under this warranty shall not exceed the original purchase price of the Product or, at Zodiac’s option, the cost of replacing the Product. D - Freight Charges E - 12) Zodiac may, in its sole discretion, accept responsibility for the payment of freight to and from your chosen delivery address within Australia. In the event that no-one is available to sign for the goods being collected or delivered, a delivery fee may be charged and must be paid prior to any goods being returned to you. H F - B G - 13) If you have not collected any replacement or repaired Product or paid relevant delivery fees within 12 months of making a warranty claim, Zodiac will be under no obligation to return the Product and may dispose of it as Zodiac sees fit. A General Conditions 14) Zodiac assumes no responsibility for any warranties or representations made by other individuals or businesses beyond the express terms contained in this warranty. Carton contents: E. F. G. H. Ei Collar 1 x Screw set (includes wall plugs) 1 x Hole saw 1 x Owners manual/warranty card 1 x Ei Power pack 1 x Ei Chlorine generating cell 1 x Power pack bracket 1 x Pipe spacer (40mm pipe only) A. B. C. D. 15) This warranty is not transferable and does not apply to subsequent owners of the Product. 1 22 Ei Brochure A4 Spread 090701.indd 2 1/07/2009 2:27:22 PM
YOUR COMPLETE FILTRATION SYSTEM d. Your filtration system should look like this, once the Ei is installed Any failure, to the extent that the failure is not a failure of the Product to perform in accordance with its specifications or results from a defect in its materials or workmanship. Replacement or repair of any lost or stolen parts or accessories. Discoloration of the Product caused by prolonged UV exposure or reaction to chemicals used in the pool water. Zodiac products are designed so that discolouration will not affect their operating ability. Damage to or malfunction of the Product resulting from excess chlorination or improper water chemistry balance, including where swimming pool water is not balanced in accordance with Zodiac’s recommendations. Replacement of parts which fail or become defective as a result of improper installation, negligence, misuse, abuse or tampering by unauthorised repair personnel. Damage to pool liners due to age, pool water imbalance improper installation and corrosion of the supporting walls and/or irregularities in the pool base. The use of this Product in such an environment is at the pool owner’s sole risk. Abrasion to hoses or damage caused by misuse or improper installation. Damage where the Product is used outside of recommended operating conditions or where Zodiac’s instructions regarding installation, operation, maintenance or servicing of the Product are not followed. Your new Ei system Pump 1st, then your filter (plus any other equipment such as a heater etc) then your Ei chlorine cell should be the last thing on the plumbing line back to the pool e. f. g. h. i. j. k. Return line (pipe) to pool 8) This warranty gives you specific legal rights You also have certain rights under Federal or State legislation which are not able to be excluded, restricted or modified by this warranty. All other conditions, warranties, terms and obligations in respect of the Product, express or implied by law are excluded, other than as expressly set out in this warranty. 9) To the extent permitted by law, Zodiac’s liability for any claim arising from a breach of any term, condition or warranty implied by statute which cannot by law be excluded (except for a breach of section 69 of the Trade From pool 21 2 Ei Brochure A4 Spread 090701.indd 3 1/07/2009 2:27:31 PM
4) When outside of the manufacturers build date a proof of purchase (i.e. bill of sale, invoice or purchase receipt) may be required when making a claim under this warranty. At Zodiac, we take safety seriously. The Ei is designed with many in built safety features but you should always exercise caution when using electrical appliances and follow the instructions closely. Failure to do so could result in permanent injury, electrocution or drowning. 5) Zodiac reserves the right to replace the Product or relevant part with the same or equivalent Product or part, rather than repair it. Where a replacement is provided the Product or part replaced becomes the property of Zodiac. Zodiac may replace parts with refurbished parts. Replacement or repair of the Product or a part does not extend or restart the Warranty Period(s). Zodiac replacement parts come with separate warranties for the part itself. Alternatively Zodiac may, in its sole discretion, elect to refund the purchase price paid in lieu of replacing or repairing a defective Product via their authorized dealer network. Important things to consider! Before you begin installation please turn the filtration equipment off and close off all your valves to prevent water from escaping when drilling into the pipe Ensure you have a suitable place on the plumbing return line for Ei. If the only suitable length of pipe is obstructed, such as on a 40mm 6 way multiport valve often found on a sand filter (see fig1), it is acceptable to ‘lean’ the Ei over up to a maximum of 45deg. However if this is the case, you must mark your feeder holes on the angle you will have your Ei on (see fig2) to make sure you drill in the right position. 6) Zodiac and/or its Authorised Service Centres may seek reimbursement of any costs incurred by them (including labour charges) when the Product or relevant part is found to be in good working order or if the warranty claim is invalid. fig1. fig2. General Exclusions and Limitations 7) a. If the factory-applied serial number has been altered or removed from the Product. Damage, malfunction or failure resulting from alterations, accident, misuse, abuse, fire, liquid spillage, mis-adjustment of customer controls, use on an incorrect voltage, power surges and dips, thunderstorm activity, acts of God, voltage supply problems, tampering, unauthorised repairs or other acts by any persons (including any repairs by persons other than Zodiac authorized service personnel), use of defective, incompatible or non-genuine parts or accessories, exposure to abnormally corrosive conditions or entry by any insect, vermin or foreign object in the Product. Damage arising during transportation, installation or while moving the product. This warranty will not apply in any of the following circumstances: b. Do not install past 45 degrees c. 3 20 Ei Brochure A4 Spread 090701.indd 4 1/07/2009 2:27:32 PM
GENERAL WARNINGS WARRANTY WARNINGS ZODIAC WARRANTY TERMS AND CONDITIONS Zodiac Ei salt chlorine generators are designed for domestic swimming pool use only. Contrary use could affect performance and void warranty. Operating a chlorine generator without water flowing through the cell may cause a build up of flammable gases, resulting in fire or explosion. Subject to the terms and conditions set out below, Zodiac Group Australia Pty Ltd (ABN 87 002 641 965) (“Zodiac”) agrees to repair or replace at Zodiac’s cost the Zodiac product which this warranty card accompanies (“the Product”), and any Zodiac component supplied with it, originally purchased by you from a Zodiac Authorised Dealer when the Product does not perform in accordance with the manufacturer’s specifications or is otherwise defective during the relevant Warranty Period(s) from the date of purchase. Specific warranty periods for individual products (including any extended warranty offered) are stated on the relevant product documentation concerning those specific products. This warranty only covers factory imperfections in materials and workmanship and does not cover normal wear and tear. Other exclusions apply — see below. Keep equipment out of reach of children. A damaged supply cord should only be replaced by the manufacturer, service agent or electrician. When installing and using this electrical equipment, always follow basic safety precautions. Before performing installation, disconnect all power. Connect to a circuit that is protected by a ground fault circuit interrupter (GFCI). For swimming pools, a minimum of 1 Part Per Million (ppm) of free available chlorine must be maintained at all times. Warranty Claim Procedure 1) No claim under this warranty will be recognized unless the Zodiac product registration card is completed online at www.zodiac.com.au or returned to Zodiac Registration Dept, GPO Box 2637, Sydney NSW 2001, within fourteen (14) days of the day of purchase. SERVICE TO ZODIAC EQUIPMENT SHOULD ONLY BE CARRIED OUT BY A QUALIFIED POOL PROFESSIONAL. THE USE OF EYE PROTECTION IS RECOMMENDED WHEN WORKING WITH POOL CHEMICALS. 2) Any claim must be limited to those claims which may be asserted under the scope of this warranty outlined in this document. Claims should be lodged as soon as possible after any defect in the Product is discovered. CHILD SAFETY 3) To make a warranty claim, the Product must be returned, to the Zodiac Authorised Dealer where the product was purchased. When submitting a claim, always supply serial number, evidence of purchase date, retailer and a brief description of the problems/defects encountered. We suggest you contact your Zodiac Authorised Dealer in the first instance, who will assist you in making a warranty claim. Children should not be allowed to operate or perform maintenance ...................on this product. No one, particularly children, should sit, step, lean, or climb on any of your pool’s operational system. In the interests of child safety, all components of a pool’s operational system should be located at least 3 metres away from the pool. 19 4 Ei Brochure A4 Spread 090701.indd 5 1/07/2009 2:27:38 PM
CLEANING THE CELL Before you remove the cell for cleaning ensure you shut off any necessary valves to prevent any water loss. WARNING wear correct safety protection PLEASE NOTE: When ever mixing water/acid always add acid to the water. Never add water to acid. Use a mixing ratio of 10 parts water to 1 part acid ELECTRICAL HAZARD To avoid accidental contact with lawn mowers and hedge ....................trimmers, power cords should remain within sight and above ground at all times. The Zodiac Ei Power pack must not come into contact with water and should be installed at least 3 metres from the inside wall of your swimming pool. Should a lack of water be detected, the unit’s electronic flow switch is designed to turn off the system. Interfering with the electronic flow switch could result in personal injury and/or damage to the cell. One pump per electrical socket only (no ancillary equipment should be connected to the same outlet). This appliance is not intended for use by persons (including children) with reduced physical, sensory or mental capabilities, or lack of experience and knowledge, unless they have been given supervision or instruction concerning use of the appliance by a person responsible for their safety. Children should be supervised to ensure that they do not play with the appliance. The installation of the chlorinator should be carried out in accordance with the Australian wiring rules AS/NZS 3000. The chlorinator power pack should be located in the correct pool zone and connected to supply via a power outlet that is protected by a residual current device (RCD) having a rated residual operating current not exceeding 30mA. The power outlet should have a degree of protection suitable for the pool zone Ensure that equipotential bonding of all parts of the pool installation is carried out. 1) Remove the cap and cell leads 2) Undo the locking ring. If required, use the Ei locking ring tool provided 4) Refit the cap on the cell, invert and fill to the top of the electrode plates with the acid solution. Leave no longer than 30min 3) Remove the cell Once the cell is clean you can simply dispose of the solution by throwing it into your pool or check with your local council regulations 5 18 Ei Brochure A4 Spread 090701.indd 6 1/07/2009 2:27:43 PM
BACKUP BATTERY INSTALLATION Tools required before you begin The Ei is fitted with a long life battery. This battery should last in excess of 500 hours without the mains being connected. The battery will retain ALL settings in the event of a power failure. In addition the Microprocessor in the unit will retain some settings permanently, in the event of the battery going flat or being replaced: Before you begin installing your Ei chlorine generator please check you have the right tools and a suitable location to install the Ei. Please also ensure you have read and understood the General Warnings section, in the front pages of this brochure. - - - Operating hours Cell hours Controller setting A cordless drill (a power drill is ok). A 6mm hammer drill bit if you need to drill into brick or concrete. A pencil or marking pen. A philips head screwdriver or bit (for the drill). Ei must be installed on a straight length of horizontal pipe on the return line (after all other accessories). The Ei should be last. A power point needs to be located no more that 1.5M away from where you mount the power pack. If attaching to a post, you must fix a waterproof panel to the post first, measuring 350 x 250mm. 1) 2) 3) 4) 5) ERRORS / WARNINGS NO FLOW Diagnosis: Insufficient water flow in the cell. This could mean the circulation pump has ceased to function, or the filter needs cleaning. The chlorine output will be turned off at this time. 6) 7) CHECK SALT Diagnosis: Salt level is between 3000 and 4000 ppm, depending on the water temperature. Always maintain a salt level above 4000ppm. If you don’t know what your salt level is or how to test it, consult your local pool care professional. Mounting the control unit OUTPUT FAULT Diagnosis: There could be a problem with the power supply. Turn power off at the power point and consult your local pool care professional. 2) Position the power pack in place by aligning the bracket with the corresponding through holes 1) Screw the power pack bracket into position ensuring it is no more than 1.5m from a power point 17 6 Ei Brochure A4 Spread 090701.indd 7 1/07/2009 2:27:50 PM
24 HOUR SAFETY TIMEOUT Less than 1.5m To prevent the possibility of hazardous over-chlorination, the Ei has a built-in safety shutdown. If the Ei is manually turned ON (with no timers set), and left on, chlorine generation will automatically turn OFF after 24 hours. The Ei can be turned ON as normal after this time. 3) Plug it into the power point but do not turn on yet 4) Ensure placement of Ei cell on pipe is no more than 1.5m from power pack NOTE: If using the Ei with an external timer – the 24 hour timer is reset whenever power is cut to the Ei. Do not install past 45 degrees CHLORINATOR REVERSAL NOTE: If the inlet/outlet lines are close to each other your Ei cell will need to be mounted on an angle. Holes should be drilled on an angle no more than 45 degrees The Zodiac Ei chlorine generator has a reverse polarity cell. This means that every 5 hours the cell will switch its polarity to help prevent any build up of calcium on the cell plates. This is sometimes referred to as self cleaning. During the transition between changing its polarity there is a 5 minute wait time when the cell will not produce any chlorine. Dont be alarmed, once it has changed polarity it will continue to make chlorine. Smooth edges ‘** CLEANING **’ will be displayed on the screen during the 5 minute ‘WAIT’ period (the output level indicator will remain as set during the CLEANING period. 5) Invert the lower housing of the cell enclosure to mark the holes for drilling 6) Drill holes using the holesaw provided and ensure holes are clean and smooth The water flow must follow the direction of the arrows Spacer used for 40mm pipe only 7) 40mm diameter pipe, use spacer as shown. Spacer not required on 50mm pipe 8) Fit the cell housings around pipe (and spacer with 40mm pipe) as shown 7 16 Ei Brochure A4 Spread 090701.indd 8 1/07/2009 2:27:55 PM
AUTOMATIC PUMP PROTECTION The Ei chlorine generator has an in-built pump protection feature (when the Ei pump output is used). This feature is designed to prevent pump damage due to the pump running dry. The pump protection feature operates in the following way: 9) Clamp together the 2 pieces of the cell housing, ensuring both clips are engaged 10) Make sure the O-ring is seated in the channel and position the clear cell firmly on the O-ring, as shown If a ‘no flow’ situation occurs for more than 3 minutes, while the pump output is turned ON, the pump will automatically turn OFF. At this point ‘CHECK EQUIPMENT!’ is displayed on the screen. The pump output will remain off for 14-15 minutes (to allow the pump to cool). After this time the pump output will turn on again for 3-4 minutes. If flow is not restored during this time, the pump output is permanently turned OFF (to prevent damage to the pump). Ensure Alignment 11) Position the collar with the alignment details as shown, before threading 11) Screw down the locking ring to the threaded housing, ensuring it’s level NOTE: If at any time during the pump protection process, flow is restored, the Ei will revert back to normal operation. The pump protection timer can be manually reset by pressing twice. button Recommended water chemistry settings Free Chlorine (ppm) Total Alkalinity (ppm) Cyanuric Acid (ppm) Salt Level (ppm) Calcium Hardness (ppm) pH NOTE: Ensure the locking ring is level when engaging the threaded housing 12) Securely connect the cell leads to the terminals 1 - 3 80 - 300 Australian Standard 7.2 - 7.8 90 - 300 30 - 50 4000 - 7000 4000 at 27°C** Ideal reading/range 7.5 50 1 - 3 80 - 140 90 - 300 Add chlorine or increase output of equipment Add buffer or soda ash (sodium carbonate) Add sodium bicarbonate Add calcium chloride Add cyanuric acid Add salt To increase* Add chlorine or increase output of equipment Partially drain and refill pool Partially drain and refill pool Partially drain and refill pool Add muriatic acid To decrease* Frequency of testing (in peak season) Weekly Weekly Weekly Weekly Weekly Monthly Finally, after fitting the electrode cap, plug the filter pump into the base of the Ei power pack, turn power on at the mains, then switch the power pack on 15 8 Ei Brochure A4 Spread 090701.indd 9 1/07/2009 2:28:02 PM
SETTING THE OUTPUT LEVEL CONTROL PANEL When setting the chlorine output level you must consider the size of the pool, the amount of use the pool will be receiving and how hot the weather is. All these factors weigh greatly on the level of output needed. Simply adjust the output level needed using the following steps. 1) Turn the chlorinator ‘ON’ by pressing the button. Indicates the level of chlorine output production, each light is 20% production 2) Press the UP button to reach the desired output level. One amber level is the minimum setting (20%) and the output can be adjusted in increments of 20% up to 100. 3) If the ‘UP’ button is pressed beyond 100%, the output level setting will drop to 20%. Indicates not enough flow through the cell Indicates salt level is too low NOTE: If your output is set at 20% (one light) the Ei will run for 2mins every 10mins, 40% (2 lights) it will run for 4mins every 10mins and so on. Safety Alert: if using a pool cover of any kind always reduce your chlorine output to a minimum. High levels of chlorine in your pool will corrode some equipment such as pool cleaners etc CONNECTING TO AN EXTERNAL CONTROLLER The Ei chlorine generator can be connected to an external control device such as a Jandy Aqualink or Polaris EOS etc. please go to www.zodiac.com.au and find further information regarding these connections. 14 9 Ei Brochure A4 Spread 090701.indd 10 1/07/2009 2:28:09 PM
MANUAL OPERATION SETTING THE CLOCK Apply power to the Ei unit 1) In addition to running off a timer, the Ei can also be operated manually Wait for the start up sequence to finish (~5 seconds) 2) by pressing the button. The Ei will run until the next ‘OFF’ time is reached, then will operate from the timers. NOTE: If the Ei is manually turned on and no ‘OFF’ time is set, the Ei will run for a maximum of 24hours continuously, then turn ‘OFF’ to prevent over chlorination. Press and hold the 3) button. 4) While holding the button, press the button to USING AN EXTERNAL TIMER increment the hours to the correct time. ( button can be held to speed up increments) 5) While holding the button, press the button to increment In some cases it may be desirable to connect the Ei to an external time switch. In this case, the chlorine output must turn on whenever power is supplied to the power pack. To set the Ei up to run this mode, NO TIMERS should be set. the minutes to the correct time. ( button can be held to speed up increments) 1) Clear any timers that are set (a small ’T’ symbol will be visible in the top right corner of the screen if a timer is set). See page 12 ‘CLEARING THE TIMERS’ 6) Release the button - the clock is now set. 2) Turn the chlorine output on and set to the desired output level. See page 14 ‘SETTING THE OUTPUT LEVEL’ NOTE: The clock display is in 24 hour format 3) Set the external timer to the desired setting. 13 10 Ei Brochure A4 Spread 090701.indd 11 1/07/2009 2:28:20 PM
SETTING THE TIMERS The Ei has 2 ON/OFF timers available, which can be set to enable the chlorinator (and pump if connected) to run up to 2 times each day. 7) If another ON/OFF timer is required, press the button to move to setting the TIMER2 ON time and repeat steps 2 to 5 above. If no further For most pools we recommend running your filtration equipment 4hrs in the morning and evening during summer, and 3hrs in the morning and evening during winter. You may need to adjust this depending on bather load and climate conditions timers are required, press the button to return to the main operating screen. If a timer setting has been set, a small ‘T’ symbol will appear in the top right corner of the screen. 1) From the main operating screen, press the button. 2) Wait for message to clear CLEARING THE TIMERS 3) Press the button to increment the hours setting to the desired setting ( button can be held to speed up increments). From the main operating screen, press the button 1) 4) Press the button to increment the minutes setting to the desired Wait for message to clear 2) setting ( button can be held to speed up increments). Press the button, ‘TIMERS CLEARED’ will appear on the screen 3) Press the Button to return to the main operating screen 4) 5) Once a suitable ‘ON’ time is set, press the button to move to setting the ‘OFF’ time. (There is a factory preset off time of 3hrs after the on time, simply adjust if you require more or less) 6) Repeat steps 2 and 3 to set the desired off time. 11 12 Ei Brochure A4 Spread 090701.indd 12 1/07/2009 2:28:26 PM