NXT Programming Environment Guide
Connect your laptop/PC to your NXT, manage memory, work on pre-built robots, and learn workspace tools for efficient coding.

NXT Programming Environment Guide
E N D
Presentation Transcript
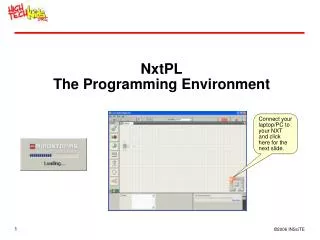
NxtPLThe Programming Environment Connect your laptop/PC to your NXT and click here for the next slide.
NxtPL to NXT Communications When connected by USB cable or Bluetooth Give your NXT a new name Check Battery voltage View available memory (in KiloBytes) Firmware version
NxtPL to NXT Memory Select, then delete Programs, Sounds, Graphics, and Unused files. Can free up to 130Kb of Free Storage on the NXT.
NxtPL Opening Workspace Profiles Pre-builtRobots, Programs, and Challenges Program Blocks Select a Program Name Help and Zoom Panel Block Settings
NxtPL Work Space Add Program Blocks here Download and Run a. Common,b. Complete, andc. Custom tabs
NxtPL Work Space Comment Pointer Tool Grab Hand to move the display
Common Blocks • Common blocks are full featured actions • Like English statements • Move • Wait for an action • Display a value • With many modifiers • Move direction, steering, distance, motors used . . . • Wait for light sensor, light threshold, sensor port, . . . Move Block Move Block Settings
Common Blocks Move Sound Display Wait For Touch Switch (Touch)
Adding a Block to a Program Click a Block • Click on a Block • Move cursor onto Program and drop it into place. NxtPL will make room. • Change settings Drag it here Release when the white position preview marks appear. Change the settings
WaitFor Blocks • Click on the hourglass. • Click on a WaitFor Block • Time • Touch • Light • Sound • Distance (Ultrasonic sensor) • Others (see settings) WaitFor Blocks
Motors • 9 volt geared motor • Making the motors turn is the output of your program. It makes your creation a robot! • Without load, motor shaft turns at about 150 rpm. • Servo sensitive to 1 degree. • With a typical robot, 3-4 hours on a set of batteries. • FLL allows up to 3 motors.
Motor Details • Motor can be set to different power settings • Power levels 0-100 • Power is adjusted by Pulse Width Modulation • Turning the power setting up higher essentially makes the shaft turn faster.
Using the Move Block Ports A, B, and/or C Power 0-100% Duration Time, Degrees, Rotations, Forever Forward, Backward or Stationary SteeringSpin, Pivot, Arc, Straight Brake or Coast
Conversion to a Program • Forward: Motors B and C forward • Spin: Motor B forward, C backward, Power Level 50% 250 degrees motors brake.
Optimizing Code • Which is faster?more reliable?best? • Use the one that makes sense to you, the programmer.
Debugging and Analysis • Literally walk through it • Ask lots of questions • What ifs • Do little pieces at a time • For example, get the robot to where it needs to be first, then work on getting it to do something • Reuse pieces that work • For example, you know how to turn 90° • Feel confident in your algorithm before starting to code it.
Common Situations • Not sure which solution is better • Try them both, or at least the primary element of each • Which is easiest for your team to do? • Can’t think of all the steps needed for the algorithm • Program and test the steps you understand.