Download
1 / 27
280 likes | 360 Views
Explore VRML file structure, event architecture, sensors, scripting, prototyping, distributed scenes in VRML 2.0. Dive into VRML with HTML and Java integration possibilities.

E N D
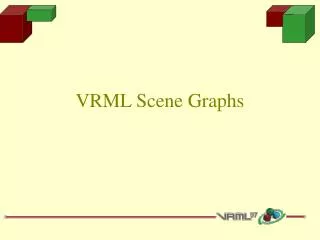
An Overview of VRML • Scene Graph Structure VRML files describe 3D objects and worlds using a hierarchical scene graph. Entities in the scene graph are called nodes. VRML 2.0 defines 54 different node types, including geometry primitives, appearance properties, sound and sound properties, and various types of grouping nodes. Nodes store their data in fields, and VRML 2.0 defines 20 different types of fields that can be used to store everything from a single number (the SFFloat field type) to an array of 3D rotations (the MFRotation field type). • Event Architecture VRML 2.0 defines an event or message-passing mechanism by which nodes in the scene graph can communicate with each other. Each node type defines the names and types of events that instances of that type may generate or receive, and ROUTE statements define event paths between event generators and receivers. • Sensors are the basic user interaction and animation primitives of VRML. The TimeSensor node generates events as time passes and is the basis for all animated behaviors. Other sensors are the basis for all user interaction, generating events as the viewer moves through the world or when the user interacts with some input device. Sensors only generate events; they must be combined with other nodes via ROUTE statements to have any visible effect on the scene.
Scriptnodes can be inserted between event generators (typically sensor nodes) and event receivers. Scripts allow the world creator to define arbitrary behaviors, defined in any supported scripting language. The VRML 2.0 specification defines Script node bindings for the Java and JavaScript languages. • Interpolator nodes are essentially built-in scripts that perform simple animation calculations. They are usually combined with a TimeSensor and some node in the scene graph to make objects move. • Prototyping: Encapsulation and ReuseVRML 2.0 includes a prototyping mechanism for encapsulating and reusing a scene graph (the PROTO statement). Geometry, properties, and animations or behaviors can be encapsulated, either separately or together. Prototyping allows the definition of a new node type in terms of a combination of existing node types, which can make VRML easier to use and can reduce the size of VRML files. • Distributed Scenes VRML 2.0 includes two primitives that allow a single VRML world definition to span the WWW. The Inline node allows the inclusion of another VRML file stored anywhere on the Web and the EXTERNPROTO statement allows new node definitions to be fetched from anywhere on the WWW. More generally, EXTERNPROTO allows nodes to be defined external to the VRML file and it is the basic extensibility mechanism for VRML.
VRML + HTML + Java • VRML file inside an HTML file: This is a semistandard part of HTML using the <EMBED> or <OBJECT> HTML tag, although HTML does not require that HTML browsers support embedding of VRML files (or any other type of file) into HTML documents. • Java code inside a VRML file: This is a standard (although not required) part of VRML 2.0, using a Script node that refers to the compiled Java code. • Java applet communicating with a VRML browser: This is a not-yet-standard extension to VRML 2.0 known as the External Authoring Interface (EAI). At some time in the future it will probably become a standard (but perhaps not required) part of VRML.
Java classes corresponding to VRML nodes: Several companies are developing programming toolkits that define in-memory representations of VRML nodes that can be used in any way the programmer wishes. These can be extremely useful when implementing VRML browsers or VRML tools, but none are yet a standard part of either VRML or Java. • HTML file inside a VRML file: Using an HTML file as a texture map to display it inside a 3D world would be an interesting extension to VRML, but it is not yet supported by any VRML browser and is not part of VRML 2.0. • Java applet inside a VRML file: Using a Java applet as a texture map to display the Java program inside the 3D world would also be an interesting extension. Interaction with the Java program could also be supported by projecting pointing device motion onto the applet. However, this also is not supported and is not part of VRML 2.0.
The structure of a VRML file • Resources (http://www.best.com/~rikk/Book/, http://www.coreweb3d.com, http://www.web3d.org) • the header • #VRML V2.0 utf8 Generated by VRML-o-matic V1.3 • the scene graph • contains nodes (objects & their properties) in a structure of hierarchically grouped geometry + nodes for event generation and routing mechanism. • the prototypes • Prototypes allow the set of VRML node types to be extended by the user. Prototype definitions can be included in the file in which they are used or defined externally. • the event routing
Event Routing • Some VRML nodes generate events in response to environmental changes or user interaction. Event routing gives authors a mechanism, separate from the scene graph hierarchy, through which these events can be propagated to effect changes in other nodes. • Once generated, events are sent to their routed destinations in time order and processed by the receiving node. This processing can change the state of the node, generate additional events, or change the structure of the scene graph. • Script nodes allow arbitrary, author-defined event processing. An event received by a Script node causes the execution of a script function which has the ability to send events through the normal event-routing mechanism. • The ideal event model processes all events instantaneously in the order that they are generated. • A timestamp, the time at which an event is delivered to a node, serves two purposes. First, it is a conceptual device used to describe the chronological flow of the event mechanism. It ensures that deterministic results can be achieved by real-world implementations which must address processing delays and asynchronous interaction with external devices. Second, timestamps are also made available to Script nodes to allow events to be processed based on the order of user actions or the elapsed time between events.
Presentation and interaction • The interpretation, execution, and presentation of VRML files will typically be undertaken by a mechanism known as a browser, which displays the shapes and sounds in the scene graph. This presentation is known as a virtual world and is navigated in the browser by a human or mechanical entity, known as a user. The world is displayed as if experienced from a particular location; that position and orientation in the world is known as the viewer. The browser may define navigation paradigms (such as walking or flying) that enables the user to move the viewer through the virtual world. • In addition to navigation, the browser may provide a mechanism allowing the user to interact with the world through sensor nodes in the scene graph hierarchy. Sensors respond to user interaction with geometric objects in the world, the movement of the user through the world, or the passage of time. • The visual presentation of geometric objects in a VRML world follows a conceptual model designed to resemble the physical characteristics of light. The VRML lighting model describes how appearance properties and lights in the world are combined to produce displayed colours.
The three main components of the browser are: Parser, Scene Graph, and Audio/Visual Presentation. • The Parser component reads the VRML file and creates a Scene Graph. The Scene Graph component consists of a Transform Hierarchy (the nodes) and a ROUTE Graph (the connections between nodes). • The Scene Graph also includes an Execution Engine that processes events, reads and edits the ROUTE Graph, and makes changes to the Transform Hierarchy (nodes). • User input generally affects sensors and navigation, and thus is wired to the ROUTE Graph component (sensors) and the Audio/Visual Presentation component (navigation). The Audio/Visual Presentation component performs the graphics and audio rendering of the Transform Hierarchy that feeds back to the user.
UTF-8 file syntax • http://www.best.com/~rikk/Book/ch2-23.htm • Notation, reserved words, reserved characters
What is a node? • A node is the fundamental building block of a VRML file. • Some nodes are objects (Cylinder, cone, box..) and other nodes are used as containers (grouping node) to hole related nodes. • A shape node = (geometry node + appearance node) • Special nodes (hyperlinking, detecting collisions, and etc.) • Each node contains fields, which hold the data for the node • A node given a name using the DEF keyword may later be referenced by name with USE or ROUTE statements. The USE statement does not create a copy of the node. Instead, the same node is inserted into the scene graph a second time, resulting in the node having multiple parents. Using an instance of a node multiple times is called instantiation.
Example • #VRML V2.0 utf8 • Shape { • appearance Appearance { • material Material { • diffuseColor .5 0 .5 • shiness .5} } • geometry cylinder { • radius 3 • height 6 • side TRUE • top FALSE • bottom TRUE } • }
#VRML v2.0 utf8 Transform { translation -2.4 2 3 children [ shape { appearance Appearance { material Material { diffuseColor .5 0 .5 shininess .5 } } geometry Cylinder { radius 3 height 6 } } ] }
Transformation • Translation followed by rotation is not same with rotation followed by translation • Within one transformation, order is (1) a scale, (2) a rotation, and (3) a translation • Use nested transformation if different combination is needed
#VRML V2.0 utf8 #before scaling Transform { translation 0 2 0 # x y z (move up 2 units on Y axis) children [ Shape { appearance Appearance { material Material { diffuseColor 0 1 0 # R G B (this shape is green) } } geometry Cone { } } ] } Shape { appearance Appearance { material Material { diffuseColor 1 1 1 # R G B (this shape is white) } } geometry Cylinder { }}
#VRML V2.0 utf8 #After scaling Transform { translation 0 2 0 # x y z scale 5 1 1 # x y z children [ Shape { appearance Appearance { material Material { diffuseColor 0 1 0 # R G B (this shape is green) } } geometry Cone { } } ] } Shape { appearance Appearance { material Material { diffuseColor 1 1 1 # R G B (this shape is white) } } geometry Cylinder { } }
#VRML v2.0 utf8 #using DEF & USE DEF BothBraziers Transform { children [ DEF Brazier Group { children Inline { url “TMBrazierTlaloc.wrl” bboxCenter 799.5 127.01 -118.5 bboxSize 124 5 5 } }, Transform { children USE Brazier translation 54 0 0 } ] translation 0 -1.43 0 }
#VRML V2.0 utf8 Transform { translation 0 2 0 # x y z scale 2 2 2 # x y z rotation 0 0 1 .785 # x y z, angle children [ Shape { appearance Appearance { material Material { diffuseColor 0 1 0 # R G B (this shape is green)}} geometry Cone { }}]} Transform { translation 0 -1.5 0 # x y z scale .25 1.5 .25 # x y z rotation 0 0 1 .785 # x y z, angle children [ Shape { appearance Appearance { material Material { diffuseColor 1 1 1 # R G B (this shape is white)}} geometry Cylinder { }}]}
#VRML V2.0 utf8 Transform { rotation 0 0 1 .785 # x y z, angle children [ # make the cone shape a child of the root Transform,but give the cone a #Transform of its own so that it can be controlled independently of any other child: Transform { translation 0 2 0 # x y z scale 2 2 2 # x y z children [ Shape { appearance Appearance { material Material { diffuseColor 0 1 0 # R G B (green) }} geometry Cone { }}]} # now make the cylinder shape a child of the root Transform as well, and also place the #cylinder in its own Transform so that it can be controlled independently of other children: Transform { translation 0 -1.5 0 # x y z scale .25 1.5 .25 # x y z children [ Shape { appearance Appearance {material Material { diffuseColor 1 1 1 # R G B (white)}} geometry Cylinder { }}]}]}
#VRML V2.0 utf8 Background { skyColor [1 1 1, # white at top point (0 degrees) 0 0 1, # blue at 45 degrees 0 0 .5] # dark blue at 90 degrees skyAngle [0.785, # 45 degrees 1.571] # 90 degrees } NavigationInfo { headlight FALSE } Group { children [ DirectionalLight { } Inline { url "sphereColumns.wrl" } ] }
#VRML V2.0 utf8 Group { children [ Background { skyColor 1 1 1} Fog { color 1 1 1 # white color fogType "LINEAR" # default thickness visibilityRange 30 # 30 meter visibility range} DEF OneSphere Shape { appearance Appearance { material Material {}} geometry Sphere {radius .5}} Transform { translation 0 1 -4 children USE OneSphere } Transform { translation 0 2 -6 children USE OneSphere } Transform { translation 0 3 -8 children USE OneSphere } Transform { translation 0 4 -10 children USE OneSphere} Transform { translation 0 5 -12 children USE OneSphere} Transform { translation 0 6 -14 children USE OneSphere} Transform { translation 0 7 -16 children USE OneSphere} Transform { translation 0 8 -18 children USE OneSphere} Transform { translation 0 9 -20 children USE OneSphere} Transform { translation 0 10 -22 children USE OneSphere} Transform { translation 0 11 -24 children USE OneSphere} ]}
PROTO PROTO Column [ field SFColor columnColor .5 .5 .5] { shape { appearance Appearance { material Material { diffuseColor IS columnColor} } geometry Cylinder {}}} Column { columnColor 1 0 0 } Fields vs. Events field ==> exposedField
PointLight { on TRUE intensity .75 ambientIntensity .5 color 1 0 0 } Lights • DirectionalLight • doesn’t take as much processing power as others • PointLight • like a light bulb • location, radius, attenuation • reasonably fast • SpotLight • slowest • a cone pointed in a specific direction
Etc. • Terrain Modeling with the ElevationGrid Node • Extrusions (crossSection, spine paths) • use piecewise linear • LOD • center, range, level • viewpoint
Events & Routes (Interacting with the Scene) • A class of nodes, called sensors reacts to user events in some prescribed ways. • TouchSensor, ProximitySensor • a sensor is wired to a Script node that runs a program TouchSensor Node Sound Node Rout eventOut eventIn
#VRML V2.0 utf8 #Event routing Group { children [ Shape { appearance Appearance { material Material { } } geometry Cone { } } DEF TS TouchSensor { } # define the sensor "TS" DEF DL DirectionalLight { # define the light "DL" color 1 0 0 on FALSE } ] ROUTE TS.isOver TO DL.set_on }
Project 1 • Your first project is (1) to make you feel comfortable with VRML world. Build your (static) VRML world. You may import 3D models from other tool, but you should have full control over the model to make use of them in your project 2. This project is also (2) to make your base environment for project 2 (multi user game). Therefore, think carefully in advance, not to waste your time and do it again for project 2. Your project 2 should have some component that multi users interact in 3D world. For example, car racing game needs cars and tracks at least. Shooting game needs 3D avatars and shooting environment. You build at least a car and tracks that you want to use for racing game. For project 1, your world can be static, no need to animate, respond to user input, nor events handling. Build your static world in .wrl file and test in your browser. For project 2, you will have to work towards installing (or implementing) server, EAI scripting of your VRML components using java (this also requires game algorithm – collision, running speed, etc).
Grading : Grading of project I will be based on your world and documentation. Your world needs to have textured and navigatable environment, with multiple light sources. If your world looks reasonable enough for project 2, then you will get most of credit. For documentation, draw scene graph at least. Also use this documentation as a proposal for your project 2 since you will have to spend some time to design project 2 anyway. • Submission : Hard copy of documentation that obviously includes URL of your world by 4:00 pm of 10/8/2001.